Did you just receive the WiFi extender for AT&T Fiber and want to set it up? There are three different ways to do so. Setting up an AT&T extender can hardly take 15 minutes.
However, not following the instructions carefully might cause issues such as the extender not connecting or displaying red or flashing green lights. Fret not, I shall also help with troubleshooting after configuration. Let’s get going.
AT&T WiFi Extender Setup Guide
The initial step involves placing the extender strategically where it can effectively amplify the WiFi signals.
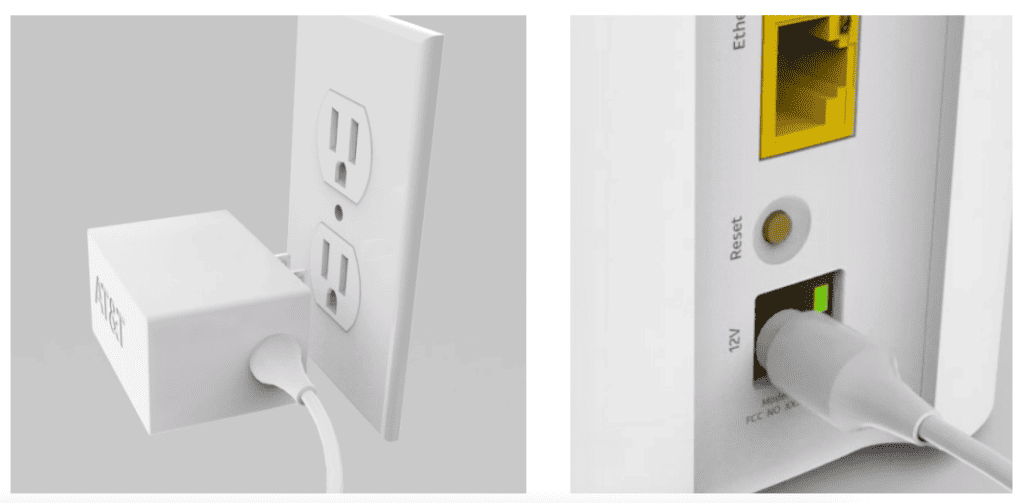
Once mounted, plug the extender into the nearest electrical outlet to the main router. Before proceeding with the setup, ensure that your router is powered on and working properly and that you are connected to the internet.
Method 1: Using the SmartHomeManager App
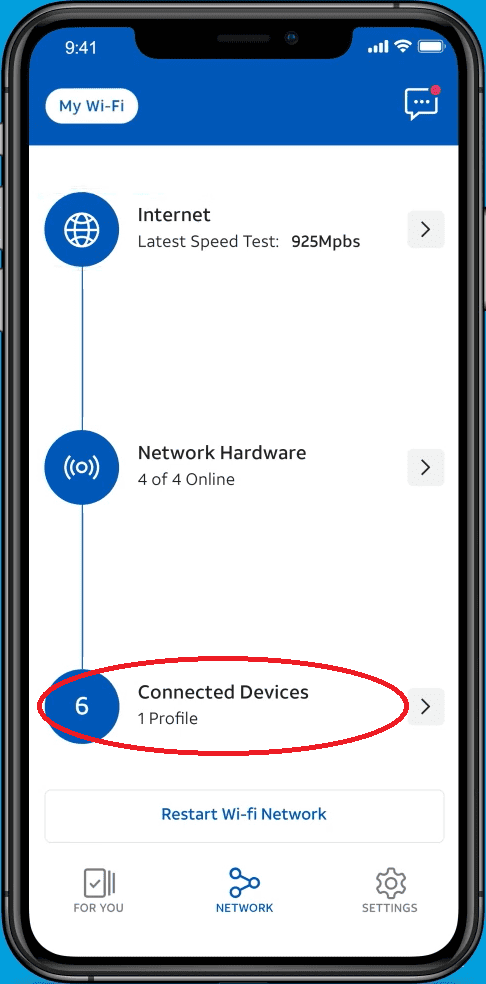
The SmartHomeManager app is the most convenient way to set up your AT&T extender. It allows you to manage your home network at your fingertips.
Steps To Follow:
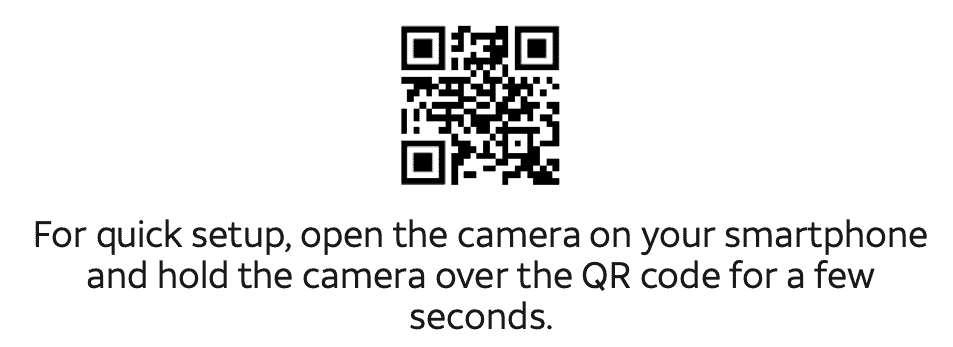
Step 1: Download the SmartHomeManager app for your Android or iOS device. You can also get it by scanning the QR below.
Step 2: Launch the app and create an account or sign in with your existing AT&T account.

Step 3: The app will guide you through the configuration process, including connecting the extender to your Wi-Fi network.
Step 4: Once your AT&T extender is connected, it will restart.
Method 2: Using Ethernet
This method lets you connect your extender to your Wi-Fi gateway using an Ethernet cable. This is a good option if you have a wired connection available in the location where you want to place your extender.
It is better than a wireless connection and ensures a stable and reliable connection.
👉 Related Reading: AT&T Modem & Router Lights: Explained with Pictures
Step To Follow:
Step 1: Connect one end of an Ethernet cable to the LAN port on your router.
Step 2: Connect the other end of the Ethernet cable to the LAN port on your AT&T extender.
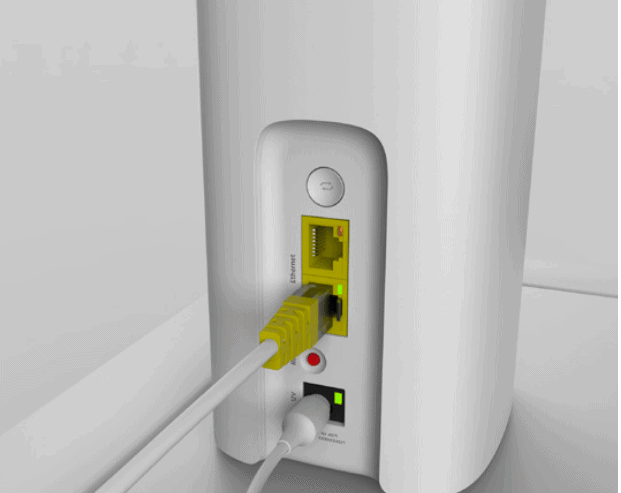
Step 3: Plug the extender into a nearby electrical outlet.
Step 4: Wait for the extender to power on and establish a connection with your router.
Step 5: The extender shall start functioning once the connection is established.
Method 3: Using a WPS Button
This method lets you pair your AT&T WiFi extender with your router using the WPS button. This is the quickest and easiest way to configure the ATT extender. You need to press the WPS button present on the backside of both devices, and you are good to go.
Step To Follow:
Step 1: Place your AT&T extender in a location near your router.
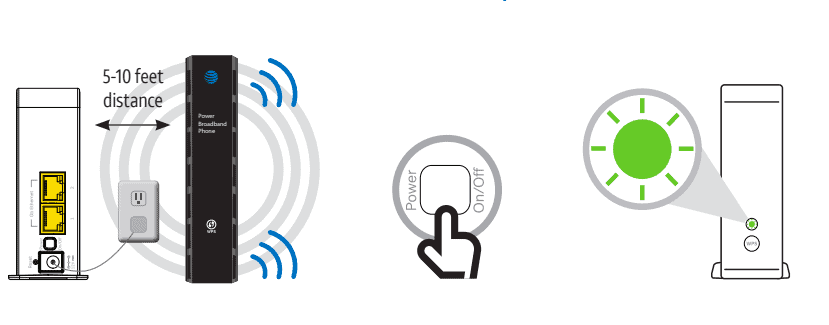
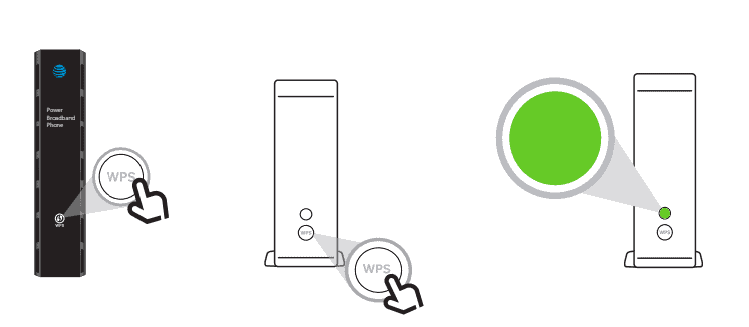
Step 2: Press the WPS button on your router.
Step 3: Within a minute, press the WPS button on your AT&T extender. The extender and router will automatically establish a secure connection.
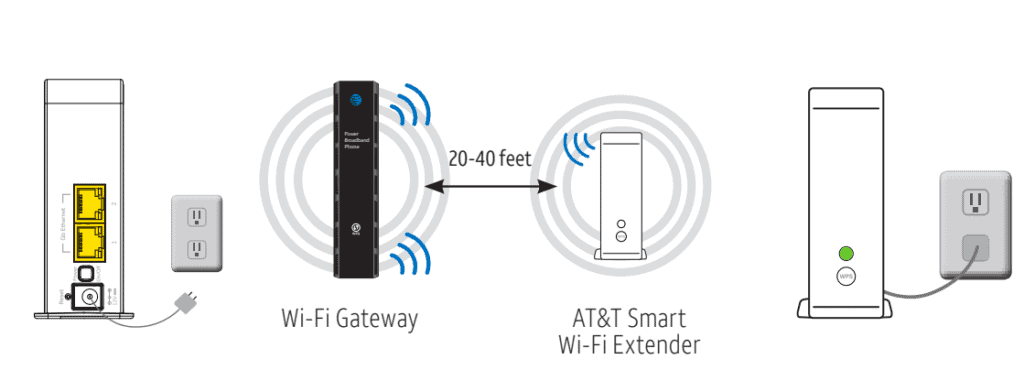
Step 4: Unplug your Wi-Fi Extender from the power outlet and move it to its new location between your Wi-Fi Gateway and the area where you want a stronger signal.
How To Connect To an AT&T Extender?
You need to ensure that your Wi-Fi-enabled device is within the range of the extender's signal. Simply access the list of available Wi-Fi networks on your device, locate the network name (SSID) of the extender, and select it.
Enter the Wi-Fi password if prompted, and once connected, your device can utilize the extended Wi-Fi coverage provided by the AT&T extender.
👉 Related Reading: AT&T Internet Slow: Causes & 14 Fixes That Work in 2025
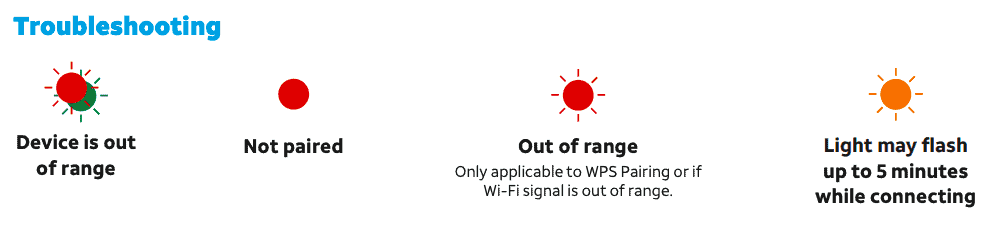
Troubleshooting ATT Extender
Here are some common problems faced with AT&T extenders and their quick fixes:
1. AT&T Extender Not Connecting to the Internet
Ensure that the extender is placed within range of the router and that both devices are powered on. Double-check that you entered the correct Wi-Fi network name (SSID) and password during the setup. If the issue persists, try restarting the extender and the router and ensuring that the firmware is up to date.
👉 Related Reading: How To Fix AT&T WiFi Extender Blinking White Light?
2. Red Light on the AT&T Extender
A red light indicates a connection issue. If you observe a flashing red light on the extender, try relocating it closer to the router.
If you encounter a solid red light, attempt to establish a pairing by using the WPS method or utilize the provided Ethernet cable to manually connect the Extender to the Gateway and initiate the pairing process.
3. AT&T WiFi Extender Blinking Green
If your extender's lights are blinking green, the extender has not yet synced with your gateway. To sync the extender, place it close to your gateway and press the WPS button on both devices.
The lights on the extender will blink for a few seconds and then turn solid green when the devices are successfully paired. Once the devices are paired, you can move the extender to its desired location.
4. AT&T WiFi Extender Not Pairing
Make sure you follow the correct pairing method, such as using the WPS button or the app/web interface, depending on the extender model. Check that the extender and the router are compatible for pairing.
Ensure that both devices are nearby during the pairing process. If the issue persists, restart both devices and try again.
Note: If none of the solutions work, your extender may be faulty. Consider getting a third-party extender for your AT&T connection. It will eliminate these issues, waive the rental fee, and help reduce your internet bill.
Frequently Asked Questions
One way is to check the extender's lights. If the lights are solid green, the extender is working properly. You can also try connecting to the extender's network using the same SSID and password as your Wi-Fi gateway. If you can connect to the network, then the extender is working.
The ATu0026T WiFi extender only works with the BGW320, BGW210, or 5268AC ATu0026T Wi-Fi Gateways. The extender is specifically designed to work with ATu0026T's network. If you have a different router, you must purchase a different extender compatible with your router.
The configuration process usually takes about 5 minutes. However, the exact time may vary depending on the model of the extender and the method you choose to set up the extender.
The light on the extender should be solid green when working properly. If the light is blinking green, the extender is in pairing mode. This means the extender is ready to be paired with your Wi-Fi gateway. If the light is red, there is a problem with the extender. You may need to reset the extender or contact ATu0026T customer support for assistance.
The WPS button is used to quickly and easily pair the extender with your Wi-Fi gateway. Press the WPS button on both the extender and the gateway within 2 minutes to use it. This will automatically pair the two devices, and you can start using the extender to extend your Wi-Fi network.
Conclusion
The frustration of dropped connections and slow speeds can be incredibly annoying. Hopefully, the extender will help you get rid of WiFi dead zones. If not, it is worth investing in a mesh system for AT&T. Although it is more expensive than a simple extender setup, it is worth the investment in the long run.