Do you want to install CenturyLink internet connection on your own? It's not fun scheduling and blocking the whole day for the technician to arrive and set it up. Plus, you can save the hefty fee charged by the ISP in the name of professional installation.
You can self-install the connection using ISP-rented equipment or use your own device. If you don't have one, you can get one from:
- Centurylink Compatible Modem/Router Combos
- Standalone Wireless Routers for CenturyLink
Regardless of your choice of renting or buying, this article will walk you through the complete installation of your CenturyLink internet connection. Let's get started!
Getting Self-Install Kit
If you subscribe to the services online, you can include the standard installation kit in your purchase. If you order via phone, tell the representative to include the self-installation kit in your package. Once the setup outside your home is done, the kit will be delivered to you.
What Do You Get in CenturyLink Self-Install Kit?
- Modem/Router device
- Power cord
- Green cable
- White cable
- Yellow cable
- Installation instructions
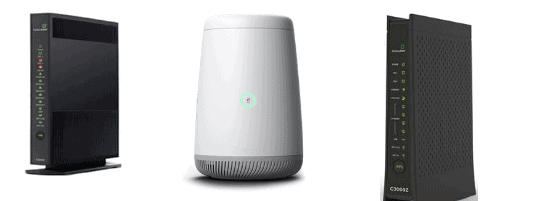
Note: You will receive any of the following gateway devices depending on the neighborhood and internet plan. Irrespective of the variant, the CenturyLink installation remains the same.
How To Self Install CenturyLink Internet?
1. Plug in the Connections
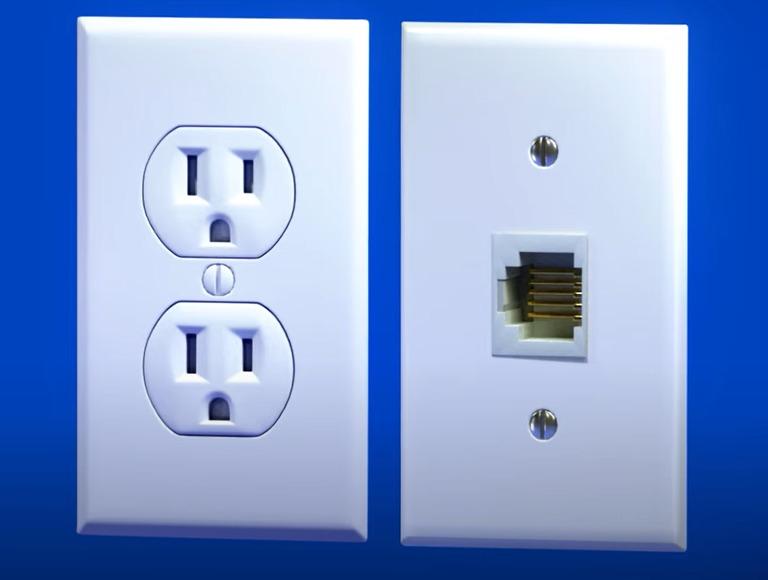
First, look for a wall jack and power outlet. If there are multiple outlets, choose the one in the most central location. It would look like this:
Step 1: Plug in the power cord on the outlet.
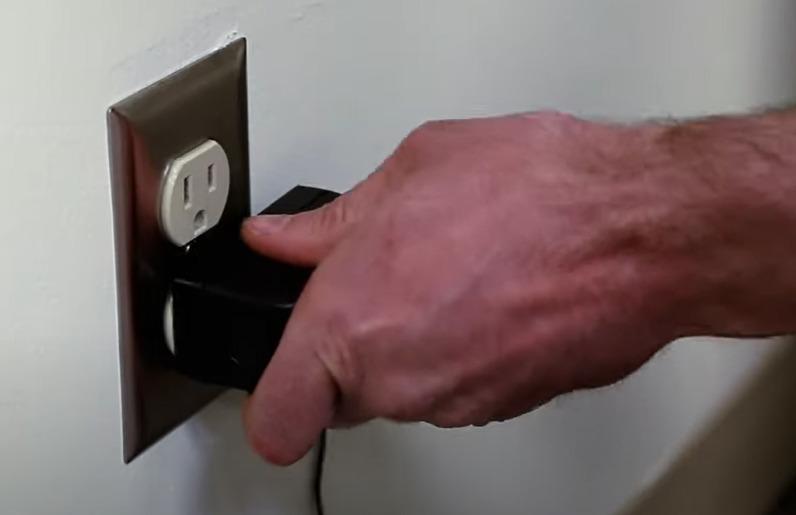
The other end of the power cord goes in the modem/router combo.
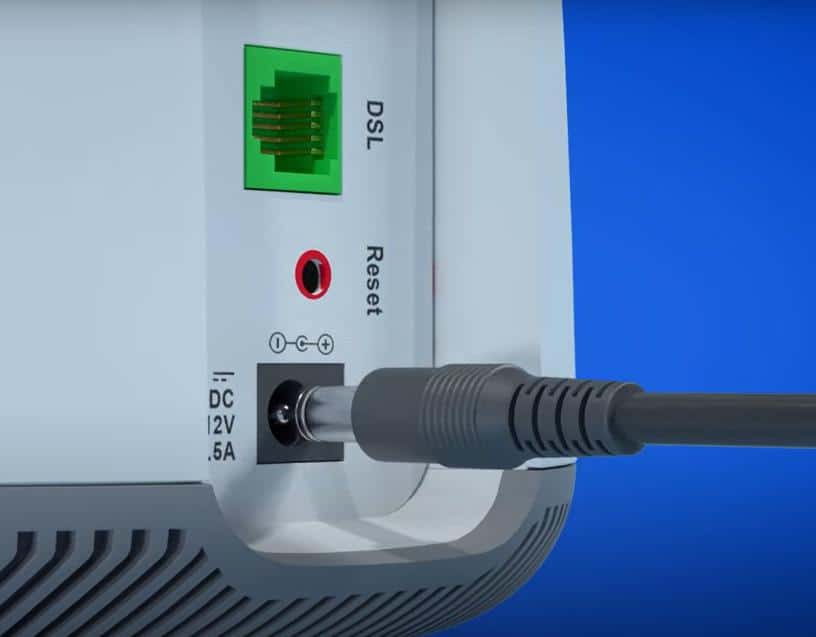
Step 2: Plug the green cable into the wall outlet.
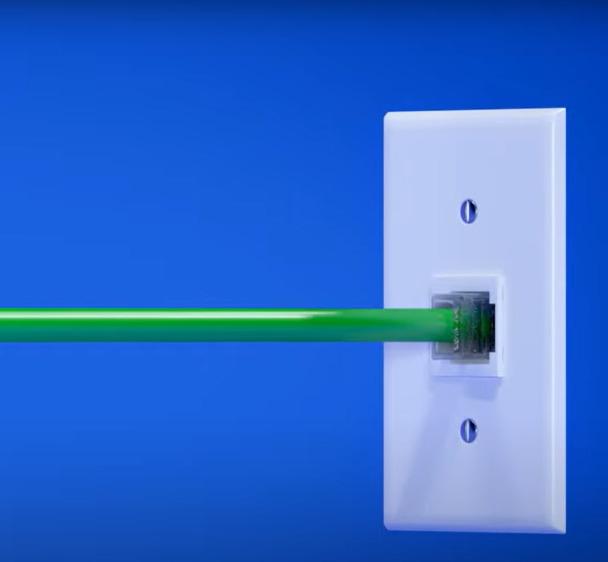
The other end goes into the DSL port of the device.
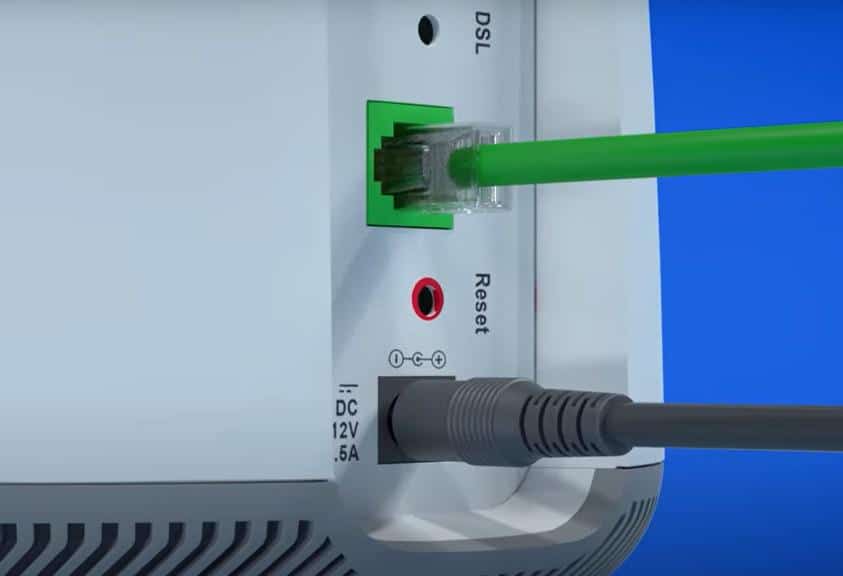
Step 3: Ensure the DSL light turns green.
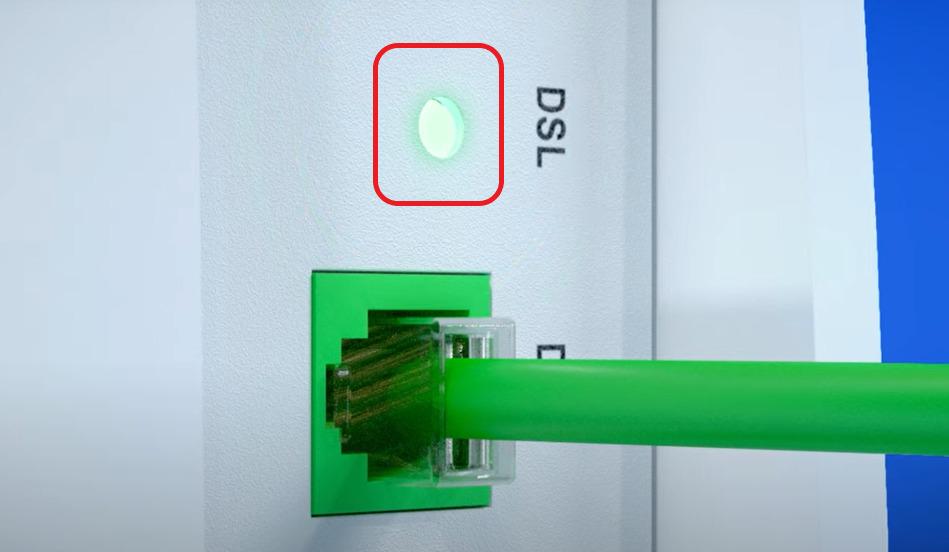
Step 4: Wait for 5-10 minutes until the green LED in the front turns stable green.
Set Up Internet + Voice Connection
If you have an internet and voice bundle, follow the additional steps to complete the CenturyLink modem connection. However, if you've subscribed to the Internet-only service, you may skip to the next section.
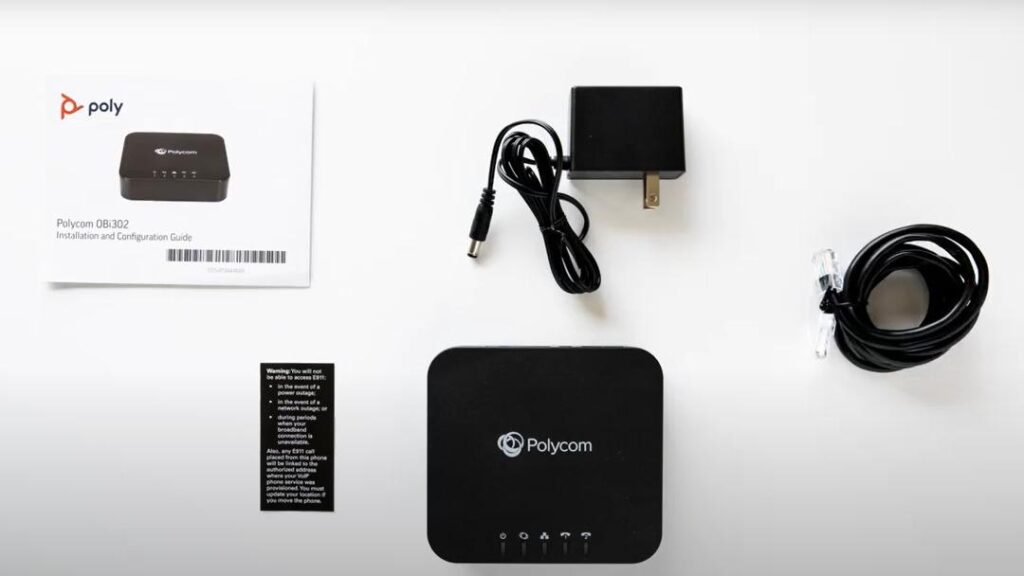
Step 1: Connect one end of the cable to the Ethernet port of the Router unit as shown below.
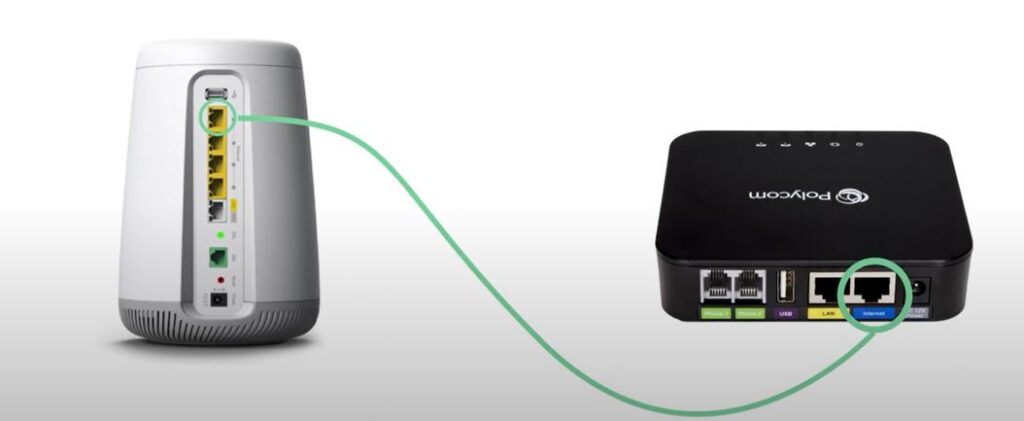
Step 2: Connect one end of the phone cable to the voice phone and the other to the phone port on the Polycom device.

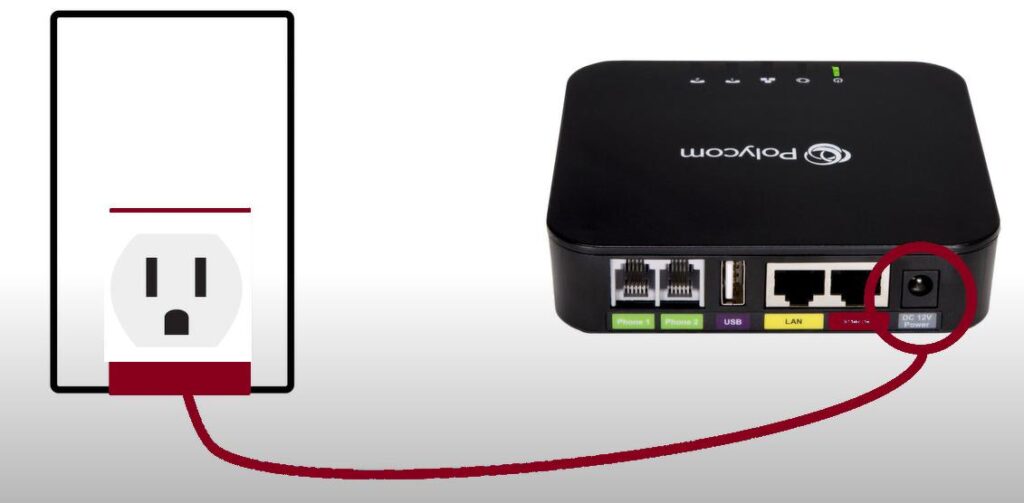
Step 3: Plug the power cord and turn the device on.
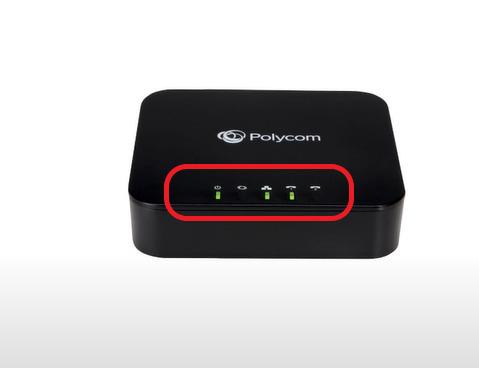
Step 4: Wait until all three lights in the device turn stable as highlighted in the picture below.
Let's proceed further to the CenturyLink setup and modem activation process.
2. Activate CenturyLink Modem
You can activate the modem using a mobile app or web portal.
If you are using the ISP-provided gateway, I suggest you stick with the mobile App based installation, which is a breeze. Follow the below-given steps:
Using the Mobile App
Step 1: Download the CenturyLink app and open it.
Step 2: Click the drop-down box and choose to activate the new modem. The app will ask you to connect the devices, and we can move to the next step, as we already have all our connections ready.

Step 3: Next, scan the details of the information in the routing device.
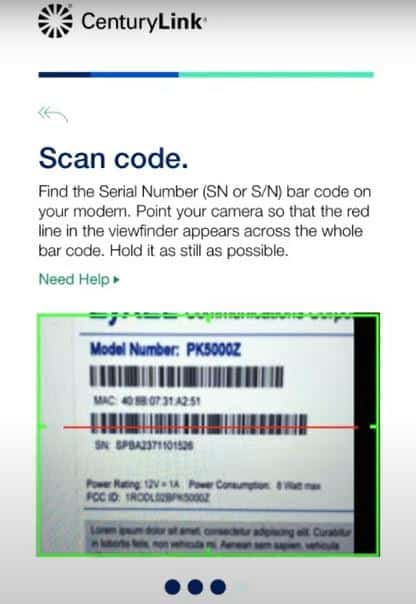
Wait until the checking is complete at the other end.
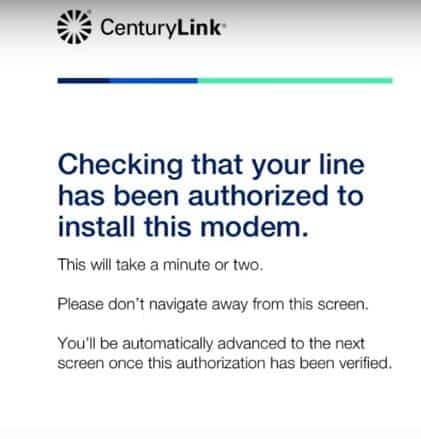
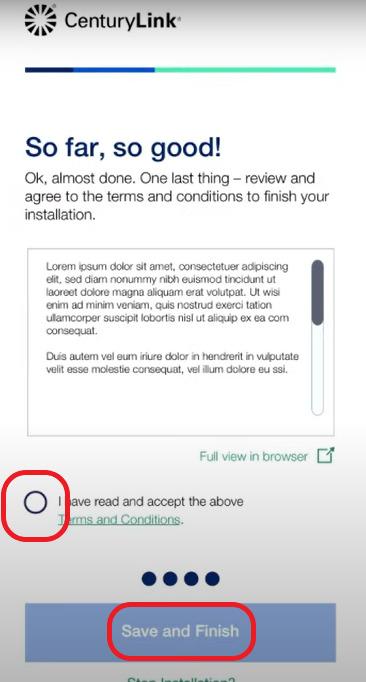
Step 4: The app will take you to the agreement page once the checking is complete. Click on accept and finish button.
Now, your modem will be active, You can proceed to set up the WiFi. Alternatively, you can complete the CenturyLink activation from the web portal. Ensure the laptop/desktop is connected to the modem/router with an Ethernet cable.
Using the Web Portal
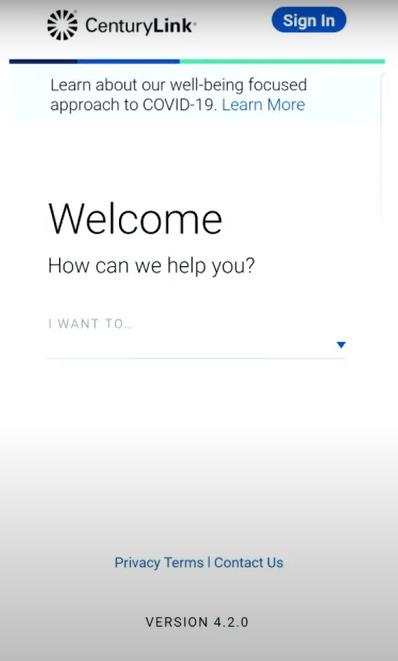
Step 1: Sign in to your CenturyLink account: https://www.centurylink.com
Step 2: The webpage will automatically detect your connection, if it fails to do so, keep the account number with CenturyLink handy.

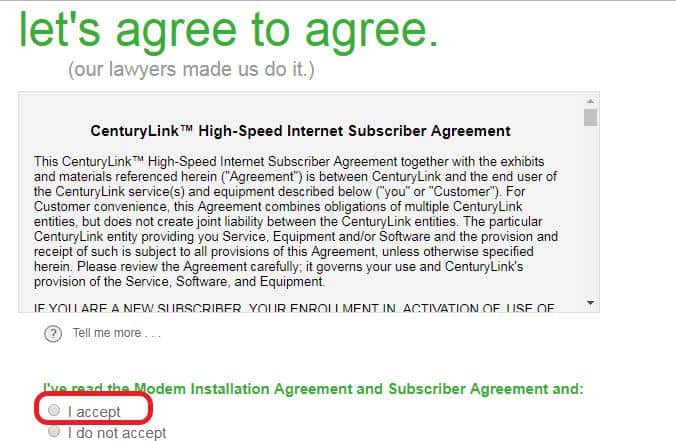
Step 3: Click on Next, read the agreement and accept the terms and conditions.
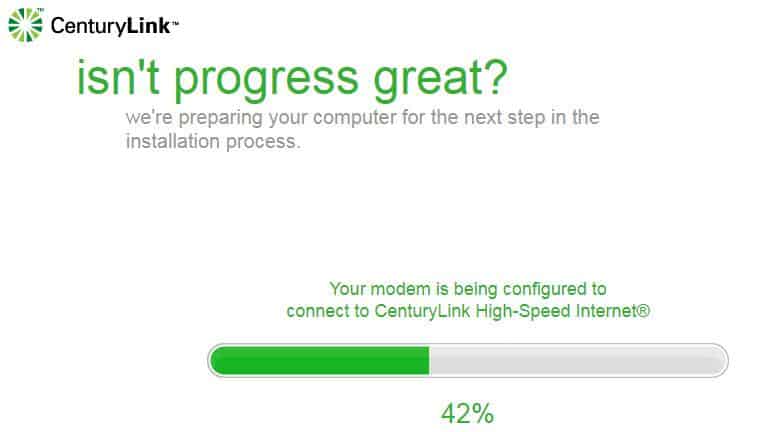
Step 4: Wait until the process completes.
Step 5: If you are using your device, you'll have to contact the support personnel for mapping the device to your account and collecting the details (PPoE, vpi/vci, and password). Follow the instructions from the technical assistant.
👉 Related Reading: 5 Best CenturyLink Compatible Modems in 2025 [DSL & Fiber]
3. CenturyLink WiFi Setup
You can complete CenturyLink's Wi-Fi network using a Mobile App or Web Portal.
Using the Mobile App
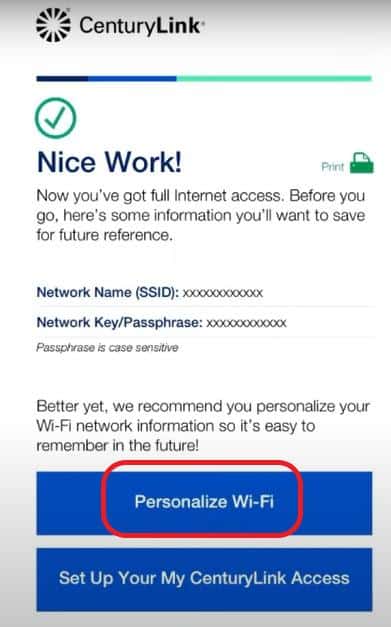
Step 1: Enter the new SSID in the network name box and the password in the network key and click on save.
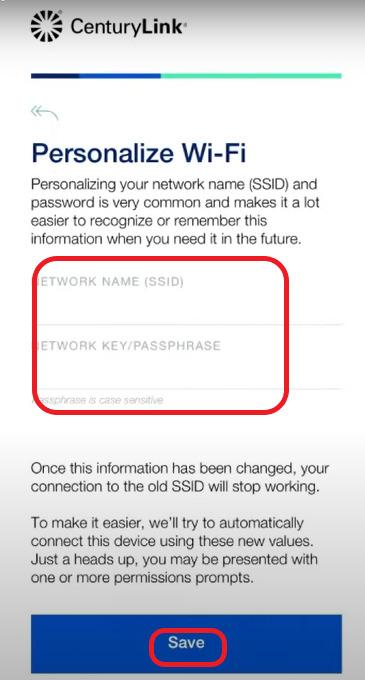
Once done, you can connect your smartphone, tablet, and laptop via WiFi.
Using the Web Portal
Step 1: Click on activate wireless and click next.
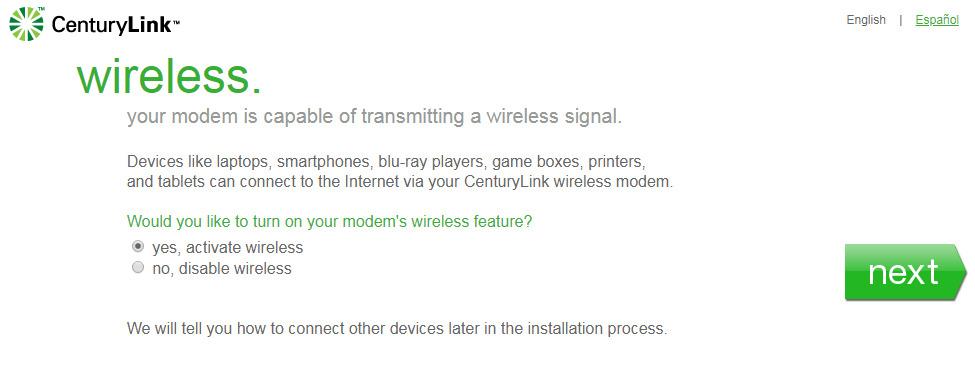
Step 2: You can note down the default details or enter the new SSID and password, Once entered click on next.
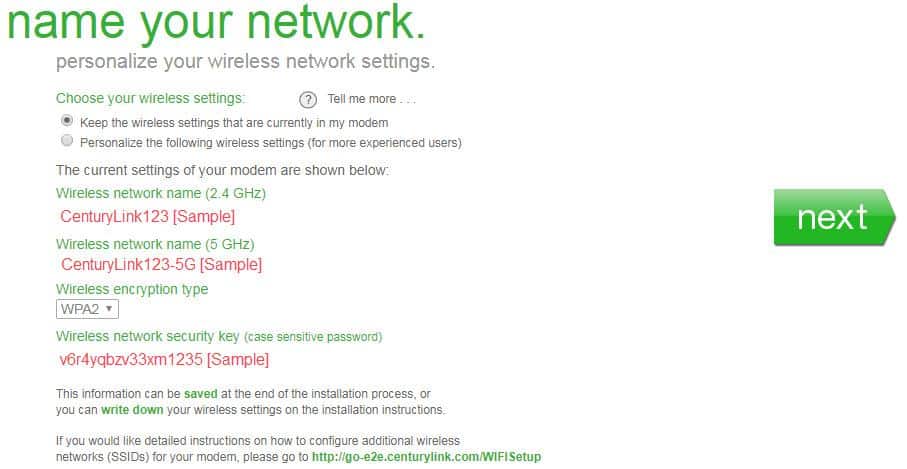
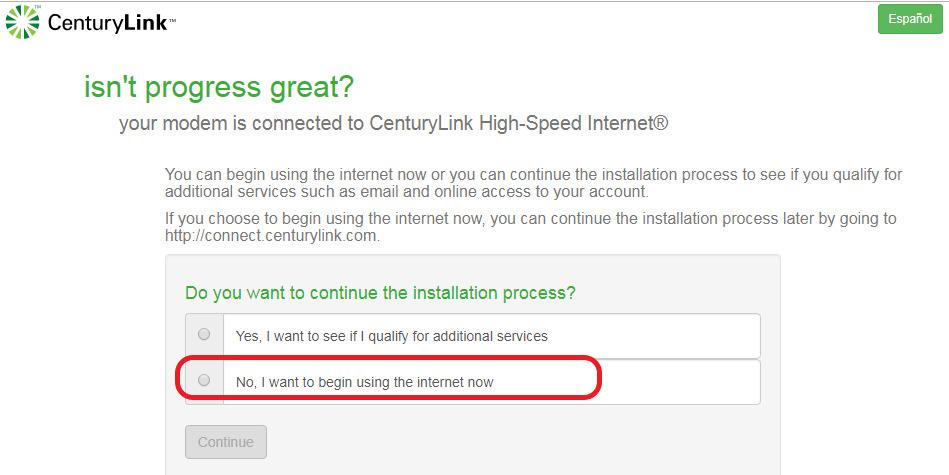
Step 3: In the next step click on no and click on continue. You can start connecting the devices and test your connection.
4. Connect Devices & Test The Connection
Step 1: Connect to WiFi from the mobile or laptop.
Step 2: Go to the right corner of the laptop and click WiFi. Click on the SSID you mentioned in the previous section and enter the password.
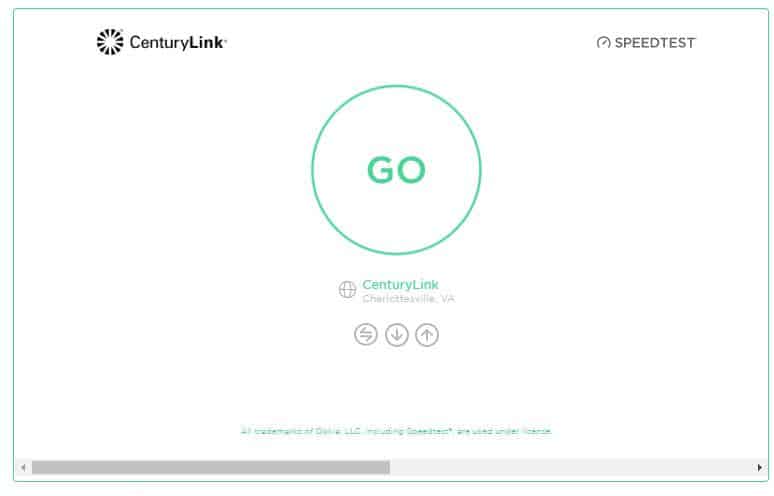
Step 3: Once you are connected, open the browser and visit the speed test page.
Step 4: Click on go and check the working status and speeds available. Start connecting the other devices using the SSID and password.
Standard Installation vs Pro Installation
- The Pro installation can cost you $99, while the standard self-setup would be free of cost (for Gigabit plans) or, at most, $15 for the other internet plans.
- Once you have the kit, you can do the standard installation at your convenience. You can avoid the hassle of booking appointments a day before, clearing schedules, and waiting for the professional technician to arrive.
- With the Pro installation, you get all the onsite help to get the internet running, while with the standard installation, you only get technical support through the phone.
👉 Related: Self Installation Guides for Other Major Internet Providers
Frequently Asked Questions
Yes, you can do the CenturyLink installation all by yourself. Follow the instructions mentioned in the article and the guided setup, you will be done in less than an hour.
Open the browser tab in the device, , and login into the portal using the default OEM credentials given at the back of the device. Click on the quick setup, enter the PPP username and password on the Quick Connect tab, and save.
From setting up the devices and completing the online activation process, it could take anywhere between 30-45 minutes.
Connect your cable from the wall outlet to the DSL port and power the device on. Customers can complete the modem activation either through the CenturyLink mobile App or the portal. The steps remain the same irrespective of the device you're using to install.
Yes, they charge for the installation. You can avoid those charges by self-installing CenturyLink and activating the modem by yourself.
You can find the default CenturyLink password on the label that came with your device. If you had changed the default password and forgotten it, you can reset the device manually. That will reset the device to its default factory setting, and you'll be able to access the device with the default login credentials.
Conclusion
Self-installing Centurylink internet is a straightforward process. I hope this article would've helped you set it up. The process shouldn't take 45-60 minutes from the get-go. Once you see 100% on the internet setup page, you'll be able to use your internet.