
Self-installing Cox can save you $100, but is it easy? Let's find out!
Have you recently subscribed to Cox internet? You might be aware that the professional installation from them costs $100. However, you can save that by opting for self-installation. But is it easy? Well, yes, it's very easy.
And this article will take you through easily activating Cox internet, all by yourself. From plugging in the connections, modem activation, and setting up a wireless network, to testing, I've covered everything here.
Even if you opt for Cox self install, you'll have the monthly rentals on the modem piling up on you for a long time. You can choose to avoid it by getting a Cox-compliant modem. No matter what you choose (Cox gateway or your own device), the article has detailed steps to take you through the Cox setup.
Let's begin!
Getting Cox Self-Install Kit AKA Easy Connect Kit
To self-install Cox internet on your own, you'll have to order the Self-installation kit. Cox calls it the ‘Easy Connect kit'. You'll be able to order it online by logging into the Cox website. They'll courier the package to your home. If you don't want to wait for the kit, you can go to the nearest Cox outlet with the subscription details and collect it.
What Does Come in Cox Self Install Kit?
Before we begin self-installing Cox internet, ensure nothing is missing from your easy connect kit. The kit contains.
- Gateway device
- Coax cable
- Power cord
- Ethernet cable
- Cox self-install instructions manual
If anything goes missing in the package, ensure you contact the outlet or Cox support to get them before you start the process.
Your gateway device can be the Panoramic Wi-Fi 6 Gateway (Technicolor CGM4331), Panoramic Wi-Fi 5 Gateway (Technicolor CGM4331), Surfboard TM3402 (Internet and Telephone modem), or Surfboard TG1682 (Wireless gateway). The activation process remains the same.
How To Self Install Cox Internet?
Make sure you have everything ready before you set up Cox internet. This section gives you the requisite information and ensures you don't miss out on anything.
1. Plug in the Connections
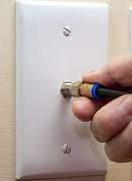
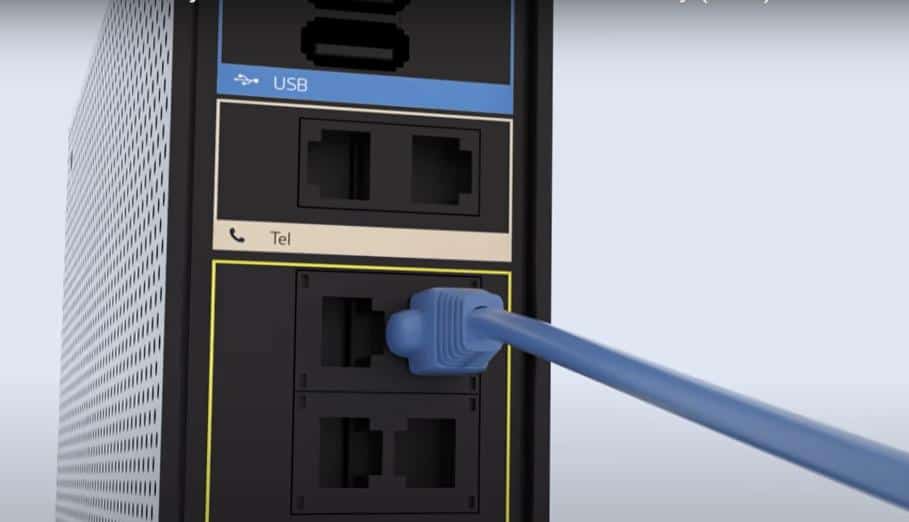
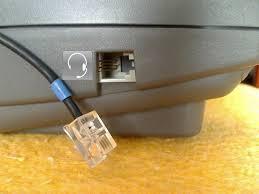
Step 1: Look for a coaxial wall outlet in your house. If you have multiple wall outlets, choose the one that is located close to the centre of the household. Plug one end of the coaxial cable into the outlet.
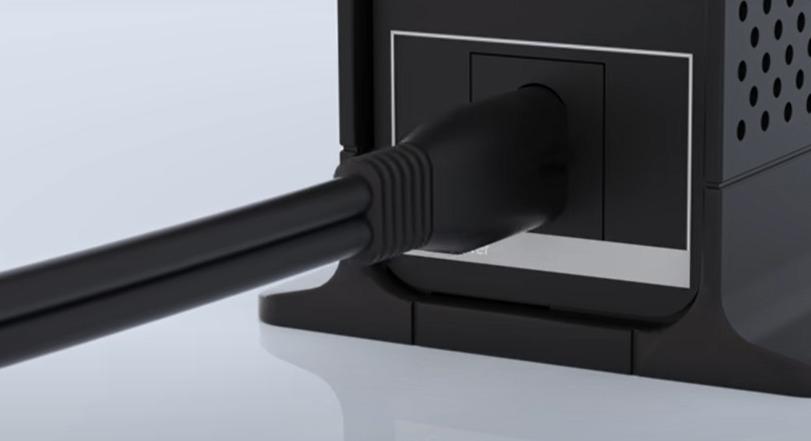
Step 2: The other end goes to the coaxial input in the Cox gateway/modem.
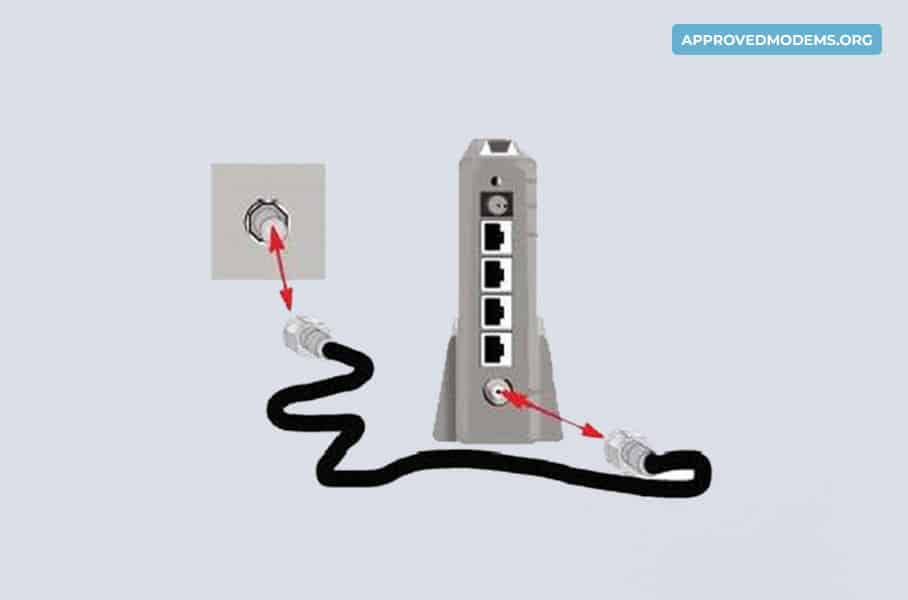
Step 3: Plug in the power cord in the modem and to the power outlet.
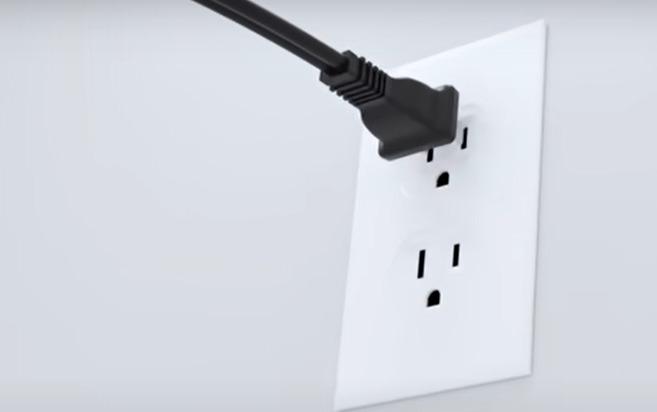
Step 4: The other end of the power cord goes into the gateway/modem. Switch the modem on.
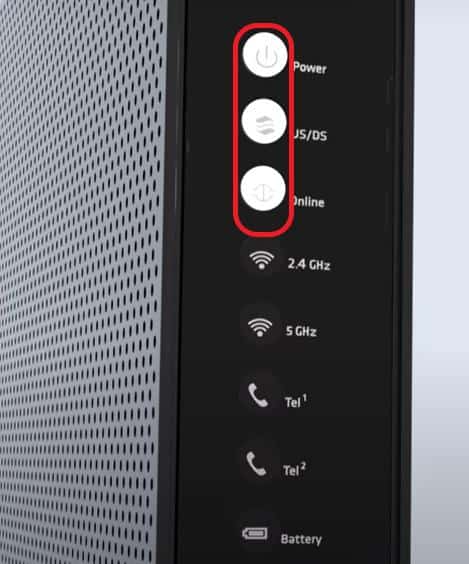
Step 5: Once the light in US/DS and online stabilizes, you are ready.
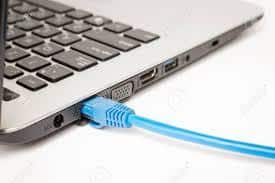
If you are going to activate the gateway/modem through the portal, connect a laptop/desktop to your modem using an ethernet cable.
Step 6: Plug one end of the cable into the Ethernet port in the modem.
Step 7: And the other end goes to the laptop.
For Internet + Voice Subscribers:
If you've bundled voice and internet, ensure you have the requisite equipment (Phone cable, phone, and power cord) and follow the below-given instructions.
Step 1: Connect one end of the phone cable to the modem.

Step 2: The other phone jack goes to the phone equipment.
Once you're done connecting the telephone to a modem, you can proceed to the Cox self-activation instructions.
2. Activate Cox Modem
First, ensure the modem is powered and lights are stable and the laptop is wired to the device. Now, you can activate the Cox modem in 2 ways: The official Website or Cox App. I have explained both methods below!
Side Note: If your Cox modem/WiFi blinks orange and doesn't stabilise with white light, try rebooting the device.
Method 1: Using the Official Website
Step 1: Open your browser and type www.cox.com/activate
Step 2: Key in the phone number used for registration.
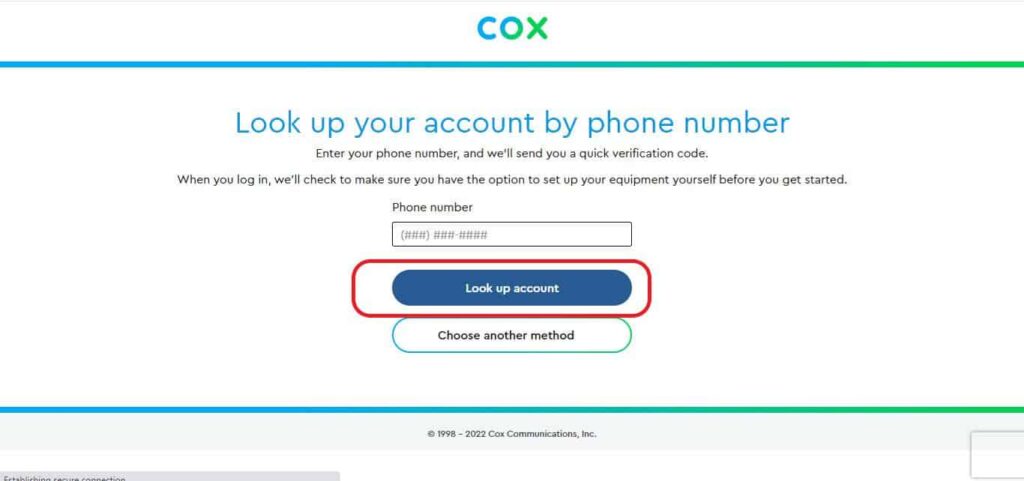
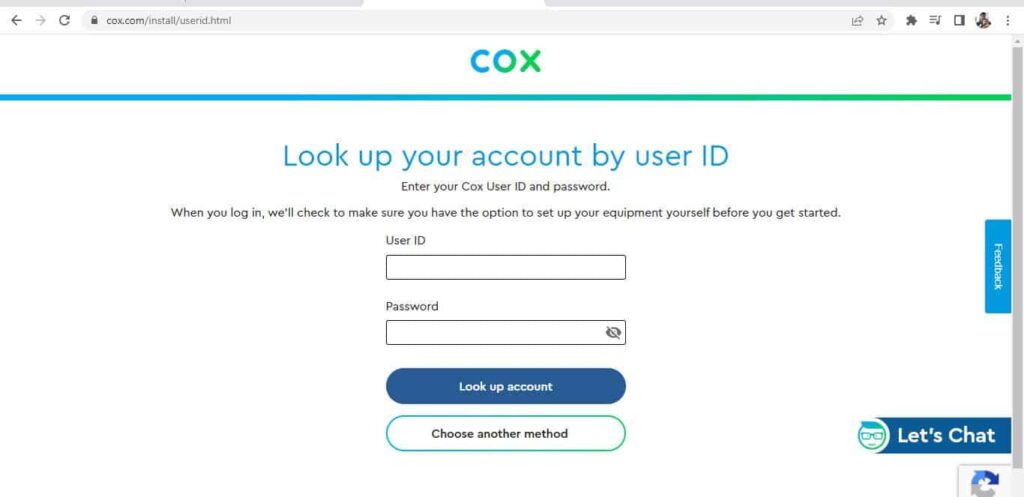
Step 3: If you have already signed up in the portal you can use the Cox ID and password to log in.
Step 4: Once you log in, Cox will verify your details, like phone number, and address, Click Next to proceed.
Step 5: The prompt will ask to you set up the equipment. Since we have already completed the connection, proceed to the next step. And click on Activate.
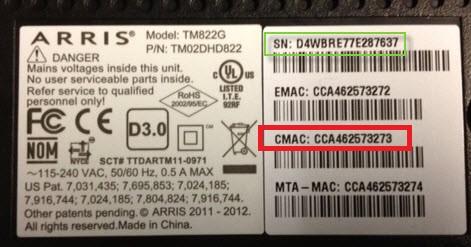
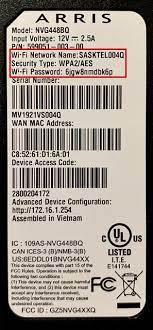
If you are using your modem, you'll have to provide the details of the device:
- Serial Number
- MAC Address
You can find the details in the rear/beneath your modem. The guided installation will ask you for this information. Keep it ready.
Step 6: The Cox modem activation process will take 15-20 minutes and the device might restart automatically while it installs the latest updates and completes the activation.
Method 2: Using the Cox App
Step 1: Alternatively, you can use the Cox App to complete the Cox self-installation. Simply download the App from the store, open and click sign in.
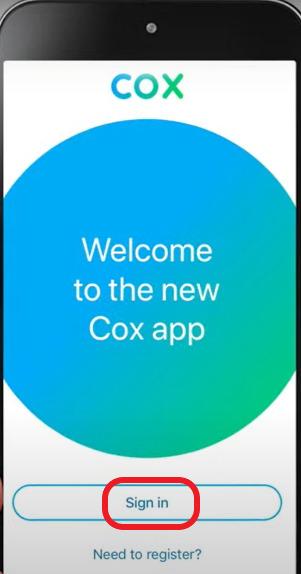
Step 2: Enter the COX ID and password and Click Sign in. If you don't have an ID, click on the register, key in the details, set up security questions, and generate an ID.
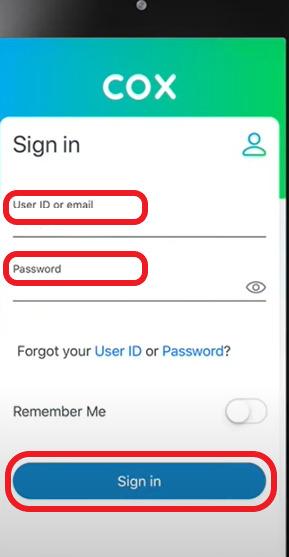
Step 3: Once you log in, navigate to the Home tab and click easy connect.
Follow the guided instructions, confirm the physical setup, accept the privacy policy, and click on activate.
The activation will take anywhere between 10 to 30 minutes. Once the process is complete, Click on register now and complete the setup.
3. Setting Up Wireless Router
Your gateway is a combo device. You can set up the WiFi router using the link provided by COX.
Visit www.cox.com, log in using your cox id and password, and navigate to my Wi-Fi. Here you can edit the SSID and password. The page allows you to optimize your Wi-Fi network.
If you are using one of the latest panoramic gateways, use wifi.cox.com to download the app and customize your Cox network.
If you're using your own modem and router compatible with Cox, run an Ethernet cable to your router. Connect a laptop to the router, and log in to its admin portal using 192.168.0.1 or 192.168.1.1 or any URL mentioned by the OEM on the router box or manual.
Set your WiFi SSID and password. Now, you'll be able to connect your devices to your router.
4. Connect Devices & Test
You can use the SSID and password given on the bottom of your device if you hadn't changed it in my WiFi section.
Step 1: Open a browser on the device and visit this webpage.
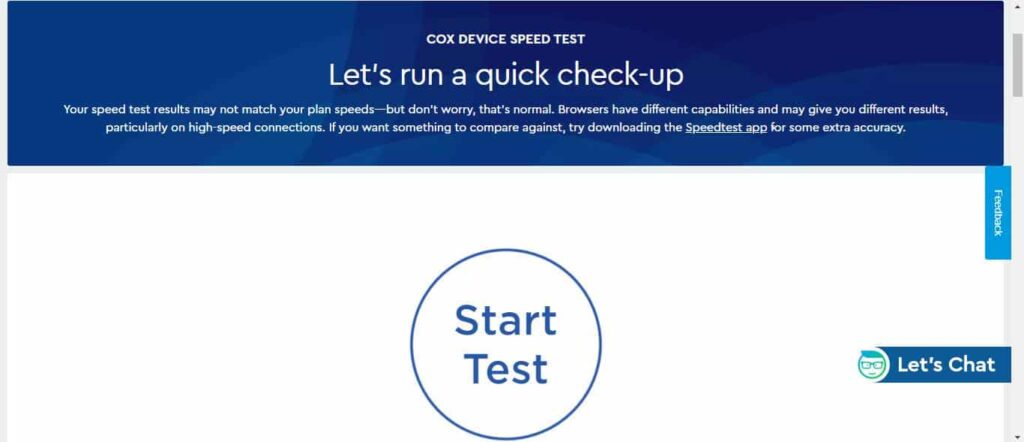
Step 2: Click on the start test. You'll be able to check your internet speeds and their working status.
Self-installation vs Professional Installation
- You'll save on the professional installation fee when you opt for Cox Easy Connect
- You are free to choose your timings to finish the setup with Easy Connect self-installation.
- For a professional setup, one has to schedule the visit and wait for the technician to arrive.
- There is limited help with self-installation. You might have to repeat the process or wait for technical support in case of any delay.
- On-site support is a given for professional installation
👉Related: Self Installation Guides for Other Major Internet Providers
Frequently Asked Questions
Yes, Cox allows you to self-install and activate Cox's internet with your modem. Ensure the modem supports the internet speeds you have subscribed to and is compatible to work with Cox Internet.
It takes anywhere between 10-30 minutes to activate the internet through self-installation. The external setup by Cox technicians will take anywhere between 2-3 hours.
Cox worked with apartment owners to set up and offer a pre-installed internet connection for the residents. You'll have an internet connection up and running, right from the moment you move into a new apartment. After a free trial, you can choose to continue the service or switch to a different service provider.
Once you have unpacked the easy-connect package, Wire up the modem to your coaxial wall outlet.Plug in the power cords and power up the modem. Login to your cox app with your cox id and password. Once you log in, click on Easy connect on the home tab. This will take you through the process in 10-30 minutes.
Yes, setting up the cox internet by yourself is easy even for users new to networking. Cox simplifies the process with Easy connect. In tandem with the Cox app, you'll be able to get through the gateway activation, hassle-free.
If you are new to the networking process, setting up Cox internet can seem like a complicated process. But if you follow the instructions there is very little chance for things to go wrong. In case of any issues, call tech support for further help.