How To Self-Install Sparklight Internet? [Step-by-Step Guide]


Self-installing your Sparklight connection might seem like a difficult task, but it’s not. However, the instruction manual you get with the installation-kit might make it overwhelming. But with the right guide at your disposal, you’ll save the $90 professional installation fee and get your own Sparklight equipment.
To ensure that the steps listed below work, I ordered the self-install kit and setup a Sparklight connection on my own. So be assured, after following all the steps below, you’ll have a working Sparklight connection and would’ve saved the professional fee.
Get Sparklight Self-Install Kit
If you already have a self-install kit with you, can head down below to the steps and start with the installation process.
Once you confirm the subscription and opt for Sparklight self-installation, the ISP will check your neighborhood eligibility and run a credit check. If eligible, you will receive the kit post the requisite connections are completed outside your home.
What Do You Get in Self-Install Kit?
- Welcome letter
- Sparklight self-activation instructions
- ISP-provided modem [Read: renting vs buying]
- Modem manual
- Power cord
- Coaxial cable
- Ethernet cable
How To Self-Install Sparklight Internet?
Before you begin with the installation, it’s essential to complete the connections and decide on the equipment placement. If you are using your Sparklight modem and router, ensure you have all the requisite power cords and accessible power outlets for connecting all the devices.
1. Plug in the Connections
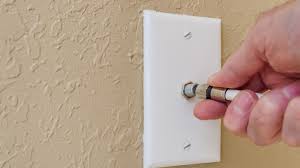
Step 1: Find a coaxial wall outlet. If you have multiple outlets in your home, choose the one most centrally located with easy access to power outlets. Your coaxial wall outlet will look like this:
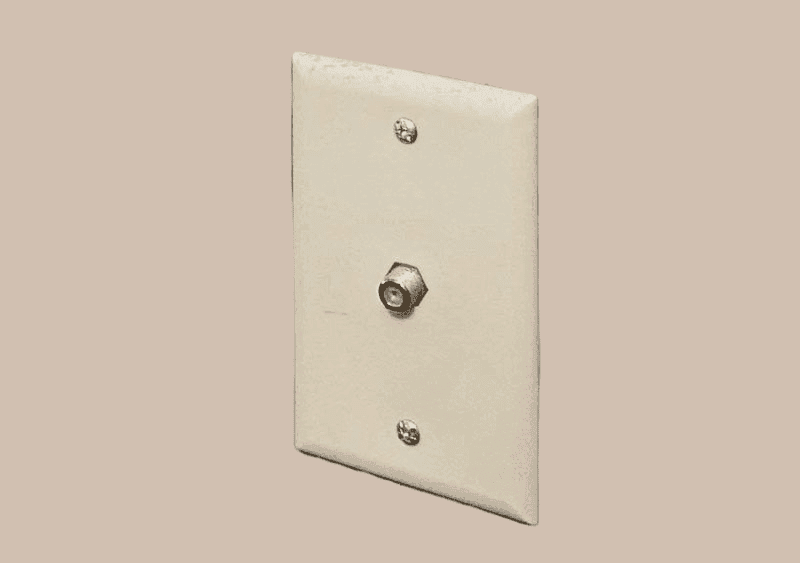
Step 2: Once you have located your choice of outlet, look for the coaxial cable in the kit. Plug one end of the kit into the wall outlet and the other end into the modem.
Step 3: Fetch the power cord from the kit and plug one end into the modem and the other end into the power outlet nearby.
Step 4: Switch the modem on, and wait until the lights turn stable.
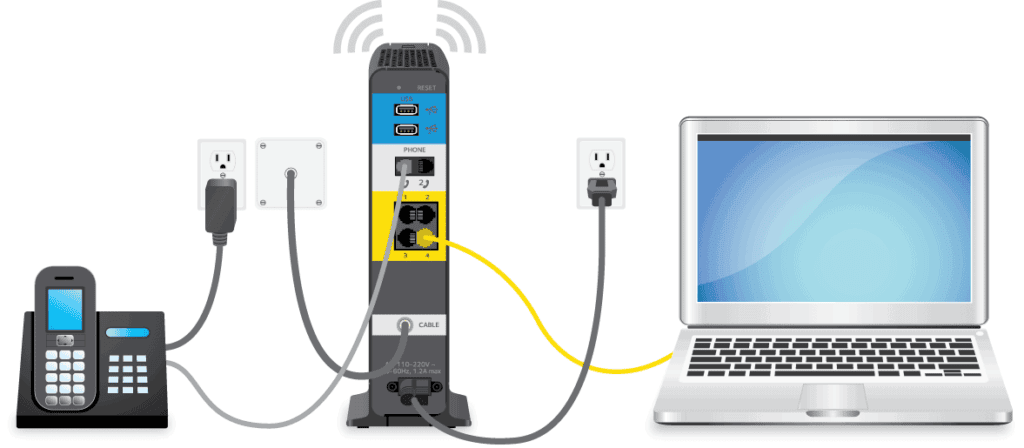
If you are using an Internet + Voice bundle, connect the phone device to the modem.
Step 5: Look for the phone cable and plug one end in the voice port of the modem and plug in the phone. Once you are done, your complete setup will look like this:
2. Activate Sparklight Modem
Step 1: After the lights turn stable, you can connect your mobile/laptop/desktop to the WiFi network using the login credentials given in the label.
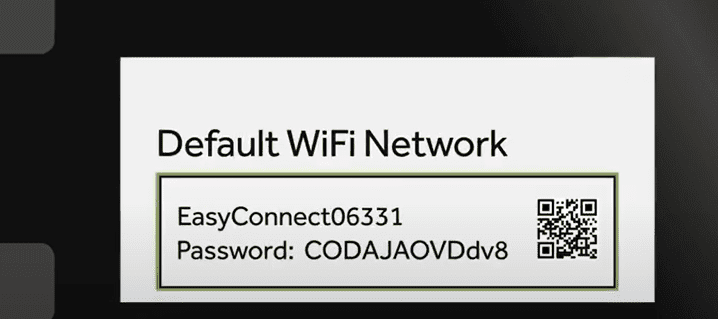
Step 2: Once you are connected to WiFi, open a browser, and it will automatically take you to the Sparklight modem activation page.
Step 3: Enter the account details, pin code, and phone number and click on activate.
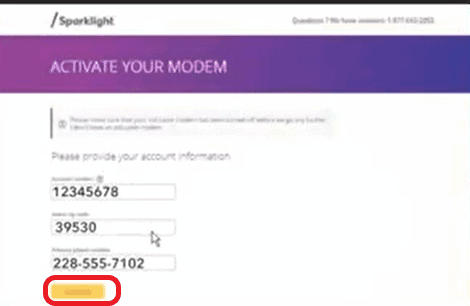
Step 4: The Sparklight modem activation process may take between 5 to 10 minutes. Do not refresh or close the page.
Once the activation is complete, it will take you to a page, as shown below.

Once the process is successful, you’ll be able to use your internet and phone devices.
Step 5: If you are using your own modem and router as separate devices instead of a single modem-router gateway, you will connect an ethernet cable to the laptop and the other end to the ethernet port in the modem.
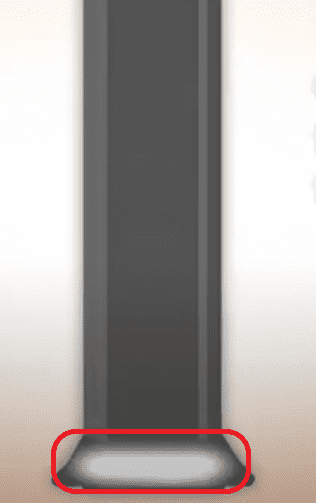
Make sure you keep the MAC address of your modem handy. You can find it at the bottom of the modem on the label. To make sure it works, you need to get one of the Sparklight-compatible modems.
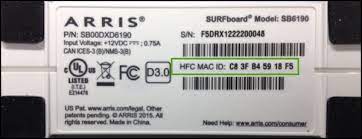
Call +1 877-692-2253 for the technical support team, furnish the MAC address of your device and ask them to map it with your account. Once this additional step is complete, you can continue with the modem activation process mentioned above.
3. Connect Devices & Test Connection
Step 1: Once you see the modem activation is successful, you can connect a laptop or mobile gadget and test your connection.
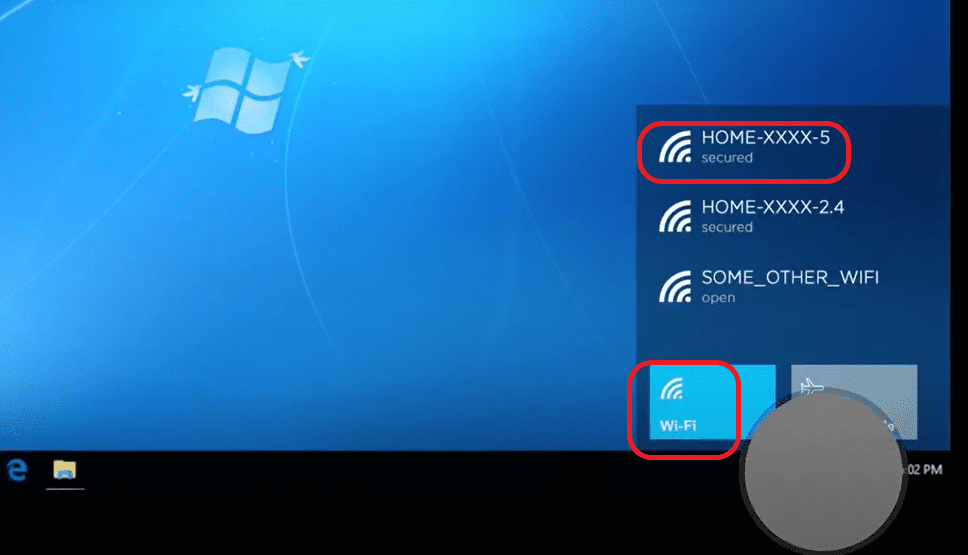
Step 2: Use the credentials from the label and connect to wifi.
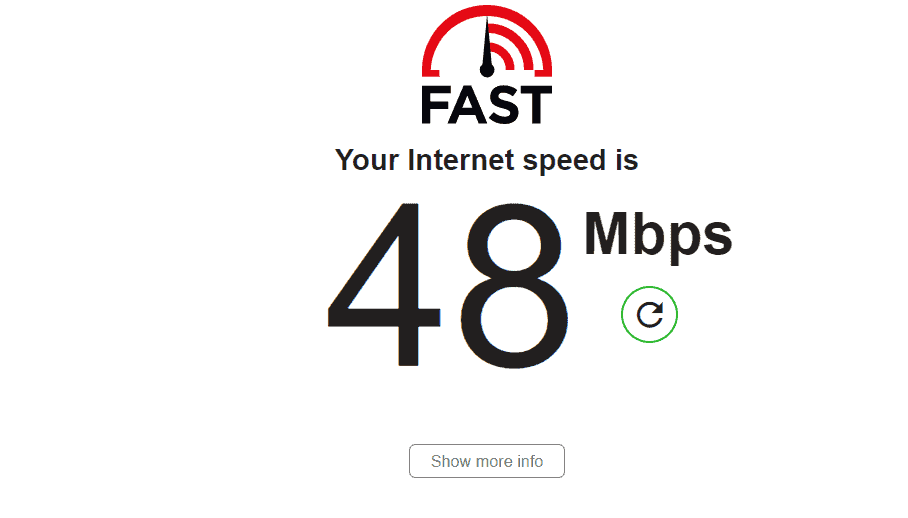
Step 3: Open the browser, type in https://fast.com
You’ll find the Sparklight internet speed available for you and the status of your internet connection.
Step 4: If you are using your modem and router setup, you will run an Ethernet cable from the modem to the router’s WAN port. And continue the steps mentioned above.
Self-installation vs Professional Installation
- The self-installation is free, while the Sparklight installation fee can set you down by $90.
- You are free to install Sparklight internet on your own at your convenience, but the professional installation has to be booked with the technician and entails blocking your schedule for the appointment.
- Your service provider decides if your home is eligible for self-installation or not.
- The professional installation comes with on-site support, while you get limited technical support with the self-installation.
👉Related:Self Installation Guides for Other Major Internet Providers
Frequently Asked Questions
Can you self-install Sparklight internet with your own modem?
Yes, you can. The concerned ISP allows you to use your device and activate your internet connection. It involves an additional step of noting down the MAC address of your modem and calling technical support for linking the device with your account.
How long does Sparklight take to install the internet?
Once all the devices are connected and the modem is powered up, the process of self-installation takes anywhere between 20-30 minutes to complete. It might take an extra few minutes if you are using your own devices.
How to activate the Sparklight modem?
Find an active coaxial wall outlet and connect the modem using the coaxial cable in the kit. Plugin in the power cord and turn the device on. Once the modem lights are stable, you can either log in through WiFi or a wired connection to complete the activation process in the browser.
Is Sparklight internet self-installation easy?
Yes, the self-installation is a simple process and will also save you the Sparklight installation fee. Once you have subscribed to the services and received the self-install kit, you’ll be able to proceed with the installation. Even if you are a networking newbie, the process takes less than an hour, if you have an active internet connection.
What is Sparklight’s internet phone number?
You can reach technical support at +1 877-692-2253.
Conclusion
Self-installing Sparklight internet is a straightforward process. While it might appear hard for users new to networking, the above guide will help you install Sparklight internet on your own in less than an hour. Once you have all the connections ready, follow the Sparklight self-activation instructions and have the internet up and running.