
Want to set up your Starlink Internet connection? The manual you get with the installation kit has all the instructions. However, a lot of people fail to install even after following all the steps from the manual. That's why, I self-installed my Starlink satellite and here's a guide to make the process hassle-free.
How To Install Starlink?
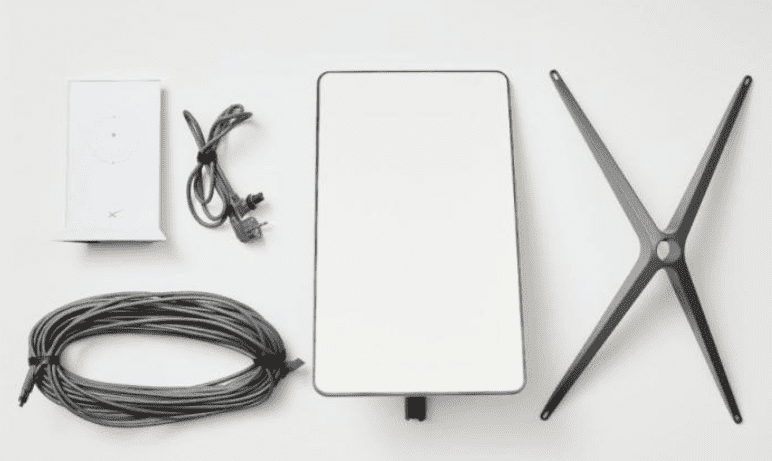
Before beginning, inspect your Starlink installation kit as it should not miss any accessories. You'll need an Antenna Dish, Mounting Tripod, Starlink WiFi router, Power Supply Adapter, and Black & White Cables, all as shown in the picture below.
1. Configure Dish, Stand, and Cable
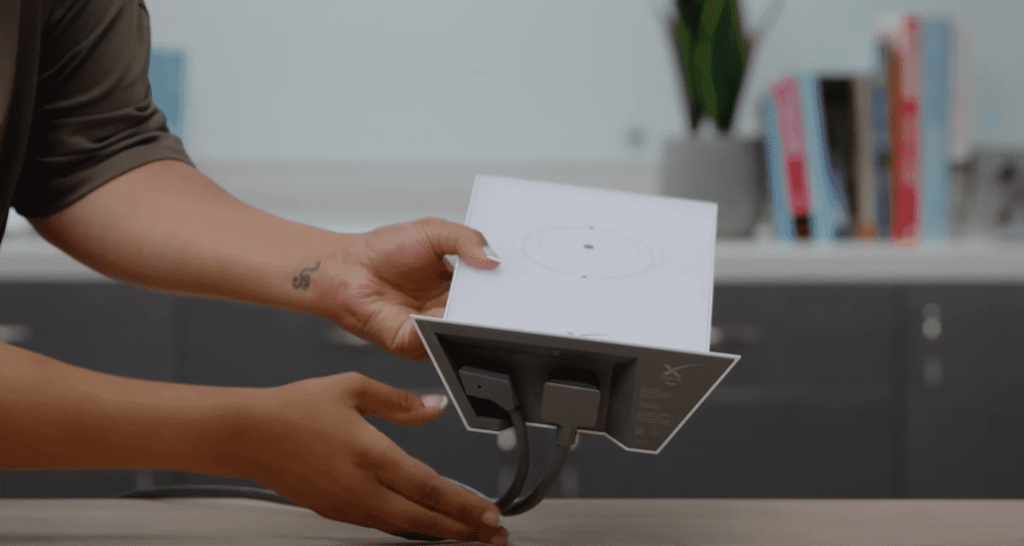
Now you took out all the contents of your Starlink internet setup kit, it’s time to assemble the dish, stand, and cable.
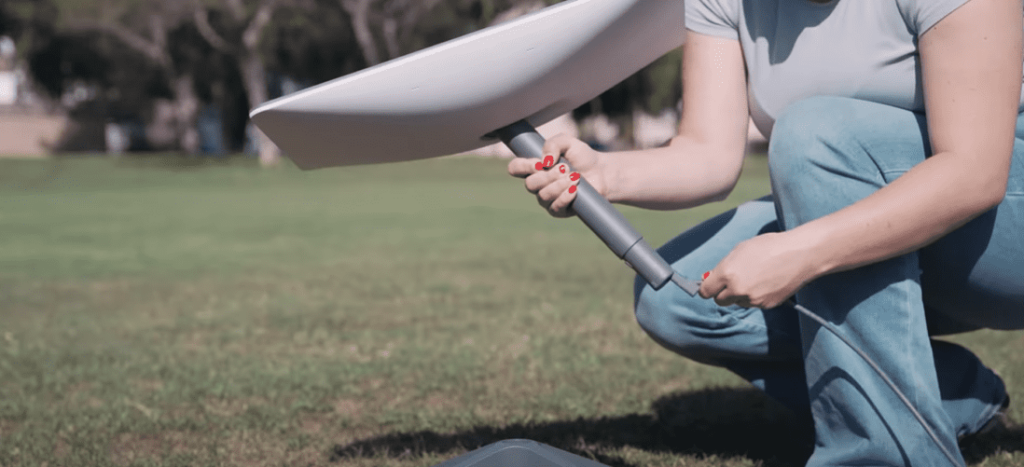
Insert the cable into the dish through the opening at the bottom of the mast or stand (as shown in the image).
You’ll see there are two sides to the cable, straight and elbow, and the straight end goes into the dish. You’ll hear a click sound as the cable is seated properly.
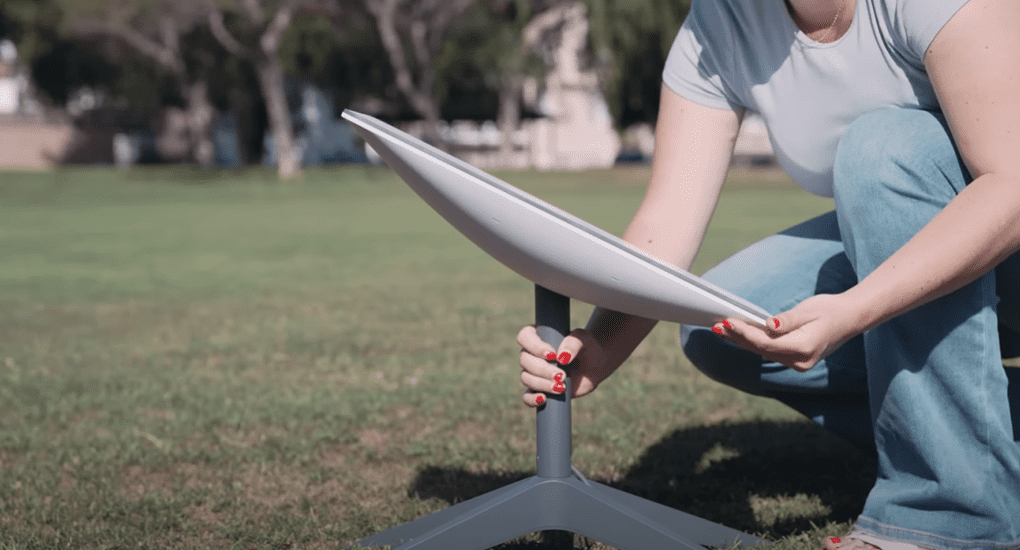
Then, insert the mast into the Starlink mount and let the two spring tabs lock in place.
2. Decide a Place for The Dish
As the mast is secured in its place, it’s time to hop onto the roof and install it properly. But before we do that, it’s important to locate a good spot for your dish.
Because, unlike cable internet providers, Starlink connects to the satellite, and any obstructions like chimneys, walls, trees, or others break the path of traveling signals.
Suggested Read: Satellite vs Cable Internet
But you don’t have to pace through the roof to search for an optimal location, as Starlink has graced us with a nifty feature called “check for obstructions”.
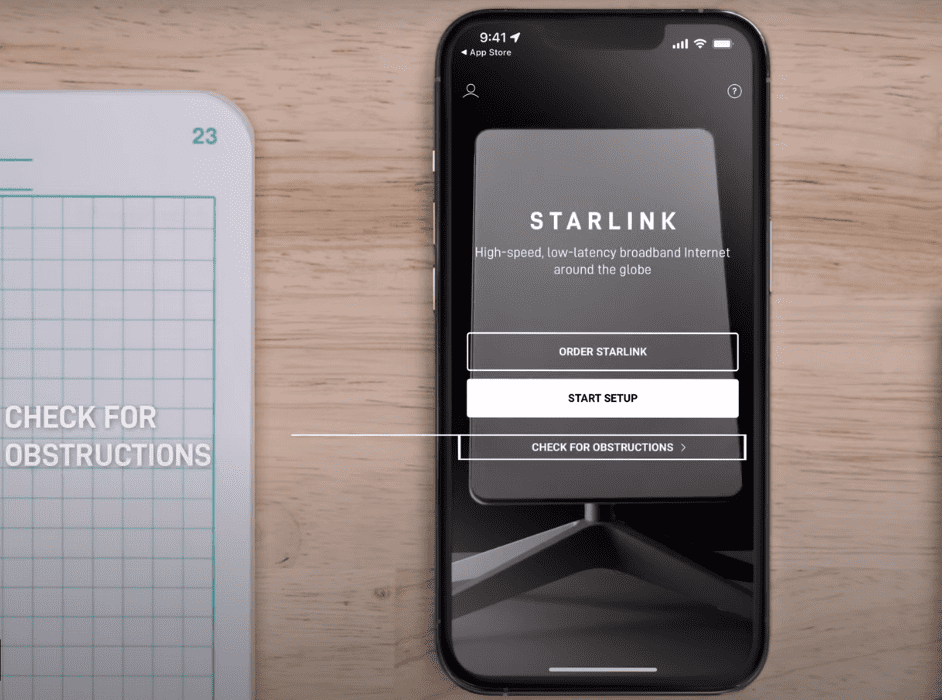
To start with, install the Starlink app on your smartphone and log into your account by putting in the provided username and password. Search and tap on the check for instructions tab. Go through the instructions and click I am ready.
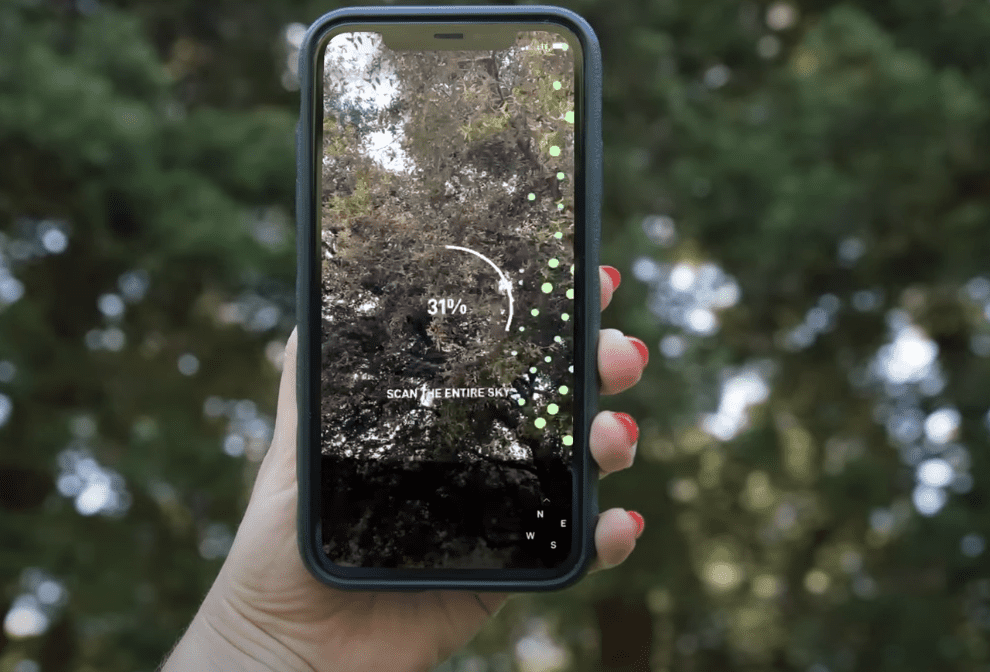
Then, point your smartphone to the sky and point at the directions the app asks for. Once you’re done, tap on View Results.
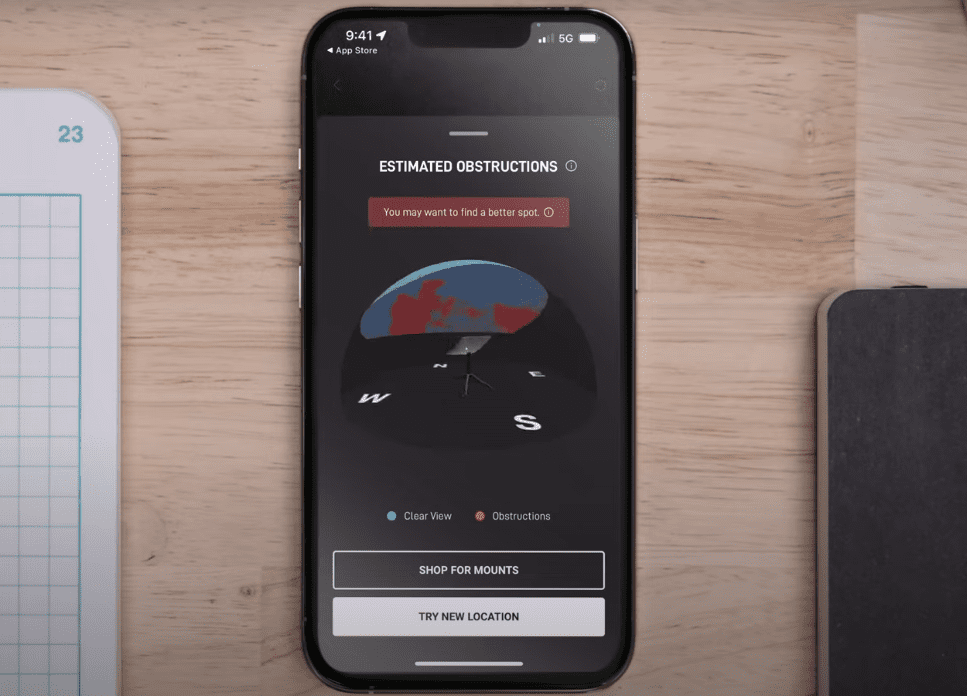
The blue area on the “earth” indicates the optimal viewing angles of the dish, while the red area indicates obstructions.
Now that you know where to install it, let’s move to the next step.
👉 Related reading: Starlink Mesh Router Review: Is It Worth It?
3. Mount The Dish & Run Cable
The following step is probably the most important in the entire Starlink setup.
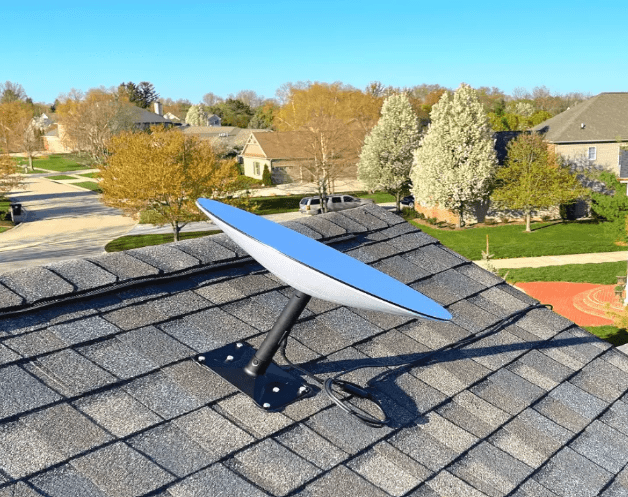
To start with, fix the mount on the roof using pushing screws through the aperture of the mount, and make sure it stays strong. Then you run the cable to the WiFi router.
For testing purposes, you can lead the cable through a window, as I did initially. Or you can drill a hole into the exterior wall when you’re complacent with the router position.
Once the cable is inside your house, plug the elbow end into the router, and the router into the power plug. As soon as it’s powered up, the dish starts to realign itself with the satellites. It takes only a few minutes.
And as the Starlink router LED lights up, it’s time to configure the network and move on to experiencing the “high-speed” Starlink connection.
How To Set Up Starlink?
Now everything is in place, here are the further steps:
- In the Starlink app, find the settings tab and navigate to the WiFi tab.
- There you will find a temporary SSID with the name “STINKY”. Connect to it and proceed.
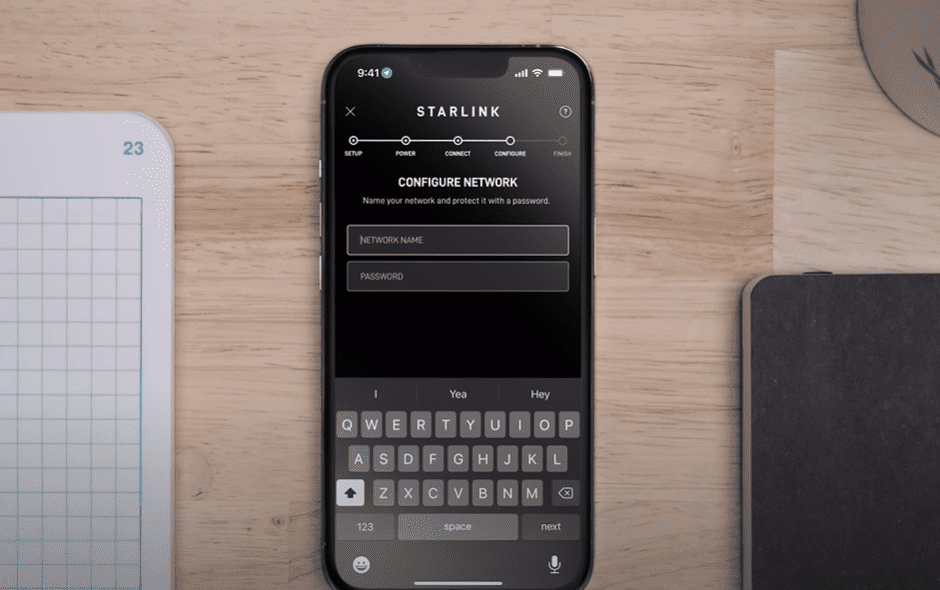
- It will then ask you to configure a new username and password. Once you save it, the internet is now ready to use.
- Go back to the WiFi settings tab and connect to the network by putting in the password you just created.
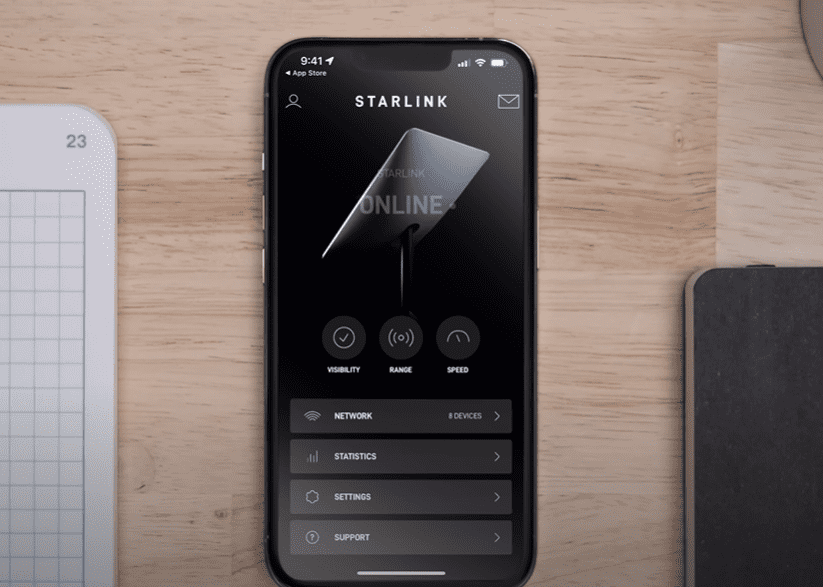
- You can use this app to take control of the internet by checking through the connected devices, status, any obstructions that might be hampering the dish’s performance, and the speeds you get.
Done with Setup? What's Next?
Once you’re done setting up Starlink Internet, you must have access to the Internet. You might want to know the speeds you’re now getting, but keep in mind that Starlink takes almost 12 hours to reach its optimal performance.
By that time, it installs the necessary drivers, scans and maps the satellites around the dish, and calculates the way to make an optimal communication path with them.
Don’t worry, these things happen automatically, so you don’t have to worry about tweaking the setup.
However, if you face issues like slow upload speed or the signals don't reach every corner of your house, you might want to use a third-party router.
I've tested many devices and recommended the best options for varying settings:
- top wireless routers for Starlink — ideal for small-medium households
- top mesh WiFi systems for Starlink — ideal for large households
Note: Once you get a third-party device, you'll need to enable the bypass mode. Follow my step-by-step guide on installing a third-party router/mesh on Starlink.
Frequently Asked Questions
Yes, the process isn’t that technical and you just need to follow the step-by-step process very carefully. Just stay careful when you climb the roof to mount the dish.
Find an optimal location by scanning the entire area using the Starlink app. The blue portion in the displayed result is the best location to install the Starlink router.
No, the main point of installing Starlink outside is to establish a clear communication path between the dish and the satellite. There are multiple obstructions inside the house that in turn hampers the signal quality and your overall experience.
The Starlink plans stay between $90 and $500 per month, and you must pay a one-time $599-$2500 upfront as an equipment fee.
I hope this guide breezed you through the Starlink internet installation. Configuring the dish to get access to the internet takes only a few minutes. But while doing so, prioritize your own safety while doing, especially when you’re installing the dish on the roof-top.