
One of our readers (Lucy) tried to self-install WOW! Internet, but it was not working for her. She tried to follow all the instructions and yet failed. That's why she contacted me and asked if I could help her with proper instructions to install WOW internet.
Lucy couldn't install it multiple times and fail, so she thought of getting a professional installation service which costs $75. However, before that, she contacted me, and after following the steps, she successfully set up her WOW! connection and saved $75.
To ensure that the steps I've listed work for everyone, I subscribed to WOW!, got myself the installation kit, and tried installing it on my own. Following the below steps shall successfully help you with the WOW self-installation process.
The WOW! Self-Install Kit: What Does It Include?
Once you've subscribed to the WOW internet, professional technicians will set up your internet connectivity outside your home. Once the process is completed, they will drop off the installation kit at your home.
- Gateway
- Power cord
- Ethernet cable
- Coaxial cable
- A user manual
Your Gateway can be Arris DG2470/DG3270/DG3450 or TG2472/TG3452 based on your location and internet plan.
If you are using your own, WOW supported modem, the kit consists of:
- Coaxial cable
- WOWWAY Self Install manual
Before starting the activation, ensure you have the modem, power cords, and an Ethernet cable of the desired length.
I recommend that most of my readers use their own modem instead of renting one. You get better performance and security and save on monthly rental.
How To Self Install WOW Internet?
Go through the steps mentioned in this article one by one to complete the WOW! internet installation.
1. Plug in the Connections
Before starting the WOW way activation in their portal, having all the connections ready makes the installation organized and smooth. Before getting into the activation, let’s take care of all the connections first.
Step 1: Look for an active coaxial outlet in a central location, plugging one end of the coaxial cable.
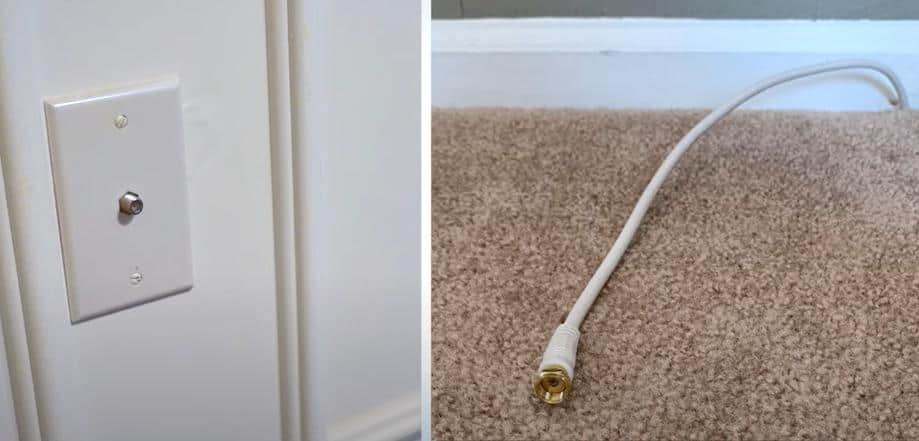
The other end of the coaxial cable goes into the gateway
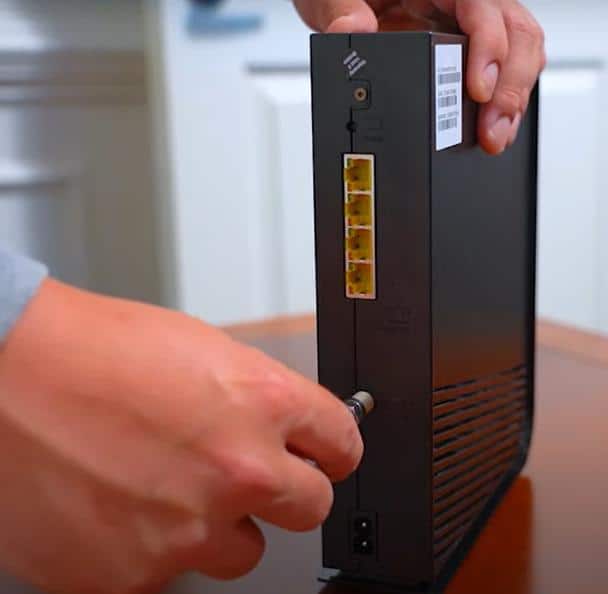
Step 2: Plug the power cord into the slot as highlighted below
Another end of the power cable goes to the power outlet nearby
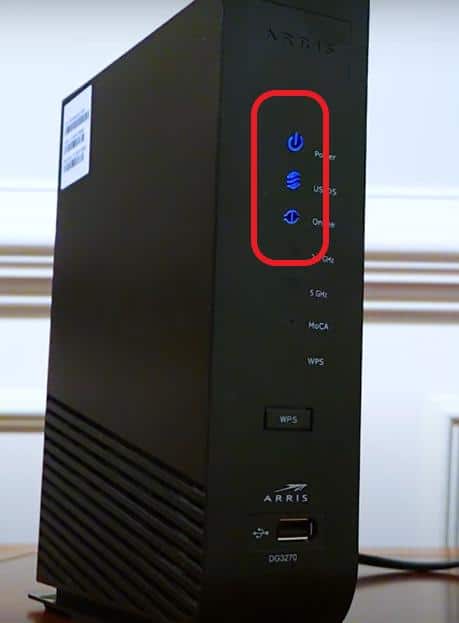
Step 3: Power up the gateway and wait until the US/DS, online lights turn stable
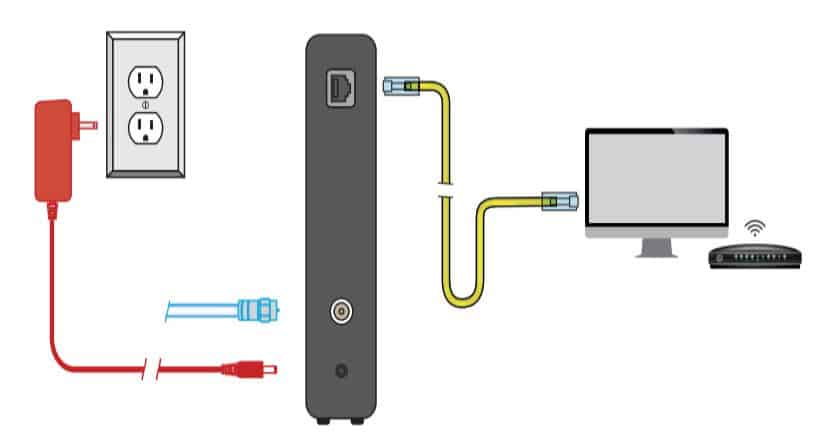
If you are using your modem and router as two separate devices, your setup will look like this:
Note:
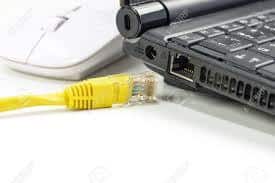
Activate the modem with a wired setup. Use an Ethernet cable to connect the modem to a laptop or desktop.
Step 4: Once the activation is complete, you can connect the router to the modem using the same Ethernet cable.
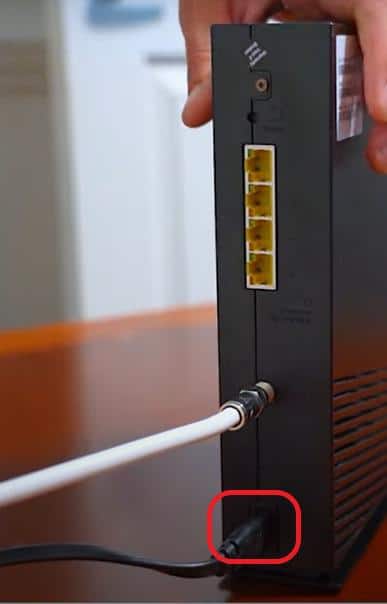
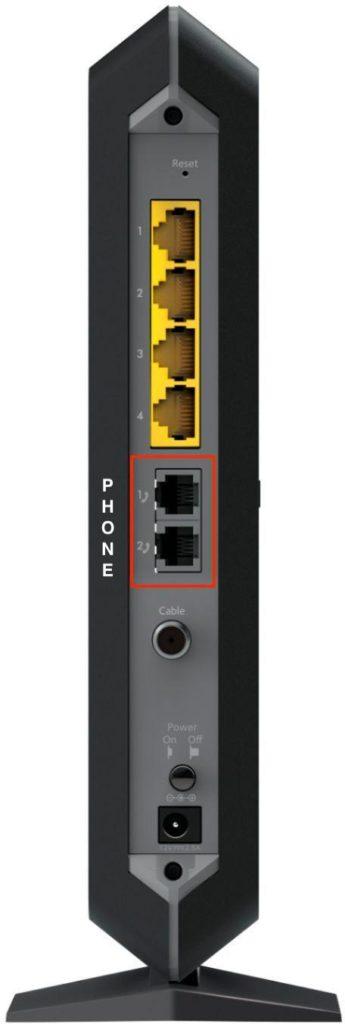
If you use an Internet and phone bundle, your modem/gateway will have a telephone port, as highlighted in the picture:
The port locations can change depending on the modem/gateway you use. However, you can easily identify the phone ports, as most modem makers clearly show them.
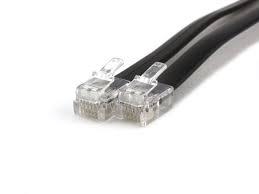
Step 5: Connect one end of the cable to the modem and the other to the phone.
Your final setup should look similar to the picture shown below.
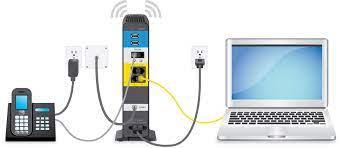
Once the modem is active, you’ll be able to use both internet and phone services. Ensure you have an active voice subscription.
👉 Related Reading: Is Your WOW Internet Slow? [Reasons & Fixes]
2. Activate Wowway
Using the WOW gateway, you can connect your mobile/laptop via Wi-Fi and complete the WOW modem setup process.
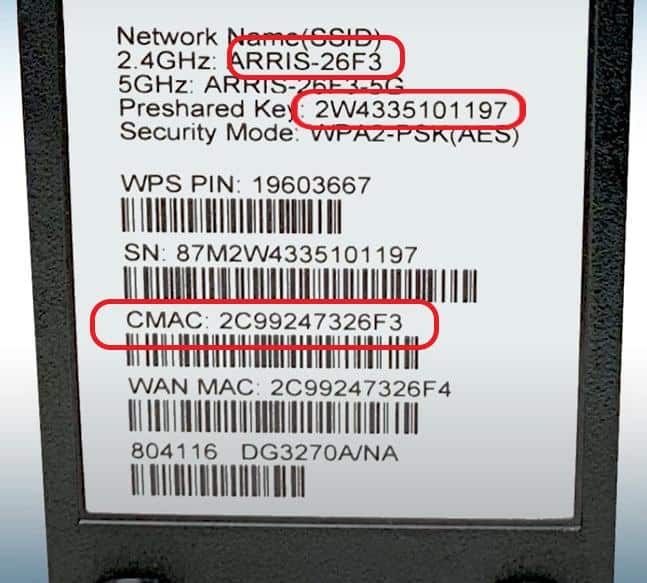
Step 1: Once the LED lights are stabilized, connect your device to the gateway using the SSID and Password mentioned in the label.
If you are using your modem, use the wired connection by running an Ethernet cable to your laptop or desktop.
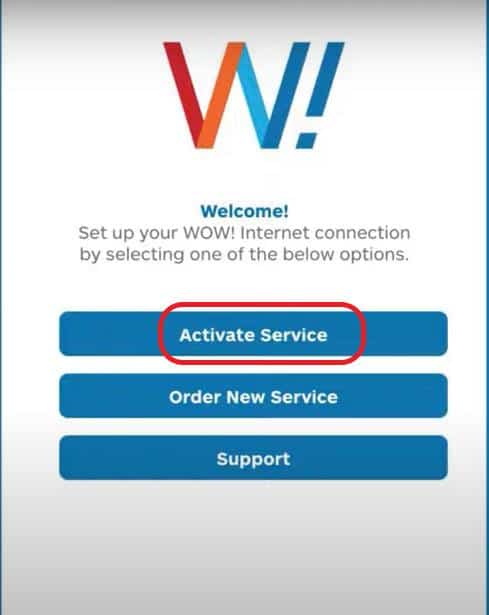
Step 2: Open the browser and visit wowway.com/selfinstall. Once there, click on activate service as highlighted in the screenshot below.
Step 3: Enter the details in the next window and click submit. You can find the account number in your subscription voucher or receipt.
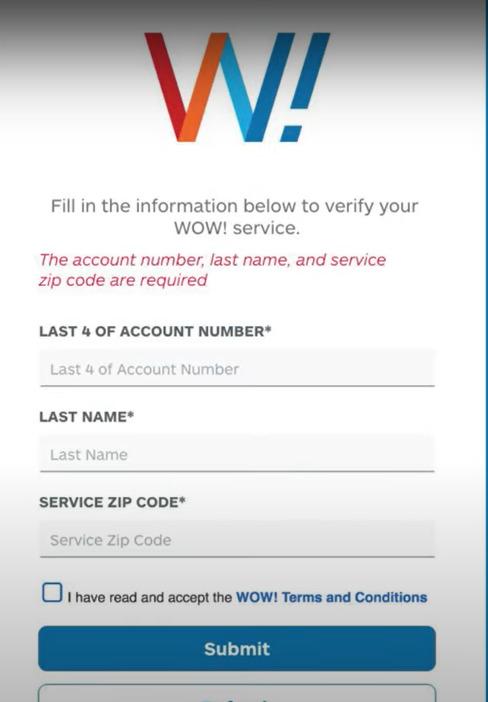
Your details will be verified before proceeding with the activation.
If you are using your device, keep the Serial number and CMAC address of the device handy. You’ll find them on the rear side of your modem in the label. Furnish the details.
Step 4: Once the verification starts, you'll see the screen display below. Wait until the process is complete.
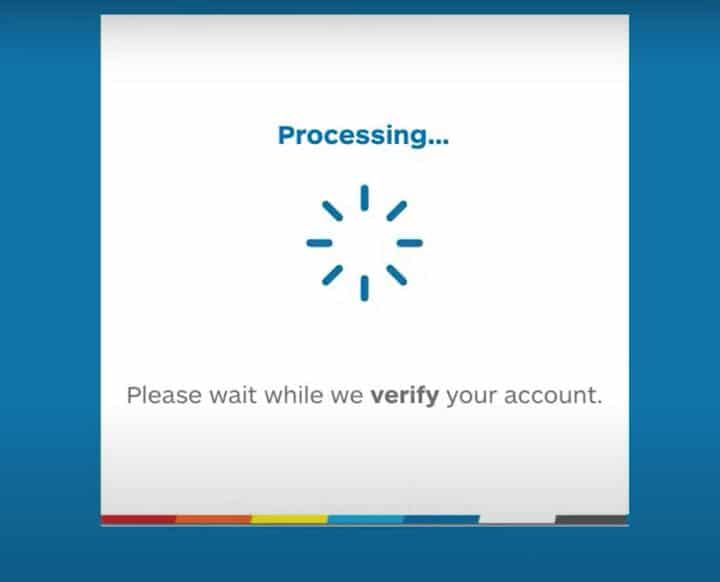
Your gateway/modem will restart a few times and the process will take up to 10 minutes.
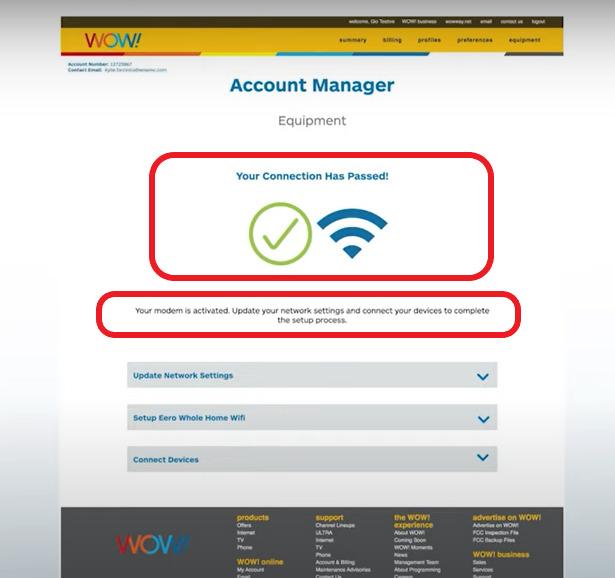
Once the verification is complete, you will find a screen directing you to the next step.
3. Connect Devices & Test Connections
You can continue with the setup as shown on the page below. WOW offers an inbuilt connection test as well.

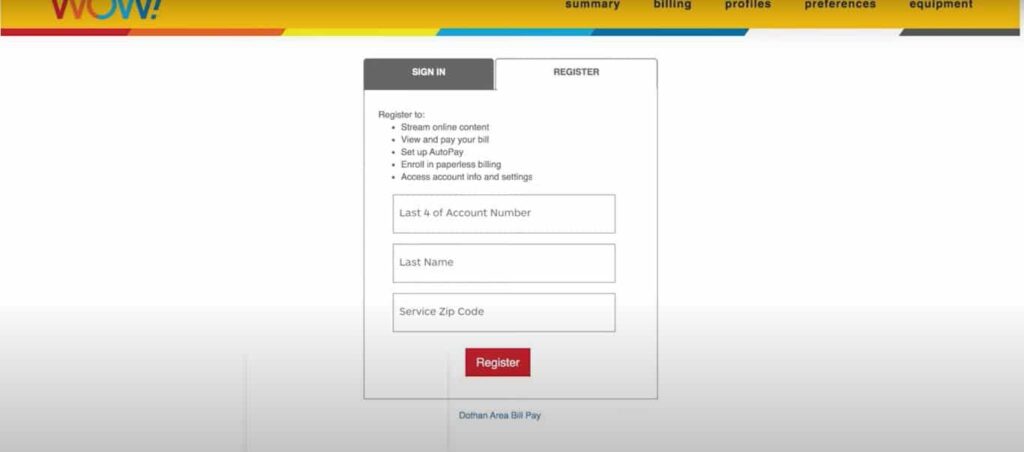
Step 1: Click Login, and register using the same details furnished in the beginning.
Step 2: After registration, login. Click on the equipment menu in the right corner.
Step 3: In the next step, scroll to the bottom of the page.
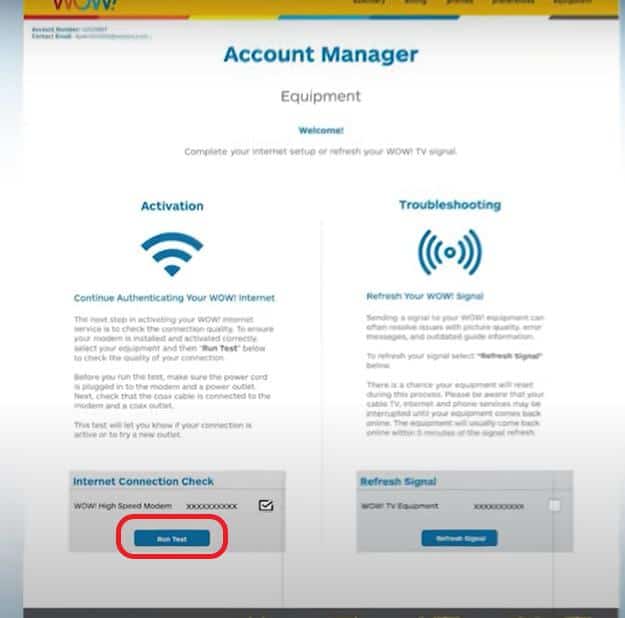
Step 4: You'll see a device name attached to your account. Check the box to the right side of the device and click test connection as highlighted.
The system will verify the status of your connection and it will display the results below.
Now you can connect other devices to the network using the default SSID and pre-shared key mentioned earlier. You can change the default password to a stronger one for more security.
4. Customize Your WOW! Connection
To change the Wi-Fi settings, you can log in to the admin portal by visiting or in the browser.
Here you'll have access to edit the SSID and password. Make the changes and click save.
If you are using your own WOW internet router, use 192.168.1.1 or 192.168.0.1 or the URL mentioned by the OEM in the label. Here you can customize your settings, prioritize devices, and change parental controls as supported by the router's firmware.
👉 Related Reading: What Are the Different Types of Internet?
Self-installation vs Professional Installation
Consider the factors before choosing the mode of WOW installation:
- The Professional installation is going to cost you north of $50.
- With the Self-install kit, you could save that and invest in getting yourself a better modem or a router.
- If you choose to proceed with the self-installation, you can do that at your own pace and schedule. You'll avoid the hassle of waiting for the technician to arrive and being available.
- With self-installation, you'll not have the comfort of on-site support that comes with a WOW professional technician.
👉Related: Self Installation Guides for Other Major Internet Providers
Frequently Asked Questions
Yes, you can use your modem and complete the WOW self-installation. But before purchasing your device, ensure the modem is compatible with WOW Internet. Alternatively, you can choose the modem from the WOW recommended list.
Login into the device admin page using 192.168.0.1 or 192.168.100.1 using the credentials shared in the gateway label. Once you log in, Go to the Wireless tab where you can edit the SSID and password for both 2.4GHz and 5GHz.
Connect the coaxial cable and power cord to the gateway and power up the device. Once the LED lights are stable, go to wowway.com/selfinstall and log in. Once you verify the account details, follow the guided installation procedure to activate the modem. It could take up to 20 minutes.
Connect the coaxial cable and power cord to the gateway and power up the device. Once the LED lights are stable, go to wowway.com/selfinstall and log in. Once you verify the account details, follow the guided installation procedure to activate the modem. It could take up to 20 minutes.
Setting up WOW internet is a straightforward process. Even a new user can follow the instructions and seamlessly get through the WOW modem activation. In less than an hour, you will have your internet running.
If you face any issues, ensure the coaxial wall outlet is active. With a pre-owned modem, manually reset the device and start the modem activation process.
Conclusion
WOWway self-installation process is as easy as it gets. The guided installation process makes the modem activation hassle-free. If you are facing any issues with activating your device contact customer service regarding its compatibility and related issues.