
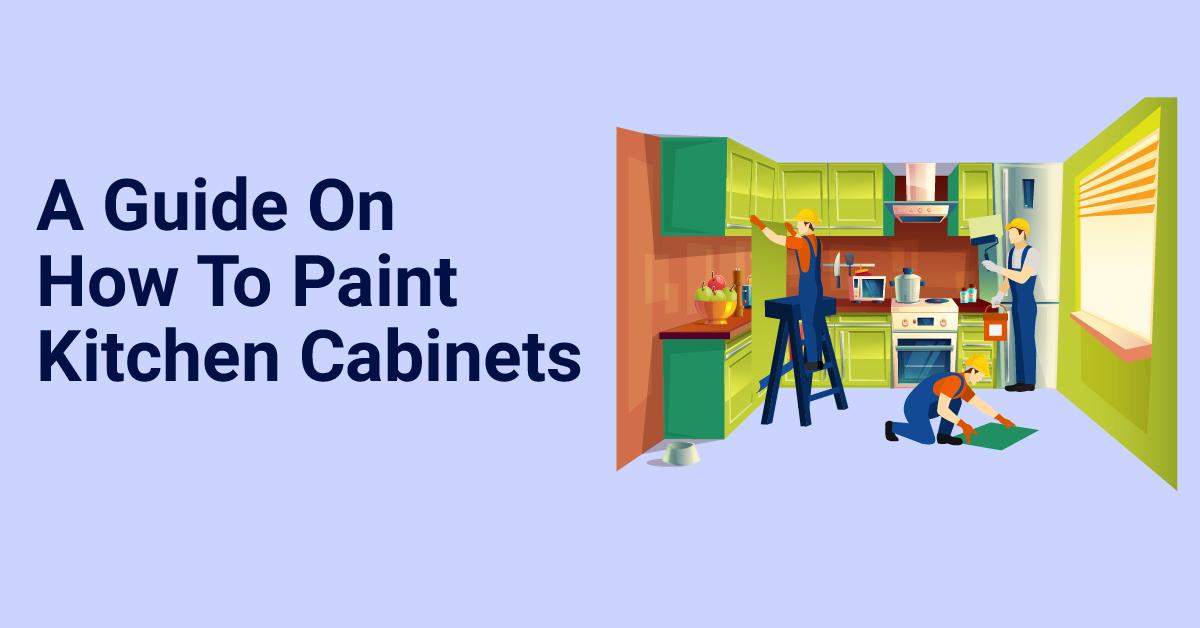
This guide will walk you through, thoroughly the steps of how to DIY paint your kitchen cabinets.
Can repainting your kitchen cabinets be a cheaper alternative to completely renovating the room? If the woodwork in your kitchen is high quality then you may want to consider keeping it.
Fashions change like the wind. It's nearly impossible to keep up with them without going broke. Particularly when it comes to kitchen renovations. While there is no pressure to redo your kitchen every season, most of us will find ourselves in a situation where we want to update our kitchen.
You may have just moved into a new home that hasn't updated its decor since the 80s. Or your kitchen may just be looking a little run down after years of use.
We understand that updating your kitchen can feel like a daunting task. It's expensive and time consuming. But, what if we told you that you don't need to completely gut your kitchen to get it looking brand new?
Painting your kitchen cabinets could be the time and money saving option you are looking for.
When we moved into our new place, we were presented with a real conundrum. The cabinets in our kitchen were beautifully made, solid oak with stunning handles and ornate carvings. However, the house had previously belonged to someone with very different tastes to our family.
These cabinets were so nice, it felt wrong to tear them out and put something new in their place just because they'd been painted mildew green. We looked into how much that would cost us – the price made our eyes water! Then we had an idea, why not make the most of what we already have and paint the cabinets in a more modern color.
We saved ourselves enough money to invest in other parts of our home, and we saved ourselves a lot of time. This article is a step by step guide, that will help you to do the same.
How Much Does it Cost to Paint Kitchen Cabinets?

Let's start with a cost analysis to see if it really is worth painting your kitchen cabinets.
Anyone who's ever tried to renovate a house will understand that kitchens are a sinkhole that will eat up more of your budget than you would like. Along with the bathrooms they are one of the most expensive rooms to renovate.
One of the biggest offenders in the room is the kitchen cabinets. These on average take up 40% of the budget. With major retailers quoting upwards of $2000+ to do the job.
On the other hand, buying all the materials yourself will cost you between $200-$300. Meaning that you could be making a 90% saving in this area. And creating a lot less waste in the process.
Another easy way to save money in the kitchen is to do the painting yourself. The work is time consuming but only a small amount of skill is required. Most homeowners with mild DIY experience could handle this job. Even beginners could give it a go if they've got some extra time to spare.
Cost comparison:
New cabinets
- $2000+ for materials
- Extra cost for labor
- 2-3 days of your kitchen being unavailable
Repainting cabinets
- $200-$300 for materials
- You can do it yourself
- 2-3 days of your kitchen being unavailable
As you can see, there are significant savings to be made if you repaint your cabinets rather than replace them.
What To Do Before You Start Painting Your Kitchen Cabinets

Every good project begins with a solid plan. And painting your kitchen cabinets will be no different. Before you even start to think about painting there are a series of steps you will have to follow to make the process as unobtrusive as possible.
The easiest way to paint your kitchen cabinets is to do them all at once. While painting a few cabinets at a time sounds like a simpler process, you'll find it a lot more disruptive in your daily life. Depending on how many cabinets you have, doing them a little by little may turn a two-day project into a six-month one. That means six months of your kitchen smelling like paint.
Wondering what those steps are? Well, keep reading.
Plan ahead
As we mentioned above, if you're looking to get this job done with the least amount of hassle then you will want to do it all in one go. To streamline the process try to do as much in advance as possible.
We would recommend picking up all the paint and equipment that you need before you start the job (see below for a complete list of everything you will need).
This job may take you 2-3 days to complete. So, you will want to make sure you have enough time set aside to get all the work done. Why not wait for a public holiday when you will have an extra day off in a row to knuckle down?
Set up a Temporary Kitchen
Your kitchen is going to be out of action for a few days. Sadly there is no way around that. So, we recommend for the 2-3 days it takes you to paint your kitchen you set up a temporary kitchen nearby. This way you can still eat delicious home-cooked food while your kitchen is out of order.
What does a temporary kitchen need to function? Make sure you include the following items when you set up your temporary kitchen:
- A toaster oven
- A hot plate
- A water filter
- A cooler or mini-fridge
- Cutlery
- Paper plates and plastic cups
Prep The Room

Now that you have set aside the time and the space to repaint your kitchen cabinets, it's time to start prepping the room.
As we mentioned earlier, the key to a stress free, a successful kitchen makeover is to plan and prepare as much as you can before you do any painting. This should include cleaning your cabinets, removing the doors, prepping and priming the cabinets, and filling any damaged areas.
Once the above is done you will be ready to start painting. The next five steps will talk you through everything you need to do to successfully prepare your kitchen for its new life.
Cover the surfaces
Equipment needed:
- Plastic sheets (coverings)
The first thing you need to do is prepare the rest of the kitchen for the job. This means putting up as much protective covering as you can. This will prevent the other areas of the kitchen from getting damaged while you do up the cabinets.
The most important areas to keep in mind are the floors and the countertops. If you have wooden or tile floors in your kitchen you will want to make sure that the coverage you put down is slightly padded to prevent any long-term scratches or cracks.
You will want to avoid getting wood paint on our countertops as it can be particularly difficult to remove. Especially, if the countertops have protective or heatproof coatings.
Set up your painting area
Equipment:
- Small table
- Newspaper
You will need an area in your kitchen for painting. While you could paint on top of your covered countertops, you may want to set up a temporary painting stand. This will help to prevent you from getting paint on the countertops.
Set up your painting station in an area of the room that gives you enough space to work, but does not get in the way of you getting to the cabinet boxes.
Remove the doors, drawers, and shelves
Equipment needed:
- Electric or manual screwdriver
- Protective gloves
Step two is to remove any doors, drawers, and shelves from the cabinets. Why? Because this will give you a lot easier access to said cabinets.
For this part of the job, you will want to wear protective gloves. This will help prevent you from getting splinters in your fingers or catching your fingers with the screwdrivers.
Depending on how old the cabinets are you may or may not need an electric screwdriver. Newer cabinets will have hinges that are easier to remove, these will only need a manual tool. However, old cabinets may have rusty or deeply embedded hardware. These may be a struggle to remove with a manual screwdriver, if so, the job will go a lot quicker with an electric screwdriver.
Once you have removed them, store them on your painting station ready to be worked on later.
Here are a few different, non-traditional ways to remove screws.
Clean cabinets thoroughly
Equipment:
- Warm water
- Dish soap
- Scourer
- Paper towels
Now that you can easily get into your cabinets, it's time to move onto the next step: cleaning your cabinets.
You will want to make yourself a bowl of hot, soap water. You can use dish soap for this, as it is great at breaking down grease and barely leaves any residue.
Take your rough sponge or scourer and begin to clean the cabinets. You will want to start at the back and top of each cabinet and work your way forward and down. This means you can clean away any run-offs as you go.
You want to make sure that you have thoroughly cleaned the cabinets, as any dirt can affect the end quality of the paint job. It can cause the paint to flake, stain, or even affect its longevity.
Once you have finished painting each cabinet, use your paper towels to speed up the drying process.
Repeat the process on the doors, drawers, and shelves that you removed earlier.
Prep the boxes
Equipment:
- Sandpaper (220 grit)
- [or] An electric sander (220 grit)
The next step is to stand down any parts of the cabinet you are planning to paint.
Once the cabinets have dried you will want to begin sanding them down. Here you have a choice as to whether you want to sand by hand, or use an electric sander. The electric sander will make the process a lot easier and quicker.
If you do not own an electric sander you may be able to rent or borrow one for the afternoon.
Starting at the highest cabinet, begin sanding down any areas you are planning to paint. You should be using sandpaper with at least 220 grit. This will make the surface smooth enough to layer paint on. The high quality of the sanding job, the better the end result will be. So, don't rush this part.
After you have completed this step, you will want to wipe down all the surfaces again. You do not want any wood shavings mixing with the paint. That will create a lumpy and uneven texture.
Repeat the process on the doors, drawers, and shelves that you removed earlier.
Prime the cabinet boxes
Equipment:
- Paintbrush or roller
- Primer (oil or latex-based – for freshly sanded wood)
Now that the surfaces of the cabinets are clean and smooth, they're ready for priming. Beginning at the top and back of the cabinet you will want to use a paintbrush or roller to apply an even coating of prime to the whole box. You will want to move forward and down as you go.
Do I have to prime the cabinets & What is Prime Used For?
Yes, you should prime your cabinets. There are three main benefits to doing this.
Firstly, it creates an even base for the paint to cling to. This will leave you with a uniform, attractive finish.
Secondly, a layer of primer will drastically reduce the amount of staining that the paint will develop. Primer helps to prevent stains from fat, smoke, tannin, grease, and water. These types of stains can breakthrough topcoats.
Finally, it extends the life of your paint. As the paint has something other than the wood to adhere to, it is able to attach itself more securely.
Repeat the process on the doors, drawers, and shelves that you removed earlier.
Caulk and fill
Finally, you will want to apply a thin layer of caulk to seal and fill any of the gaps, cracks, or splits in your wood.
When doing this you should spend the most time getting the process right on the areas of the cabinets that will be visible – i.e the doors and the front of the drawers.
Once you have finished, leave it overnight and allow it to dry completely before beginning to paint.
What Type of Paint You Will Need

If you want your cabinets to look good at the end of the job then you will have to pick the right type of paint. This can be an overwhelming process if you're fairly new to DIY or have just never painted wood before.
If you're in that boat, then you'll be glad to hear that we have put together this next section with you in mind. In it, we will talk you through everything you need to know to get the finish you're after. Including, the type of paint, how to apply it, should you strip the cabinets, and whether you want a regular or faux finish.
Oil Or Latex?
Oil paints are traditionally used on wooden furniture like front doors and kitchen cabinets. However, the last decade has seen huge improvements in the quality of latex paints, and we have finally reached a point where they can compete with oil paints.
Let's take a look at the benefits of each type of paint:
Latex pros:
- Quick drying
- Easier for beginners to use
Latex cons:
- Take 3 weeks to fully seal (for that time they are susceptible to damage)
Oil pros:
- Gives a more even finish
- Seals faster than Latex
- Smooths and fills cracks as it goes
- Dries harder
Oils cons:
- Slow drying
Both choices are good options, the main bonus to picking latex paint is there are fewer drying times between coats. Otherwise, oil paint is still the best option overall.
Brush or Spray Paint?
While spray painting is an option when it comes to painting your cabinets, it has a lot of downsides. You will need to buy or rent machinery (which will push your costs up by quite a bit), you will need to buy special clothing, and you'll have to seal off your kitchen very securely to avoid covering the whole thing in paint. They are also quite difficult to learn how to use correctly.
The easiest and cheapest option is to buy yourself a set of high quality brushes. These brushes will last you well beyond this project, so you will be able to reuse them time and time again.
If you are going to paint with latex paint you will want to buy brushes with synthetic bristles. If you want to use oil paint then you will need to purchase brushes with natural hair bristles.
Can you just paint over cabinets or should you strip them?
If we haven't convinced you already of the importance of stripping your cabinets, we can carry on.
If you are looking for a long lasting, even, stain and flake free finish then you are going to want to strip and prime your cabinets before you paint them. Not doing so could lead to you having to redo the paint job not very far down the line.
We will note that there may be areas of your cabinets that you are practically not able to strip. If this is the case then you should try to at least sand them down thoroughly.
Regular or faux finish?
The final choice you have to make when it comes to painting is the kind of finish you want. While most people opt for a traditional matte finish, you may be tempted to try something else. Here are some of the most interesting options.
Crackled
You probably remember crackle finish nail polish from the early 00s? Well, this is the same idea. As the paint is drying cracks are formed that reveals the coat underneath it, for an instant weathered look.
If you are looking for wide cracks use a thick brush or a thin brush for smaller cracks.
Distressed
The trick to getting a distressed paint colors is to splatter dark paint in between each layer of a lighter base coat. When the final coat dries you will be left with a dynamic finish that screams well used. To heighten this effect sand down small areas of the cabinet to make it look more worn.
High Gloss
The high gloss does exactly what it says on the tin (literally). This finish is a great option if you're looking to brighten up your kitchen. The shiny surfaces will reflect any light around the room, giving the illusion that the room is much better lit than it actually is.
Regular
If you're looking for a classic finish then give matte paint a try. There are many benefits to a regular finish, including being easier to clean and more long lasting.
All The Material You Will Need

Here is a round up of all the materials and equipment you will need to complete this renovation job.
- Paint – you will have the choice between water, oil, or latex based paints. Water based paints tend to be too thin to perform well on wood. Latex is quick drying but prone to damage. If in doubt, oil is usually the best option.
- Brushes – brushes will give you better results than a spray paint machine. For cabinets, you should be looking for brushes in the size range of 2-4.5 inches. You should also be looking for both square and angled brushes.
- Angled Brush
- Square Brush
- Roller – rollers are great for painting large surfaces in a short amount of time. They are also great at evenly spreading layers of paint.
- Power Drill – if you do not own, or cannot rend one of these, then you may be able to use a manual screwdriver
- Primer – if you choose an oil based paint then you will need an oil based primer to layer under it. If your paint is latex based then you will need a latex primer.
- Painters Tape – this will help to keep your lines crisp. And to prevent you painting on areas you don't want to get any paint on.
- Liquid Deglosser – this will help you to thin your paint before you begin. This will make the paint more user friendly and give you a better finish at the end of the process.
Painting The Kitchen Cabinets

Finally, you are ready to begin painting your cabinets. Don't you worry, all the preparation you have done so far will really pay off in the end results?
Once The Cabinets Have Been Prepped & Primed, It's Time To Paint Them
So far, we have cleaned, sanded down, and primed our cabinet boxes as well as their doors, drawers, and shelves. We have chosen our tools, base paints, and finishes.
Before you begin to paint you should wipe down each cabinet to make sure there is no build-up of dust or residual damp. You should also make sure that all the protective lining you have put down is in the correct place.
Once you have completed all your final checks it's time to get painting.
Thin your alkyd-based paint
It's time to open your cans of paints and make sure that they are mixed correctly.
This involves mixing a thinning agent into your alkyd-based enamel paint. Each painting will come with its individual manufacturer's instructions on how much thinner to add.
Once this is completed stir the paint thoroughly with a mixing stick. Tap the sides of the can to encourage any lumps or dried sections of paint to float to their surface. When the paint is completely mixed you can pour it into a painting tray.
Start By Painting The Cabinet frames, before moving onto the doors, drawers, and shelves
You will now want to decide what order you paint the parts of your kitchen in.
We would recommend starting with the cabinets first as they will take the longest to dry. Of the cabinets, you may find it easier, to begin with, their highest cabinets and work your way down the walls. If you have heating in your kitchen then you may want to start furthest away from the heating and move towards it.
After you have finished the cabinets you should move on to the doors, drawers, and the shelves.
Paint The Cabinet Back & Fronts
When painting your cabinets you should use a similar technique to what you did when you were cleaning and sanding them.
Start at the back of the cabinets and work your way forward when you're painting. This will make the process less messy for you (less paint on your clothes is always a victory).
You will also want to start painting at the backmost, highest point of the cabinet. Doing this will help to avoid a streaky finish if the paint starts to drip.
Don't try to make your first layer too thick. The most important thing is that it dries before you put the second coat on.
Apply A Second Coat
Make sure that the first coat of paint is completely dry before you begin painting. Failing to do this can lead to dampness or the paint moving around after the second coat is dry.
This second coat can be thicker than the first one. This is where you will want to build up the color. If you are trying to paint with a particularly bold or pastel color then you have to do a third layer. The only negative to adding extra coats is that the process will take longer. Personally, we think that there is no such thing as too many coats.
Allow each layer to dry before moving on to the next.
Apply The Paint Finish
The final stage of painting is to add the finishing top coat. This coat will seal the paint off from the elements. Making it less vulnerable to staining, chipping, and dampness.
As we mentioned above, there is a wide range of finishes available. Once you have chosen the one that appeals to you most, you will need to apply a thin but even coat across all the painted surfaces.
Repeat the process on the doors, drawers, and shelves that you removed earlier.
Please wait for the topcoat to dry before moving onto the next stage.
Reinstall doors and drawers, hinges, and catches.
Once all the coats of paint have dried, you are ready to start reinstalling the doors, drawers, and shelves.
Again, you will need either an electric or manual screwdriver to do this. You may find that you want to buy new hinges and catches if the original ones are rusty or look too worn down.
Remove the plastic coverings and enjoy your new kitchen
When everything is reinstalled, you can remove all the protective plastic sheeting from your kitchen and take your painting station down.
After this, you may need to give the kitchen a clean to remove any wood shavings or flakes of dry paint.
Now, the process is over and you will be able to enjoy your gorgeous new kitchen. Maybe, it's time to invite your friends over to show off a bit.
Summary

Kitchen renovation can be incredibly costly, many costing over $5000 just for the one room. Replacing your cabinets make up an average of 40% of that cost – with most major renovations companies charging upwards of $2000 for the job.
The good news is that if you have the time you could save yourself around 90% of the cost by repainting your kitchen cabinets, rather than buying new ones. The materials only cost $200-$300 to purchase.
To successfully repaint your kitchen cabinets you will need to prepare your kitchen and purchase all of your materials in advance. Then take the time to properly prep the cabinets before you begin painting. If you take the time beforehand you will be left with fantastic results.
So, what's stopping you?! It's time to give your kitchen that makeover you've been dreaming about.


