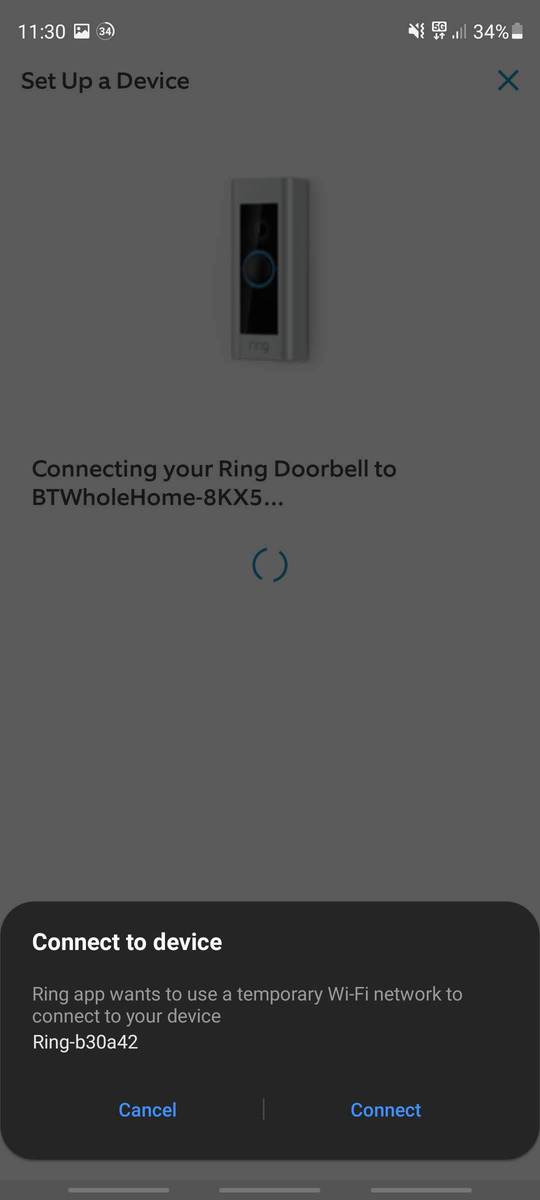
This is a problem that's going to happen to all of us sooner or later. At some point in owning a Ring device, you're going to need to change the Wi-Fi network.
Knowing how to change the Wi-Fi network easily on your Ring devices is going to save you a lot of hassle. Rather than climbing up ladders, unscrewing face plates, and holding down buttons while you're precariously balanced, you'll be able to reset your Ring device without all the hassle. Well, at least most of the time.
The easiest way to reset the Wi-Fi on any Ring devices is to scan the QR code that came in the Box. You can also use a clever trick by naming your new Wi-Fi network with the same name and password as your old Wi-Fi network. You can also reset the Wi-Fi by using the Ring app, but this might also mean having to press the reset button on the side or back of your Ring device.
Here is everything you ever wanted to know about Ring, Wi-Fi networks, and how to reset them.
What are Ring Devices?

Ring offers a wide variety of devices. Ring got their start as an independent company making smart devices, but they were quickly brought up by Amazon. Ring's current lineup of devices includes cameras, alarms, lighting and sensors, and their most popular device the Ring doorbell.
All these devices are designed to integrate with most smart home ecosystems – but especially with Alexa/Echo, due to Amazon owning Ring. These Ring devices typically center around their video feeds and motion sensing, but the Ring security alarms have some additional features. All in all, Ring is one of the most popular producers of smart home devices.
Ring’s Wi-Fi Reliance
Before we talk about the fixes for connecting your Ring devices to a new Wi-Fi network, we need to talk about why you need to do this in the first place. It all comes down to how Ring devices are able to send you live picture and video updates.
Ring devices can speak with each other, as well as your smart home ecosystem, using two primary communication protocols. Ring devices either use Z-Wave or Wi-Fi/IP.
The sensors within the Ring alarm system all use Z-Wave. However, the data they gather (for example, that a door was opened) still needs to be sent to Ring's servers – and this is handled via Wi-Fi/the internet, since the Base Station translates Z-wave data into internet data.
Apart from that, pretty much every other Ring device (including their cameras and doorbells) use the ‘internet protocol' – and specifically, Wi-Fi (apart from the expensive Ring Elite line-up, which uses PoE). This is the most popular option as it takes one step out of the process for most users: just install the Ring camera/doorbell, connect it to your WiFi network, and you're done.
There are some compelling reasons to use Z-Wave over Wi-Fi, which you can read about in another article.
Ring uses Wi-Fi to send you live updates including notifications and even videos about what's going on in your home. So if you need to change your Wi-Fi, but decide to delay this process, you could wind up losing a lot of functionality from your Ring devices. You'll certainly miss all your recordings, for one!
It's worth spending a second talking about why you would want to change your Wi-Fi network in the first place.
Why Would You Change Your Wi-Fi?

Changing your Wi-Fi network is often a complicated decision. Keeping your Wi-Fi network the same is usually the most pragmatic response, but sometimes life gets in the way. There's a few good reasons why you would wind up changing your Wi-Fi network overtime.
The biggest and most obvious one is that you moved. When you move house, you sometimes have to change your Wi-Fi network. Internet Service Providers change, technology changes from region to region, and there are other motivating factors that can cause you to switch Wi-Fi networks when you relocate.
There are also technological concerns involved. If you're upgrading routers or Wi-Fi services, you might have to also change your network name and password in the process.
The last thing to consider are security reasons to change your Wi-Fi. If you find a security breach, or you are interested in upgrading your home's cybersecurity, changing your Wi-Fi network details can be one of the best places to start.
Of course, there are more secure ways to implement home Wi-Fi – and those often involve getting your smart devices onto their own dedicated Network – but this is a topic for another day. Let's assume that you have a single Wi-Fi router, which may have just changed, and you need to change your Ring device's Wi-Fi details as a result.
Now it's getting to some fixes for how you can keep your Wi-Fi updated on your Ring devices – without removing or un-drilling them.
How to Change Ring Wi-Fi Details (Without Removing It)
We're going to start off with some of the most easy solutions first. There's no need to bust out the ladders and start climbing up to your Ring cameras if you can just simply scan a QR code.
Use That Barcode or QR Code (And Save Your Boxes)
There's plenty of good reasons to save the boxes when you buy new technology. For starters, having the box often helps when it comes time to use the warranty or to make a return. Boxes can also help you improve your resale value when it comes time to trade them in and upgrade down the road.
The biggest reasons for saving your box is that they come with additional codes that you can use during setup. Ring devices are no different. Inside the box for every Ring device is a QR code or Barcode code that you can scan during setup.
This is the same QR or code it's often printed on the back of the Ring device. These QR codes are used to register of the Ring device to your Ring app. Without these QR codes, you need to have physical access to your device in order to go to the setup process.
So ideally don't forget to keep your boxes and using that QR code is the fastest way to reset the Wi-Fi network. However one alternative is to take a photograph of the QR code/barcode before installing it – like I done with my Ring Doorbell Pro:

Google Photos or iCloud will keep this picture for years. By doing this, I can scan this photo with my Ring app and easily change the Wi-Fi details, without worrying about having to physically remove the faceplate and Ring Doorbell from my doorframe.
Use The Same Wi-Fi Name and Password
There's also a clever workaround that you can do that tricks your Ring device into logging into the same Wi-Fi network. All you need to do is name your new Wi-Fi network with the exact same name, and give it to the exact same password as your old Wi-Fi network.
This actually tricks your Ring device into thinking it's still on the same Wi-Fi network it was on originally. This trick works best if you are just upgrading Wi-Fi technology, such as a new router, or you're moving and you have to sign up with a new ISP.
This trick won't work out as well if you are trying to add a second Wi-Fi network for some additional cybersecurity, or a mesh Wi-Fi system to improve your home's Wi-Fi connection strength.

It also won't work out if you're changing the type of Wi-Fi password that you use. The solution also isn't recommended if you changed your Wi-Fi information for security reasons.
Outside of those exceptions, this is a great trick that can save you some time before switching the Wi-Fi network on your Ring devices.
Use the Ring App (Device-Dependent)
Depending on the exact Ring device you have (and the version of firmware on it), you might be able to simply change the Wi-Fi password without standing up: i.e. from within the app itself. This is another good work around it saves you sometime.
Here’s how you navigate to this menu in the app:
- Open the menu
- Go to “Devices”, and select your device.
- Click “Device Settings” or “Device Health”
- Tap “Reconnect Wi-Fi” or “Change Wi-Fi”
This will get you into a new menu. Then you can follow the steps and enter in a new Wi-Fi name as well as a new Wi-Fi password.

Of course, sometimes the app steps will require you to physically go to your device for some reason – such as to press the reset/setup button (covered below).
But sometimes you'll get lucky and can follow all the steps purely within the app – this is especially true if your Ring device is already connected to the internet.
Push the Ring Reset/Setup Button
Now we're on to some of the harder fixes. Both of these involve him pushing the setup/reset button on your Ring devices, but one of these two devices has a much easier to access reset button.
Ring Doorbell Pro devices have the reset button located on the side, and most of the Ring outdoor cameras have the reset/setup button at the top. For the Ring Doorbell Pro 1 and 2, all you need to do is remove the faceplate and push down the orange button in order to reset the Wi-Fi connection.
This means that you don't have to use a drill or unscrew your Ring device from a wall – you just need to remove the security screw at the bottom, which gives you access to the reset button.
Then you can simply reconnect the Ring device just like you did when you first open the box – i.e. by following the steps in the Ring app.

Push the Button Behind the Doorbell Faceplate or On-Top the Outdoor Cam
This is the hardest fix, but it is also necessary for certain Ring devices.
Older Ring devices have their reset buttons located on the back of the device. In order to press this reset button to change the Wi-Fi connection, you have to physically detach the Ring device from the wall.
This means you're going to need a screwdriver or a drill to remove the Ring device from the wall. After you've taken it off, you can hold down the orange reset button and repair the device to change the Wi-Fi information.
Equally if your Ring outdoor camera is located high up, you might need to climb a ladder in order to access the setup/reset button at the top. Try simply changing the Wi-Fi password within the app first (in-case it doesn't require the button to be pressed), but if it tells you to hit the button, you're probably out of luck – sorry!
If it helps, I've done this at least 3 times in the past year for some of my outdoor cameras:


