You've probably heard about home media servers or media centers. They have many different uses, but its main responsibility is to provide media such as movies, tv shows, games, music, etc. in a centralized manner. The media server is made possible through the use of a NAS (Network Attached Storage) enclosure or a dedicated computer. With this type of system, you are able to watch view content on a connected television or stream it through your home network on various devices.
Steps to Set Up a Media Server

So, how do you set up a media server for a home theater? The process for setting up a media server is not all that complicated. Here are the general steps for setting it up:
- Buy a NAS or set up a dedicated computer.
- Install hard drives to store the media files.
- Connect the media server to the network via an Ethernet cable(s).
- Transfer the files to the hard drives and install any apps you would like to use.
- Begin using your media server as a streaming service, back up storage solution, etc.
For a more detailed explanation of each step, continue reading. We will go in-depth on all of the above steps. This includes whether you should use a NAS enclosure or a regular computer, what type of hard drives you should use, connecting the device to your home network and how it should be configured, what apps or programs you should use and how to transfer your files. It's a lot to go over, but I'll make this as simple as I can!
1. Buy a NAS Enclosure or Set Up a Computer as the Media Server
Choosing whether to buy a NAS or to build/repurpose a computer to use as a media server is dependant upon a few things. How many roles do you want the machine to fulfill? How much time do you have to sink into this project? Are you a very “tech-savvy” individual or do you know enough to get by? What's your budget?
NAS Enclosure Media Server
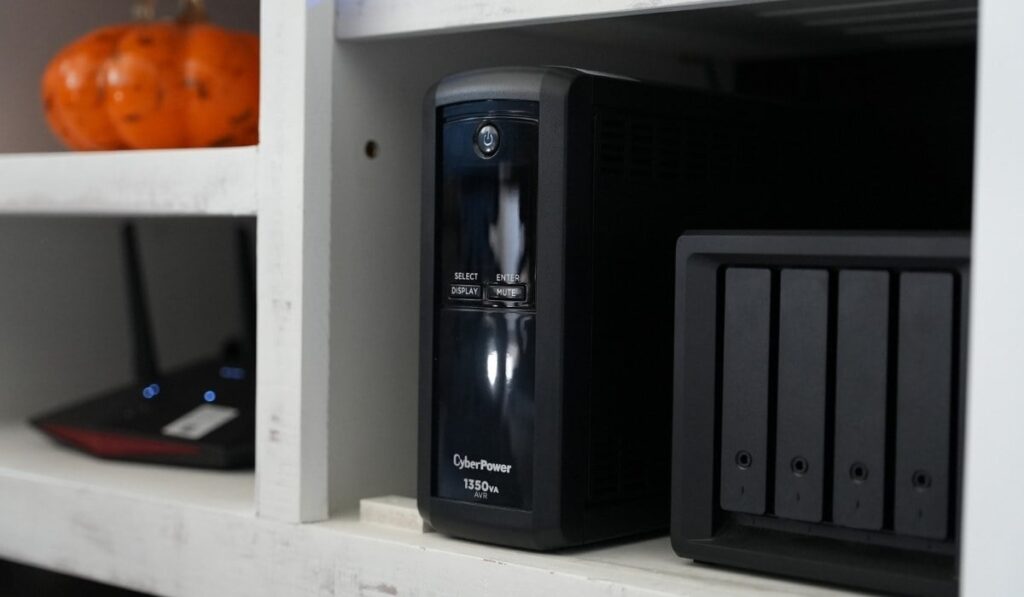
A NAS (network-attached storage) media server is an enclosure with slots or bays for hard drives and has the ability to distribute files/media throughout a network. When using a NAS as a media server, it will need to have a decent processor and RAM/memory.
Its purpose is to provide high-quality video to one or even multiple sources without buffering. If it has a slow processor or small amount of RAM, then it will be more susceptible to buffering or lag. The NAS can perform transcoding to deliver one type of media to any type of device.
Keep in mind that not all devices use the same type of file. Transcoding is taking one type of file and making it compatible to play or view on most devices (computer, tablet, smartphone, fire tv, etc). Transcoding usually uses a significant amount of processing power.
This is why a NAS has a built-in processor and RAM, just like a normal computer. Except, the NAS's processor and RAM are purely dedicated to serving, transcoding, and handling the files and media contained on the hard drives.
Pros to a NAS Enclosure Media Server:
- Dedicated Purpose – The NAS's purpose is only to handle files and media. It's utilizing almost all of the processing power to serve its purpose. It won't be running web browsers and lots of backup processes that slow typical computers down.
- Features – It is featured-packed with many different applications and utilities that are natively available.
- Easily Configured – Less of a hassle to set up and configure through use of an easy GUI and operating system.
- Availability – It's meant to be on at all times, therefore, your media will always be available. With a computer, you must ensure it is actually on to access the media.
- Low Profile – The enclosure is much smaller than a standard desktop computer or server.
- Support – Access to customer support through the manufacturer. They can assist with more advanced uses if necessary.
Cons to a NAS Enclosure Media Server:
- Price – A NAS Media Server comes with a price tag of $300+. This is more expensive than repurposing a decent desktop computer.
- Limited Customization – Some NAS enclosures have a limited amount of features and software available. If you are a super-user that really wants to customize every singles aspect, then you may feel slightly limited. Of course, this is determined by the system you are using. Some are extremely versatile in what they are capable of doing.
- Less Processing Power – A beefy dedicated computer/server will outperform a NAS enclosure easily. If you plan on having a few users stream at the same time then a dedicated computer is likely a better option.
- Limited Upgradability – Some NAS enclosures will have either 1 or 2 slots for RAM. So you could upgrade the system to include more RAM, but it will also be limited depending on the motherboard of the unit. You are able to upgrade your hard drive storage, but this is limited to the number of bays available. You are not able to upgrade the CPU (processor) of these type of units.
I recommend either the QNAP TS-251+ 2 Bay NAS (on Amazon) or the Synology 2 bay NAS DiskStation DS220+ (on Amazon). Both of these units have 2 hard drive bays available with 2 GB of pre-installed RAM, expandable to 6-8GB.
The QNAP has a quad-core 2.0GHz processor while the Synology has a dual-core 2.0GHz processor. So, the QNAP is a bit faster but is barely more expensive. I suggest either one of these units as a NAS enclosure option!
Typical Computer set up as a NAS Media Server
A computer set up as a NAS media server is basically a computer that is specifically being used to distribute files and media. Generally, a computer set up as a NAS media server should be dedicated to this task, and maybe a few smaller tasks.
It should not be bogged down by other processes such as web browsing and everyday typical computer uses. Its main purpose is to store the files and media on its hard drives, then distribute and/or transcode them when needed.
It serves the same purpose as a NAS enclosure except it's exactly like a normal computer. The nice thing about using a normal computer as a media server is that you have a ton of flexibility! Between the hardware, operating system, applications, etc. there are so many options available to you for full customization.
Pros to a Typical Computer as a NAS Media Server:
- Upgradable Hardware – With a computer, you are able to upgrade any component! You can upgrade the motherboard, processor, RAM (memory), network card, etc. at any point in time that you choose. A NAS enclosure will likely use a laptop motherboard which has a very limited upgradability. A typical desktop motherboard will have more RAM slots and PCIe slots available to further increase the potential of your system.
- More Processing Power – You are able to achieve much higher processing speeds than a NAS enclosure. If you have an older processor with slow speed, then you can always purchase a better one and install it, depending on the motherboard.
- Cheaper if using a Repurposed Computer – A lot of people have switched from using typical desktop computers to laptops. It likely you can repurpose your semi-old desktop computer to be used as the media server. Just ensure it has an appropriate amount of processing power, RAM, and hard drive storage.
- More Operating Systems Options – You aren't stuck with using Windows as an operating system. There are many different Linux-based NAS operating systems out there such as Amahi, NAS4Free, and more that are available for a fair price or even free! These operating systems make configuring the NAS a more simple process.
Cons to a Typical Computer as a NAS Media Server:
- More Difficult to Configure – Between the hardware, operating system, and software configuring everything can be a difficult task. It will require much more time to configure everything on a normal computer compared to a NAS enclosure.
- Lack of Support – With all of the configuring necessary, you will find it difficult to find an easy support channel to assist with setting it up. You are kind of stuck with youtube videos and google searches (perfectly viable options by the way).
- Larger and Bulkier – Naturally a desktop computer is way larger than the typical NAS enclosure. You won't be able to set it in your home entertainment center, you will need a much larger space to hold the computer.
- More Expensive when Upgrading Components – Unfortunately, upgrading computer components isn't a cheap task. High-end PC components can get extremely expensive and will empty your pockets quickly. Keep this in mind when using an older system that could be outdated within a couple years.
2. Hard Drives for a NAS Media Server

All NAS enclosures and almost all desktop computers will use 3.5-inch internal HDDs (hard disk drive). There are many different types of hard drives out there. They are usually designated with a color such as red, blue, green, black, purple, or gold.
Each of these colored drives should be used in a certain area. NAS drives are designated with the color Red. They are slotted to fit inside a NAS enclosure. NAS drives are built to run 24/7 and have a higher read rate than typical HDDs. Red drives also support RAID (redundant array of independent disks) configurations.
Without getting too complicated, there are two raid configurations applicable to most NAS enclosures and computers for media servers. Any RAID configuration should use identical hard drives.
RAID 0 “stripes” data across two drives. This means you are able to use the full capacity of both drives and should achieve twice the read and write performance. However, with this RAID configuration, if one of the drives stops working, you will lose the data on both drives.
It is not very reliable and typically not recommended. RAID 1 “mirrors” data to have an exact copy of the data on each drive. But this means you sacrifice half of your total storage amount. In the event that one drive fails, you will still have an exact copy of that data. For more info on RAID configurations, check out this video.
I definitely suggest using identical, red, NAS hard drives in a NAS enclosure or computer being used as a media server. I recommend either the Seagate Iron Wolf NAS HDD or Western Digital Red NAS HDD. Below is a comparison chart of the 2TB (Terabyte) model from both Seagate and WD.

Realistically, you should get a fairly large amount of storage. Get more than you expect that you will need. Once you have everything set up properly and it's working well, you will start to use it more than you initially thought.
Realistically, you should get as much storage that will fit in the NAS enclosure or computer and that you can afford. Don't break the bank by purchasing an obscene amount of storage you may never use. For an average user, 4TB will probably be plenty. For a power user, 8TB+ is generally recommended.
Install the Hard Drives
Installing hard drives is very simple. NAS enclosures have drive trays that can be removed from the enclosure. Simply mount the hard drives on/inside the drive tray, then reinsert it into the NAS enclosure.
To install a hard drive into a desktop computer, remove the case cover, mount the hard drive into one of the available 3.5-inch drive bays, and connect the SATA and power cables. The process of actually installing the hard drives should take no longer than 5-10 minutes. It's not complicated, I promise.
3. Connect the Media Server to the Network

Next, you need to connect the NAS media server to the home network. Delivering high-quality media to different devices will require a high network speed. Your media server will have issues delivering media to devices if it has a slow network speed such as 10Mb/sec.
Most NAS enclosures will have at least one GbE (gigabit ethernet) port. A gigabit ethernet port allows for transfer speeds of up to 1Gb/sec (1000Mb/sec). Keep in mind that internet speed is different than network speed.
Internet speed is how fast a device can download/upload data outside of your home network (i.e. accessing a website). Network speed is how fast a device can download/upload data inside the home network (i.e. transferring a file from your laptop to your desktop computer).
Here are a few things to keep in mind when connecting the media server to your network.
- Wired not Wireless – Always hard wire the NAS with an Ethernet cable. Do NOT use a wireless signal, it simply won't be reliable enough for the NAS to operate smoothly.
- NAS/Computer Transfer Speed – Find out the transfer speed your NAS enclosure or computer's network card supports. As mentioned, most NAS enclosures support up to 1 Gb/sec transfer speeds. Ensure the network card supports at least 1 Gb/sec transfer speeds if you are using a regular computer.
- Network Infrastructure Transfer Speed – Ensure your modem/router support transfer speeds up to 1 Gb/sec. Most newer routers will support this transfer speed. If yours does not, then I highly suggest that you invest in one that does.
- Ethernet Cable Type – Use a Cat 5e or Cat 6 Ethernet cable to connect the NAS to the network. Both of these cables support network speeds of 1 Gb/sec. Cat 6 actually supports 10 Gb/sec, but 1 Gb/sec should be plenty of speed for almost all users.
A maximum transfer speed of 1 Gb/sec isn't absolutely necessary, but it is a very large step up from 100 Mb/sec. You will notice a pretty significant increase in performance with higher transfer speeds.
4. Transfer Files, Install Apps, Etc.
Once the media server has been connected to the network, we can now transfer the media and other files to it and install any necessary applications. This is where it's difficult to give exact instructions because it varies for different setups.
NAS Enclosure
For a NAS enclosure, the manufacturer will provide pretty specific instructions for initially setting the unit up. Simply follow these instructions, and transfer your files to it through the preferred method. You can transfer files directly from your computer or external hard drive.
A NAS enclosure's operating system will likely have an “app store” with various apps to install. The most popular media server application for a NAS enclosure is likely Plex Media Server. You will need to pay a yearly fee for access on all devices, but it's definitely worth it.
The Plex Media Server application is very advanced with its transcoding and file management methods. It's able to offer your media on almost device such as a fire TV, Apple TV, smart TV, tablet, smartphone, computer, etc. If you prefer to use a different service then there are plenty of options available.
Remember, a NAS enclosure isn't just meant to be a media server. There also tons of other apps available for backup/syncing, content management, entertainment, home automation, security, and more. It has access to many applications to make it more than just a simple media server.
Computer NAS
For a Computer NAS, set up and configuration is a little more complicated, but there are a plethora of options available for everything!
- Install the Operating System – To start off with, you must choose an operating system to run on the computer. You can use Windows, Amahi, NAS4Free, regular Linux, etc. I suggest going with a Linux-based NAS operating system. This will definitely help simplify things, and it allows you to easily configure and install compatible applications from an app marketplace. Plus, Linux does not use as much operating power to run itself, Windows is much more resource intensive and will naturally run slower.
- Transfer Media and Other Files – Once you have your operating system installed, transfer your media files to the hard drives. Do this by using external hard drives, mapping drives and transferring files through the network, FTP, etc. The best option is to map the hard drive inside of Windows or Mac for easy access to your files from your laptop or other desktop computers. Here's how to map a hard drive in Windows 10.
- Install Media Server Application – After all of your files have been transferred to the NAS hard drives, we will need to install a media server application to actually distribute the media to different devices. Again, I suggest using Plex Media Server. It's one of the best (if not the best) media server applications out there! Plex Media Server is available on all major operating systems out there, so it's likely compatible with whatever OS you chose.
5. Enjoy Your New Media Server
With your newly configured and set up NAS Media Server, you are ready to rock and roll! Just install the Plex Media Player (or other media viewer) on your device you wish to view the media on.
You will be able to view the media on almost any device from anywhere in your home, as long as you have a decent network connection. Yes, the set up is slightly time-consuming, but believe me, it's totally worth it in the end!
(This article in no way encourages users to infringe on copyright laws.)
Check out another article on using a projector in a living room. This is a great way to amplify your home entertainment experience!


