How To Self-Install Astound Internet? [Complete Guide]

Did you sign up for Astound Broadband and are now looking to install the connection on your own? You’ve come to the right place. By opting for Astound self-install service, you will save $80 to $100 and avoid the hassle of waiting and scheduling technician visits.
Also, with the BYOM plan, Astound lets you bring your own modem. So, if you are keen on cutting costs, you can get your modem compatible with Astound Broadband. Irrespective of your choice, you will find the complete step-by-step guide to installing and setting up Astound internet.
No worries, it’s easy, and you can complete the self-installation in 20-30 minutes only.
Getting Self-Install Kit!
The first step to self-installing Astound broadband is ordering a self-install kit. It shall be delivered to your registered address. Alternatively, you can visit the local Astound/RCN outlet and pick up the self-installation kit. (Just FYI, RCN is now Astound.)
What’s Included in Self-Install Kit?
- Astound gateway (to be returned if you opt for BYOM service)
- Power cord
- Coaxial cable
- Ethernet cable
If you are using a voice or TV bundle, your install kit might include:
- Coaxial splitter
- The set-top box, Remote
- Phone unit
- Power cords
- Telephone cable
How To Self-Install Astound Internet?
Note: Before you start the Astound internet setup, ensure you have all the contents of the self-installation kit. Then, getting all the connections in place makes the process even easier. Let’s get that done!
1. Plug in the Connections
Step 1: Look for an active coaxial wall outlet in your home. It should look like the one in the picture below!
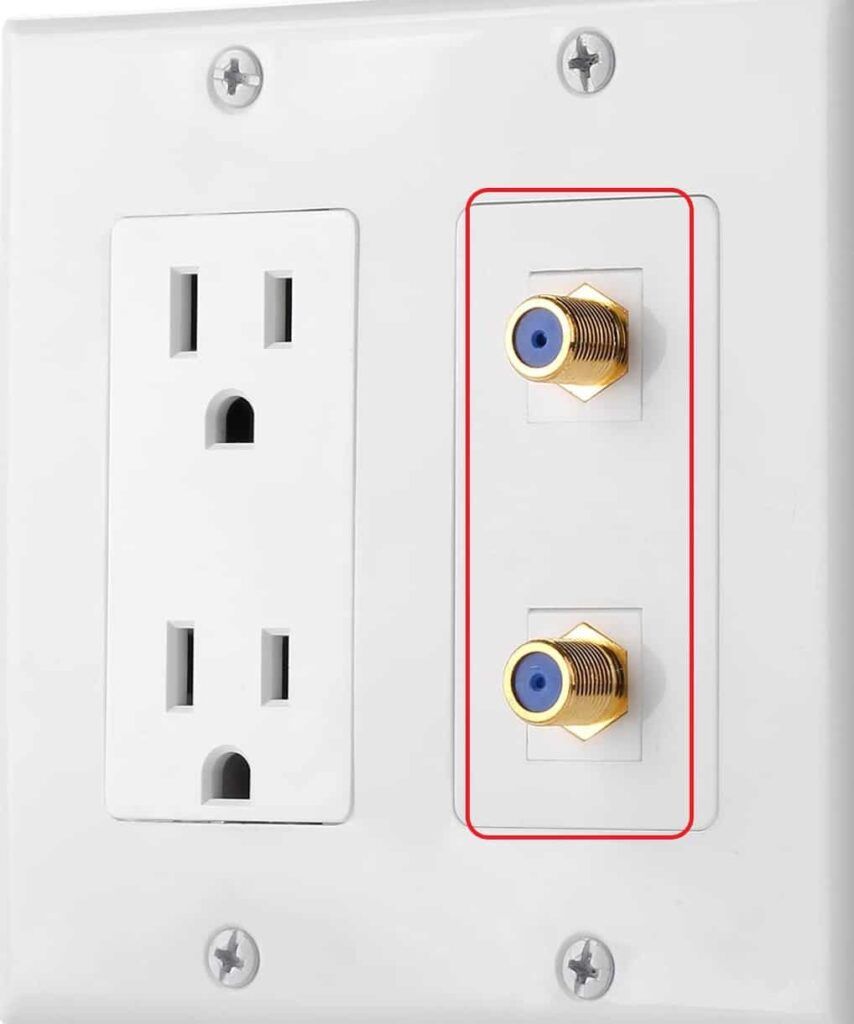
In case your home has multiple wall outlets, go for the one in the central location. Ensure you’ve got the power outlets to connect all the devices.
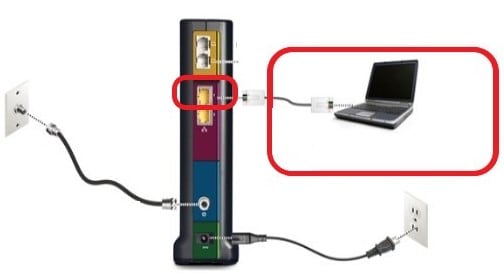
Step 1: Use the coaxial cable from the self-installation kit and plug one end onto the wall outlet.
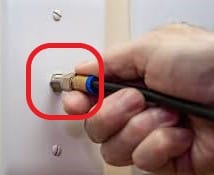
Step 2: Plug the other end of the coaxial cable into the gateway. You can plug the power cord into the modem.
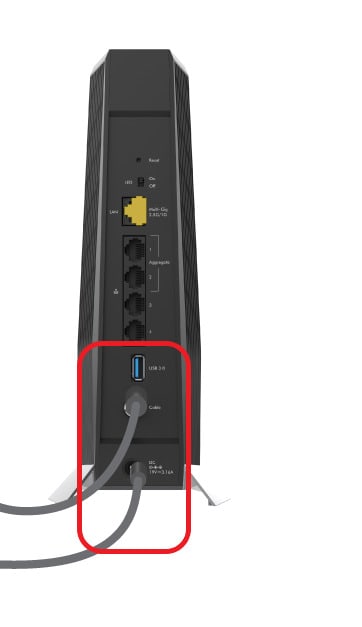
Step 3: The other end of the power cord goes into the power outlet nearby.
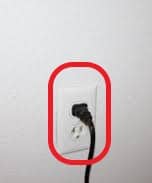
Step 4: If you are using internet and voice phone services, that will entail a couple more steps. Connect the power cord and phone cable to the phone.
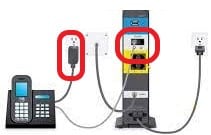
Before proceeding to the next step, ensure all the connections are finger tight.
2. Activate Astound Internet
Step 1: Turn the gateway on. You’ll notice the LED lights blinking. Wait until the LED lights are stable. If you are using a phone line, the corresponding LED lights should light up and become stable in 10-15 minutes.
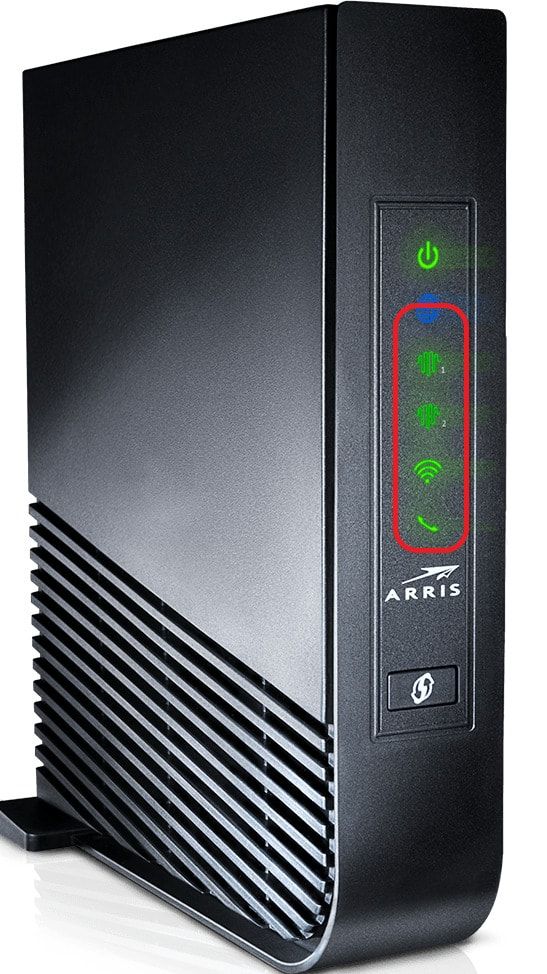
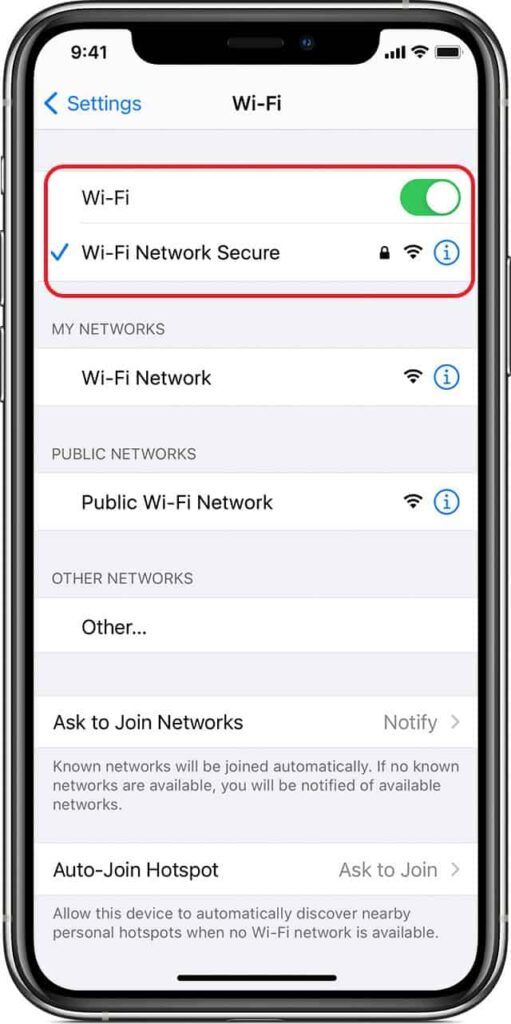
Step 2: Connect to WiFi using a smartphone or laptop, and open a browser.
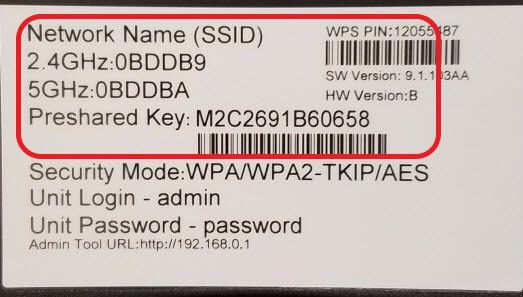
Step 3: Use the default credentials given in the label for the first login.
Step 4: Once you’ve opened the browser, Call 1-800-427-8686 and follow the onscreen and support executive instructions.
Step 5: If you are using your modem and router as separate devices (over the combo), connect your laptop to the modem using the Ethernet cable and continue the Astound internet activation.
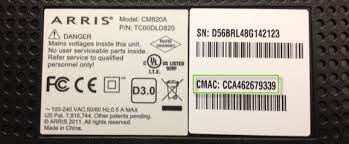
Keep the mac address of the modem ready when you call technical support.
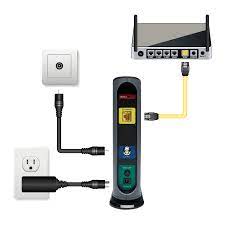
Step 6: Once the modem is activated, you can use the Ethernet cable to connect your router to the modem, and the final setup will look similar to the one below.
3. Set Up a Wireless Router
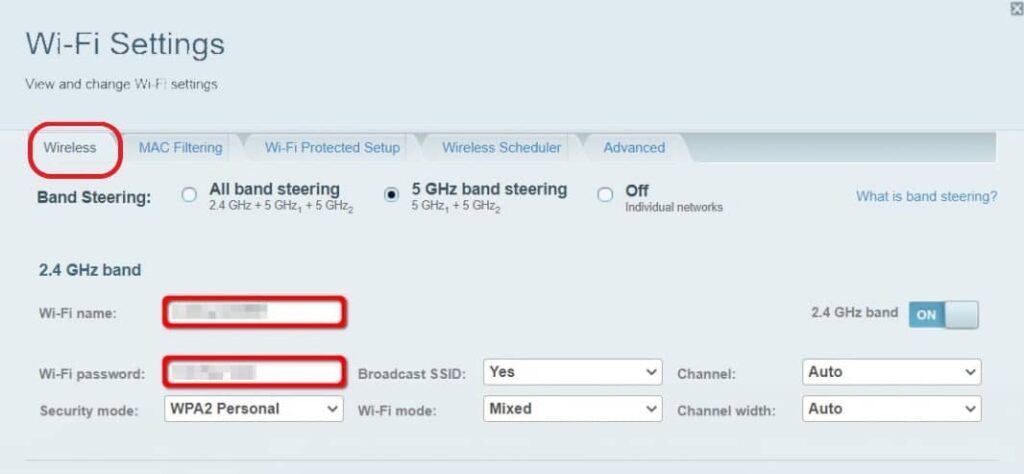
Step 1: Log in to the admin portal to set up a WiFi name and password. If you are using your router, use the URL and credentials provided by the OEM in the device label. Open the browser and visit or or , depending on your device.
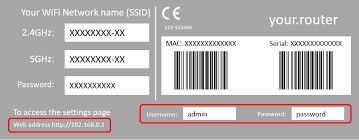
Step 2: Click on the wireless settings, and there, you can edit the WiFi name and password. Once you edit the default information, save the changes.
👉 Related Reading: 7 Best Routers for Astound Broadband in 2025
4. Connect Devices & Test Internet
Step 1: Use the new credentials to connect to the WiFi.

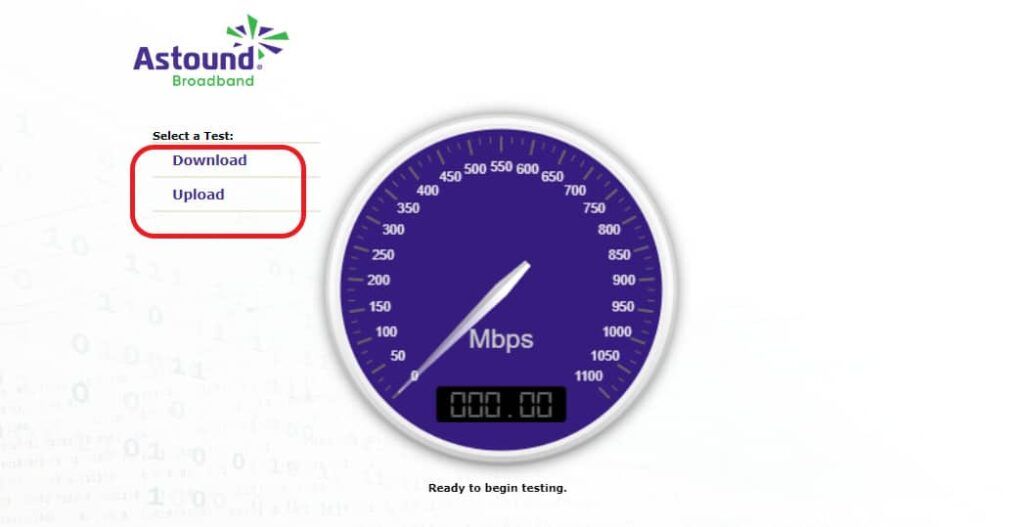
Step 2: Open a browser and visit https://www.astound.com/support/internet/speed-test/. Click on download and upload separately and check the bandwidth stands in line with your internet package.
If you face speed issues, you can optimize your WiFi router for better speeds. And if you’re unsure if the current internet speed is enough or needs an upgrade, you may check out my articles on internet speeds.
Self-installation vs Professional Installation
- If you are choosing Astound Self-installation over the professional setup, you will save $50 which Astound charges as an installation fee.
- You will also avoid the hassle of blocking your schedule, booking appointments with the technician, and waiting inside the house until the professional arrives. With Self installation, install Astound internet on your own at your convenient time.
- With a professional install, you don’t have to worry about the astound modem setup or the internet activation online. The technician takes care of all the nuances of the setup. With self-installation, you are left with the only help of customer support over the phone and your wit.
👉Related:Self Installation Guides for Other Major Internet Providers
Frequently Asked Questions
Can I self-install Astound broadband?
Yes, you can complete the modem setup inside your home yourself. By doing it on your own, you will avoid the one-time installation fee from Astound. When you finish your subscription procedures online, you can opt for self-installation.
Can you use your modem with Astound internet?
Yes, Astound allows you to get your modem and router set up. Although there are some exceptions, that mandate usage of the Astound devices, which depends on your state and neighborhood.
How long does Astound take to activate the modem?
From setting up the connections and completing the online activation of the Astound Self-install process, it takes around 30-45 minutes. You could get that done even quicker if you are handy with the equipment.
How to reach Astound Broadband support?
If you face any technical issues during the setup, contact technical support at 1-800-427-8686. You can reach the customer help-desk through their online chat on their official portal.
Even if you are a newbie with setups, don’t let the RCN self-installation intimidate you. With this article to help you through the steps, you will set up the Astound internet in less than 30 minutes. Follow the Astound modem setup instructions or call technical support in case of any issues with activating your modem/connection.
