How To Connect WiFi Extender To Router with WPS?


Did you recently buy a WiFi extender for your home or garage? Want to learn how to connect it to the router with WPS? You’re at the right place!
Of course, you’ll need to ensure that both (your router and extender) support WPS connectivity. Also, your wireless network should be active and working correctly.
Next, turn on the WiFi extender and place it within range of your wireless router. And finally, you can connect both devices by following the steps below.
How To Connect WiFi Extender To Router with WPS?
Connecting a WiFi extender to the router using WPS is quite simple and can be done in 10 minutes. So let’s go ahead without any further ado.
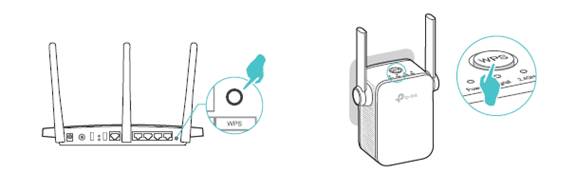
- Begin by plugging your Range Extender into a power outlet near your primary Router.
- Press the WPS button on your main Router first, then immediately press the WPS button on your Range Extender.
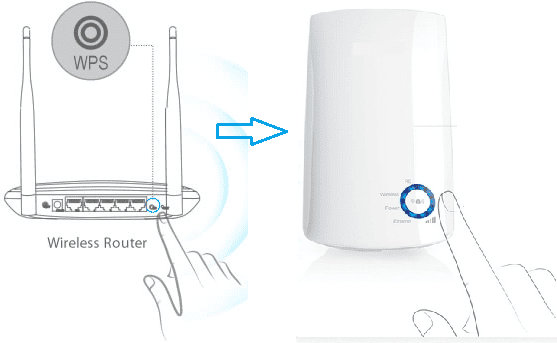
- It is crucial to press the WPS button of your Range Extender within two minutes of pressing the WPS button of your Router.
- Once you have pressed the WPS button on your Router, the Router WPS LED should blink.
- At this point, push the WPS button on the Range Extender.
- If the WPS LED on your Router/Range Extender fails to blink, press the WPS button again until it does.
- The WPS process will last two minutes.
- After this, check the wireless signal LED of your Range Extender.
- If it’s on, it indicates that your Range Extender has been successfully connected to your main Router.
- Lastly, find a suitable place to put a range extender where you want to extend the wireless network’s coverage.
Note: If the wireless signal LED of your Extender is still off after two minutes, it implies that the WPS process has failed. In this case, you may need to try the WPS operation one or several more times, repeating the steps mentioned above.
Benefits of Connecting WiFi Extender to Router with WPS
- Improved Coverage
- Enhanced Speed
- Cost-Effective Solution
- Wireless Setup
- Can Be Easily Relocated
- No Passwords Required
- Time-Saving
Connected? What To Do Next?
Now that you have connected the Extender to Router via WPS, you should now check whether you are getting good coverage and speed at your desired place. If not, relocate the extender. Here’s how to go about them:
Test The Extender
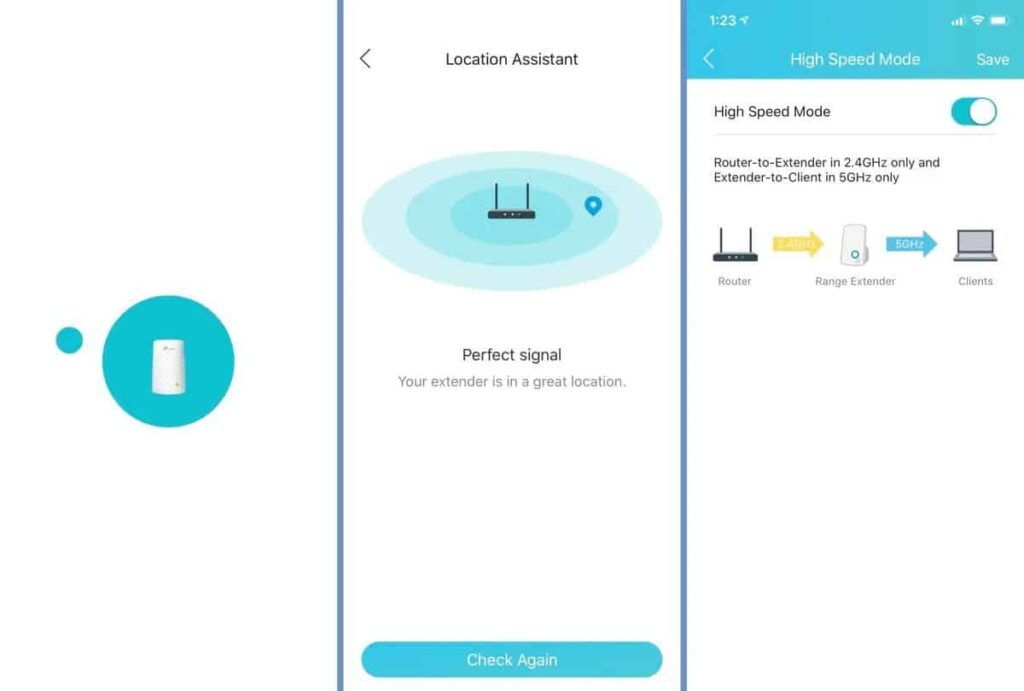
After configuring your WiFi extender, it’s important to test it to ensure that it’s working correctly and providing the desired coverage area.
This can help you identify any issues and make adjustments to improve your network’s performance, providing strong and reliable WiFi throughout your place.
Steps to Test Your WiFi Extender:
- Move to a location that was previously a dead spot in your network coverage area.
- Connect your device (e.g., laptop or smartphone) to the WiFi network of your extender.
- Open a web browser and perform a speed test to check the network performance.
- Check the signal strength on your device and compare it to the signal strength before you install the extender.
- Test multiple locations around your home or office to ensure that the coverage is consistent throughout the area.
Re-Locate If Needed
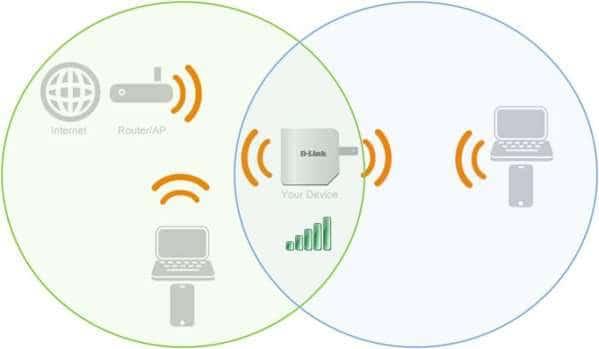
By moving the extender to a better location, you can improve the coverage area and ensure that your devices have a strong and reliable WiFi connection.
Steps to Relocate Your WiFi Extender:
- Use a smartphone or laptop to identify areas where the WiFi signal is weak or non-existent.
- Look for a location closer to the dead spots with fewer physical barriers, such as walls, appliances, or metal objects.
- Unplug the extender from its current location and move it to the new location.
- Make sure that it’s placed in a location where it can receive a strong signal from your router.
- Now again, test the signal strength in the dead spots to ensure that it has improved.
- If you find that the signal is still weak in certain areas, you may need to repeat the process and try a different location.
Suggested Resources:
- How to set up Netgear extender?
- How far does a WiFi extender reach?
- How to extend the WiFi range outside?
- Mesh WiFi vs WiFi Extender
Frequently Asked Questions
What is the WPS button on my Wi-Fi extender?
It is a physical button that initiates the WPS process, allowing for a quick and easy connection to the main router without having to enter the network password manually. It is usually located on the front or side of the extender and requires a router that also supports WPS.
Is it hard to set up an extender via the WPS button?
No, setting up a WiFi extender via the WPS button is a simple and easy process that doesn’t require any technical knowledge or experience. With just a few button presses, you can connect your extender to your main router and enjoy extended WiFi coverage in your home or office.
How long does the WPS method take to configure an extender?
The WPS process typically lasts for two minutes, during which you’ll need to press the WPS button on both the extender and the main router to initiate the connection. Once the process is complete, you can relocate the extender as needed and begin using it to extend your WiFi network.
How to know if your extender is connected properly?
If the wireless signal LED is on, it means that your extender is connected to your main router and is working correctly. You can also check your device’s network settings to ensure that it’s connected to the extender’s network.
Conclusion
So that was all about pairing a WiFi Extender to the wireless router with the help of the WPS button. Note that not all routers and extenders support WPS, and relocating an extender to the optimal location can significantly improve its performance.