How To Set Up Netgear WiFi Extender? [3 Easy Ways]


Did you recently get a WiFi extender from Netgear and are looking for ways to set it up? Unlike others, there are three different ways to set up a Netgear WiFi range extender.
This article will equip you with all three methods alongside the requisite information, steps, and pictures to simplify the process. The configuration becomes much easier if both your router and extender support WPS.
If not, you can complete the Netgear WiFi extender setup without WPS through the Nighthawk mobile app and a web portal.
How To Set Up Netgear WiFi Extender?
Connecting the Netgear WiFi extender to your primary router is a simple process. Let’s begin with the first method, using the Nighthawk app to complete the setup and get the device running quickly.
1. Using Nighthawk App
Note: Keep your router powered on and follow the steps below:
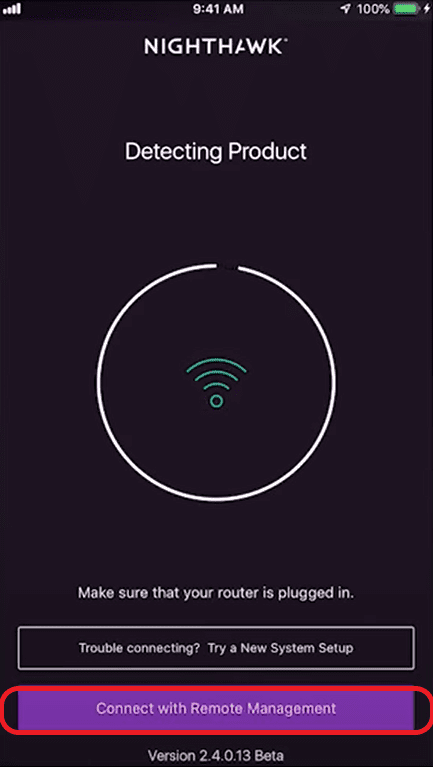
Step 1: Open the Nighthawk app on your smartphone and click on Connect with remote management.
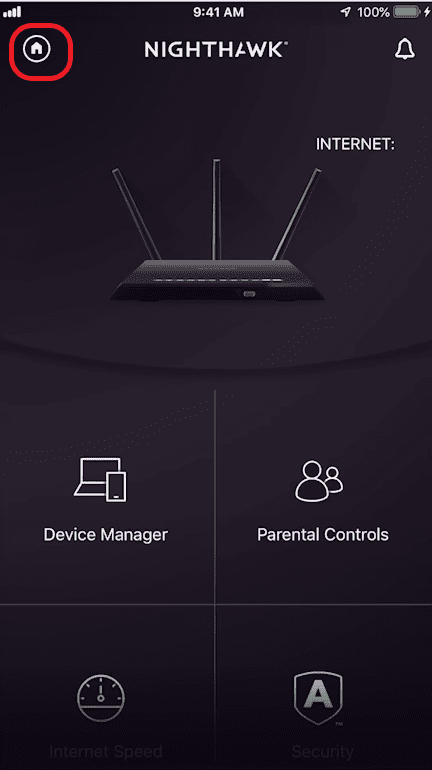
Step 2: Once logged in, click the home button in the left corner.
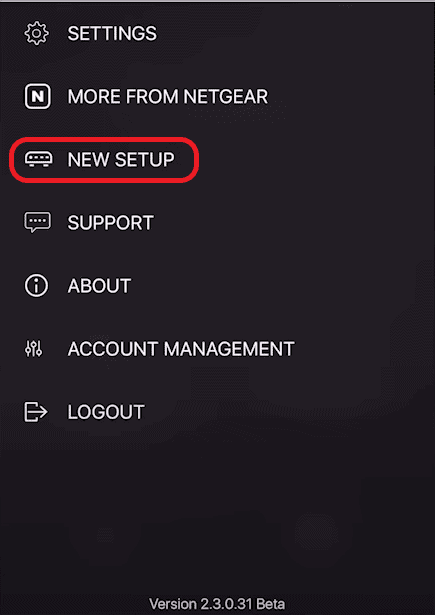
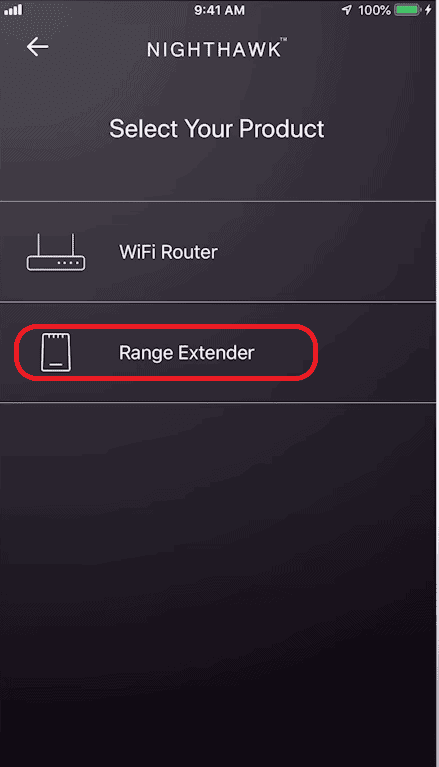
Step 3: Select the third option called ‘New Setup’
Step 4: Choose a range extender and click on the next button
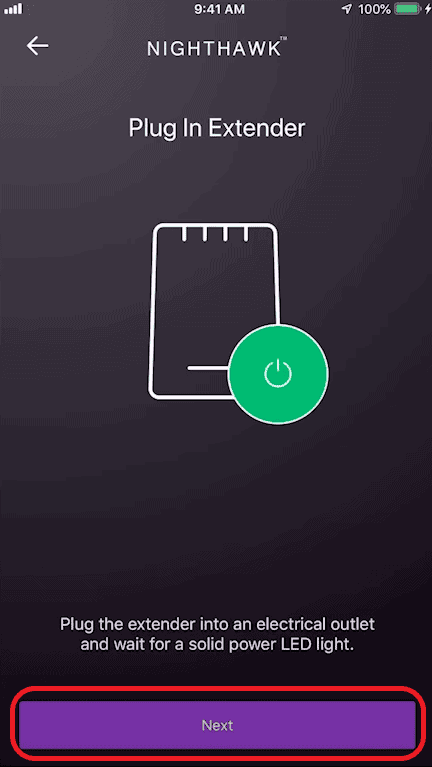
Step 5: Once the extender gets plugged in, the power LED is solid green, and click next.
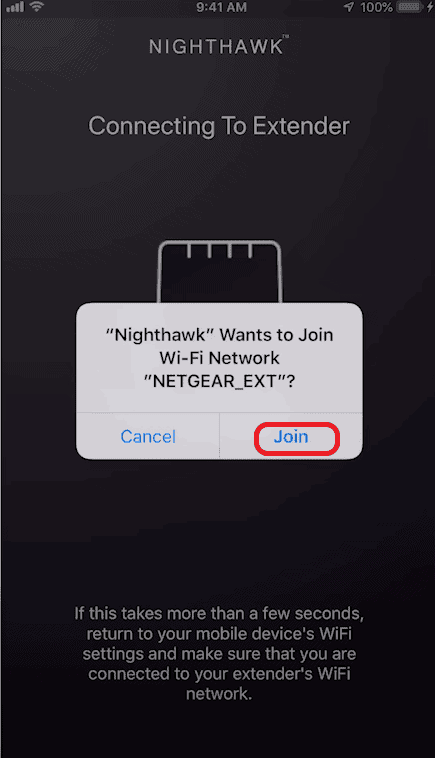
Step 6: Connect your mobile to the extender by clicking on Join.
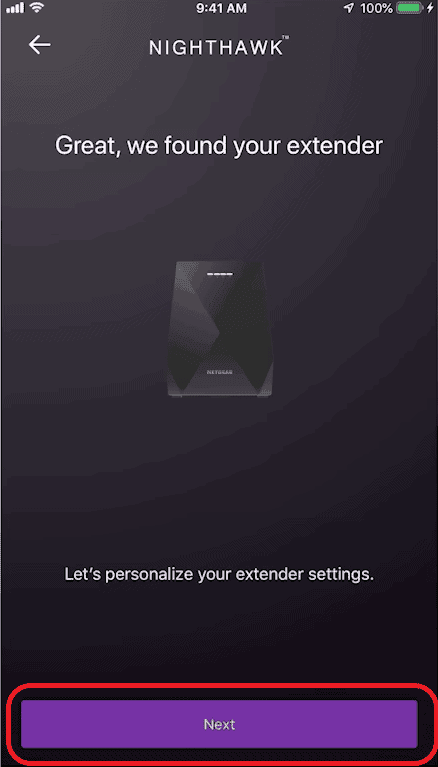
Step 7: The system will detect your extender and start the configuration process. To proceed, Click next.
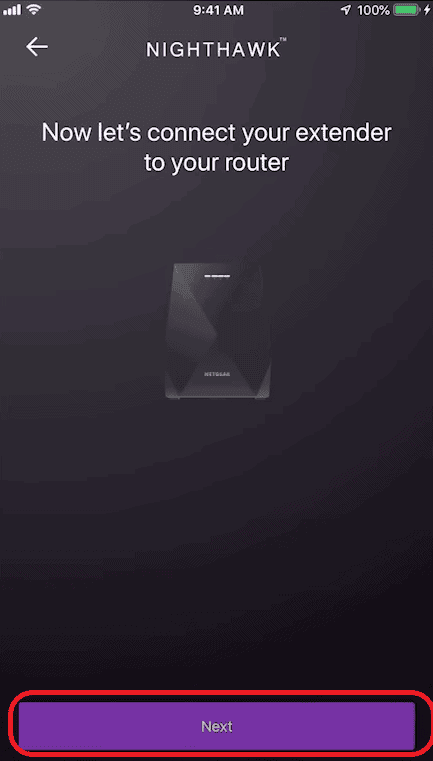
Step 8: Connect your extender to the main router by clicking next on the screen as highlighted below.
Step 9: Choose your home network.
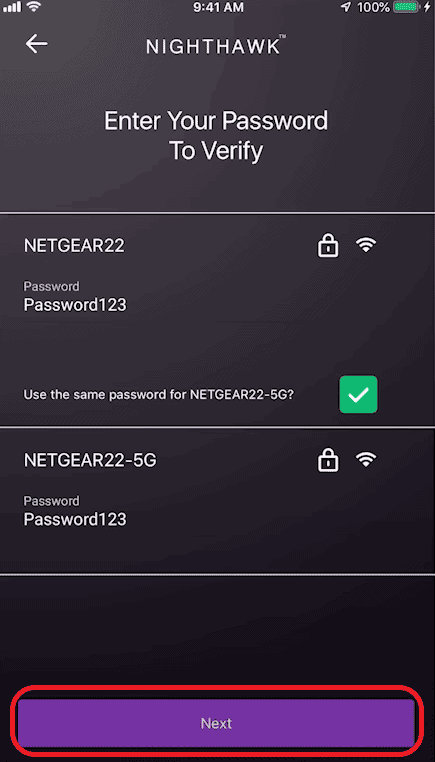
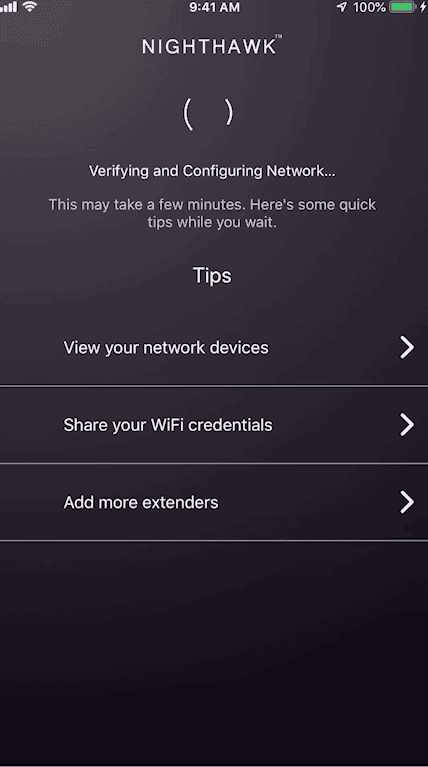
Step 10: Choose both 2.4G and 5G networks. Enter the password and click next. The application will verify the details and configure the network. This may take a few minutes.
Step 11: Once the process is complete, you can connect to the extender and access the internet.
👉 Related Reading: Does Netgear Nighthawk Work with Xfinity? [Modems, Routers, Combos]
2. Using WPS
This is one of the easiest methods of setting up a Netgear extender if both devices support WPS authentication. Here we go!
Step 1: Plug in the extender in a power outlet close to the primary router or at least in the same room.
Step 2: Wait until the power LED turns green.

Step 3: Once the LED is stable, find the WPS button on the side of the extender and press it once. The WPS LED will start blinking.

Step 4: Press the WPS button on the primary router.
Step 5: WPS LEDs on the router and extender will keep blinking. The LEDs will stabilize once the connection is successful.
Step 6: Now your extender is configured. Unplug the extender and re-plug it mid-way between the main router and the target area.
Step 7: Turn the power on and wait a few minutes until the LED stabilizes.
3. Using Web Portal
If your router or extender model doesn’t support WPS, you can complete the setup using the Netgear web portal. Here’s how to do it step by step:
Step 1: Plug in the extender and wait until the power LED turns solid green.
Step 2: Connect your device to the default SSID. Once you are connected, that will take you to https://mywifiext.com.
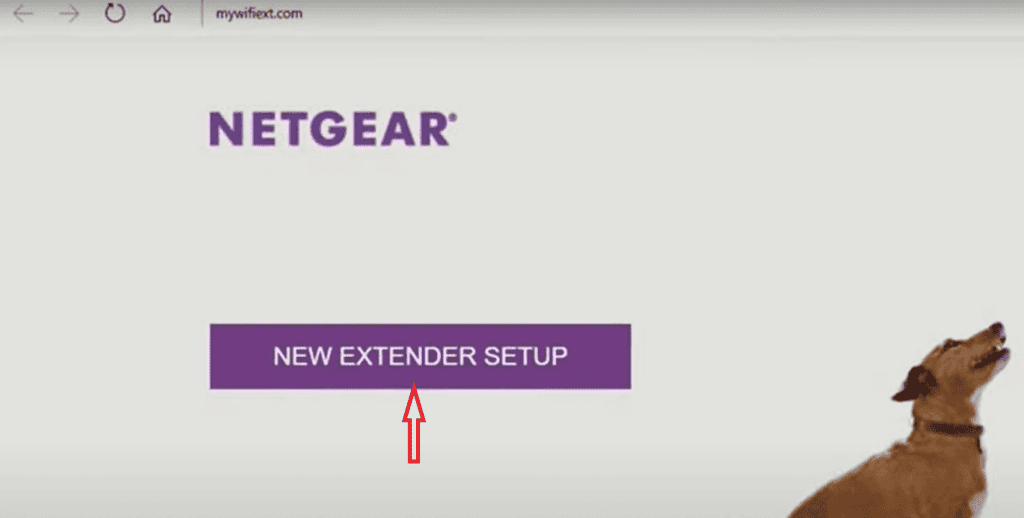
Step 3: Click on the new extender setup as highlighted above.
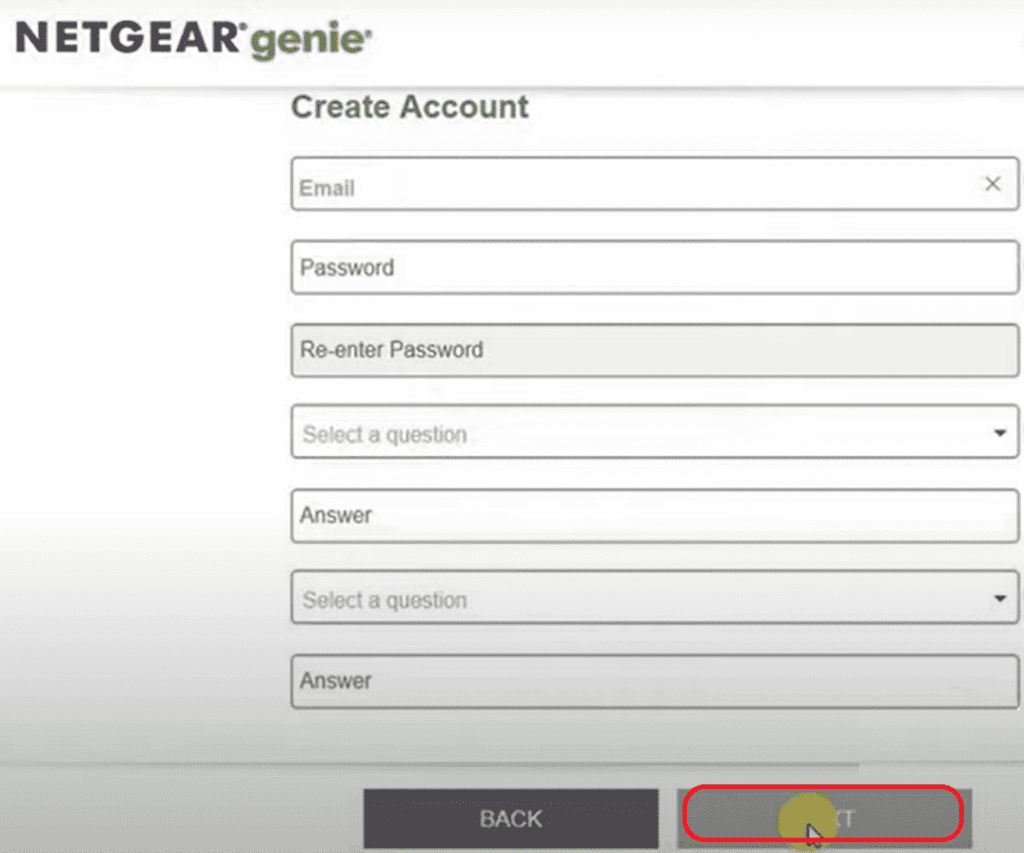
Step 4: Fill in the information to create the account and click next.
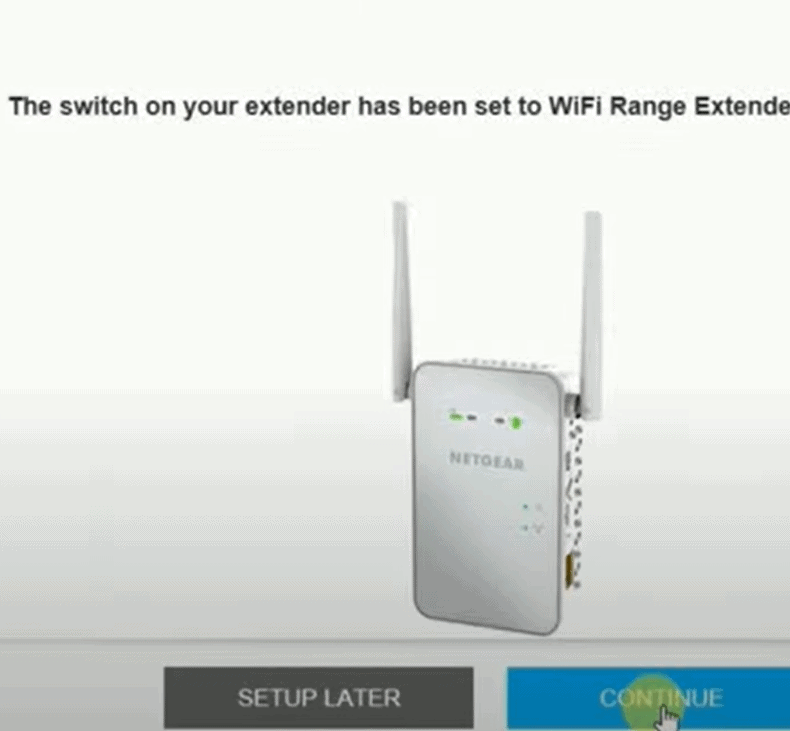
Step 5: It will take you to the next step in the installation. Click continue to set the extender in wireless mode.
Step 6: Select the home WiFi network you wish to extend on the next page. If your extender is dual-band, you can choose both wireless networks at the same time and click next.

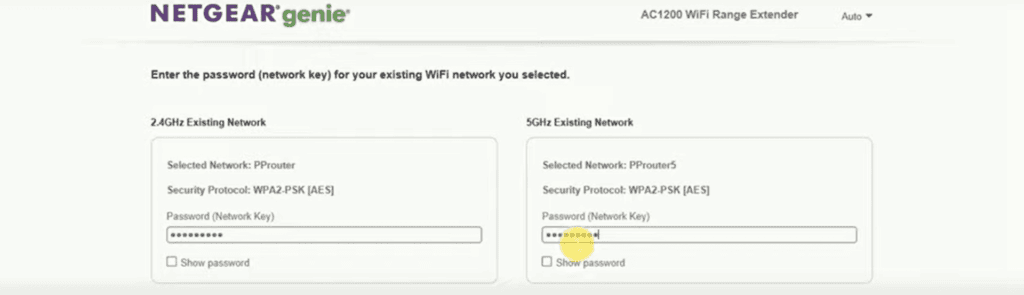
Step 7: In the next step, enter the passwords of the home wi-fi network of the primary router and click next.
Step 8: In the next step, you can customize the SSID and password for the extender. Click next when you are done.

Step 9: Wait until the settings are applied. You’ll see a pop-up on your screen. We are almost done.

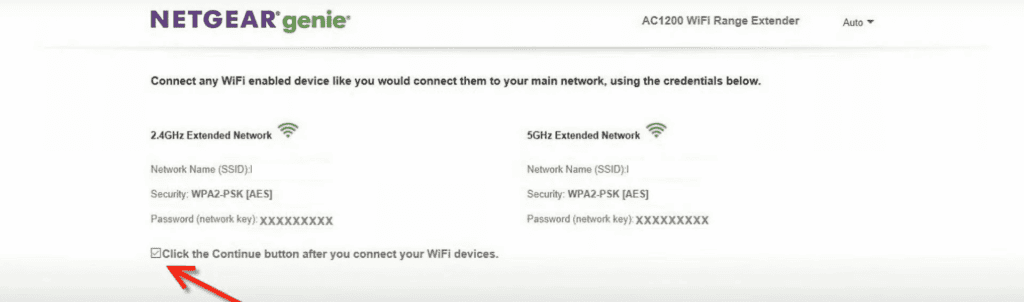
Step 10: Connect any device to the extender network, click continue and start using the internet.
What To Do Next?
If you’re done with the Netgear extender setup, the next step is to determine if it is doing the intended job: clear the dead zones in your home. Let’s verify.
1. Test The Extender
Step 1: Connect to the Extender by choosing the SSID with the “_EXT” added to your original wireless ID.
Step 2: Unless you have changed the password after the setup, it remains the same as the primary router’s password.
Step 3: Once you’re connected, move to a part of your home that the primary router had trouble reaching.
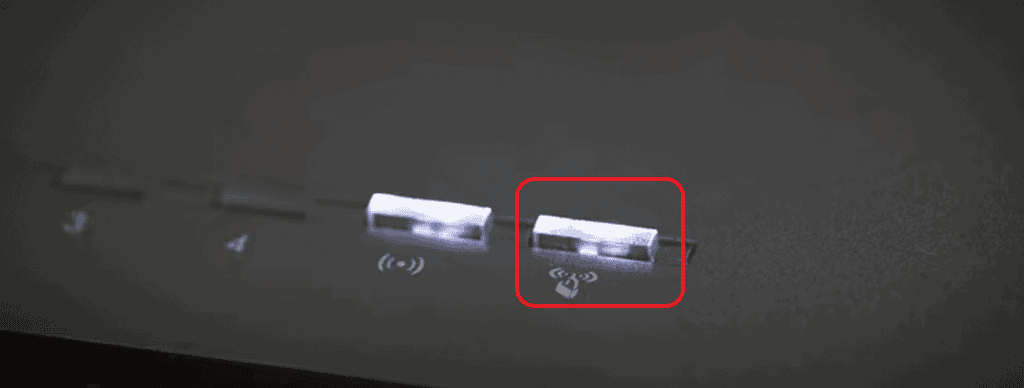
Step 4: The LED will turn green once a device is connected to the extender. As you move further away from the extender, the LED will turn to Amber and then finally red.
👉 Related Reading: Netgear Modem Lights: What Do They Mean? [Explained with Pictures]
2. Re-Locate If Needed
When should you consider relocating the extender?
As long as the LED highlighted doesn’t turn red, it indicates a decent signal quality. If the light turns red at the intended area of coverage, you might have to move the extender to an optimal distance to get the requisite coverage.
Here’s how to relocate your wireless extender:
Step 1: Find an alternative power outlet and plug the extender in.
Step 2: Wait for a few minutes until the power light turns green.
Step 3: The extender will connect to the primary router.
Step 4: Monitor the LED highlighted above. Move further away from the router if required, but stay within the region where the signal quality indicator remains green.
Step 5: Connect the client devices and repeat the test discussed in the section earlier.
👉 Related Reading: Netgear Router Lights: Explained with Pictures
Note: All the methods explained in the article above can be applied to all the Netgear extenders. Below is a list of articles where I used, tested, and featured at least one Netgear extender and successfully set them up using these methods.
- WiFi extenders for Comcast Xfinity
- WiFi extenders for Ring Cameras
- WiFi extenders for CenturyLink
- WiFi extenders for Spectrum
- WiFi extenders for gaming
- WiFi extenders for Starlink
Frequently Asked Questions
Is it hard to install and set up a Netgear extender?
No, configuring a Netgear extender is easy. They work like plug-and-play devices. Just plug them in the power outlet and follow the steps of the extender setup wizard in the Nighthawk App. The setup will be done in no time.
How long does it take to configure a Netgear wireless extender?
It takes hardly 5 to 10 minutes to configure a Netgear Wi-Fi extender. Once you set up the SSID and password and sort out the connection between the primary router and extender, the device will be up and running.
How to know if your extender works properly?
Once you plug in the device and configure the extender, you will notice the LED go green. Go to a dead spot in your home and check the signal levels. However, if you can’t access the internet seamlessly, it implies that your Netgear extender is not working and need troubleshooting.
Conclusion
This article offers all the information necessary for Netgear extender configuration and how to use it effectively. The setup becomes easier if your primary router and extender are from Netgear.