Netgear WiFi Extender Not Working? Let's Troubleshoot!


Is your Netgear WiFi extender dropping signals, giving slow speeds, or not working consistently? It could be due to a voltage fluctuation or faulty hardware/firmware. If you wonder how to fix it, you’re in the right place.
Quick Fix: Change the placement of your WiFi extender and move it closer to the primary router and restart it.
If that doesn’t work, worry not. I’ll list all the probable causes and solutions to fix the connectivity issues on the Netgear extender.
Why is My Netgear Extender Not Working?
- Insufficient power supply
- Improper initial setup
- Poor placement or signal issues
- Corrupt firmware
- Defective/damaged hardware
- Issues from the ISP or router’s end
How To Fix Netgear WiFi Extender Not Working?
In the following sections, you will be guided through a comprehensive troubleshooting process for your Netgear extender, which will assist you in resolving all the associated problems. Let’s proceed!
1. Power Cycle Main Router
Your primary router sends data back and forth to the connected devices and extender continuously, which involves a bunch of reads and write operations on its internal memory. For a prolonged period, this could lead to a memory malfunction.
Power cycling your main router resets its internal memory and makes the device operate better.
Steps to Power Cycle your Router:
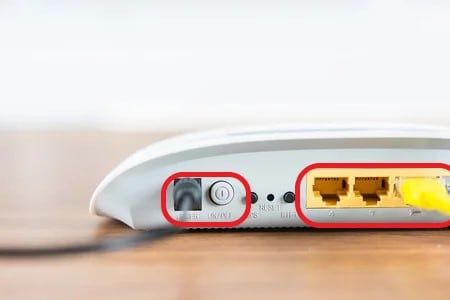
Step 1: Look for your router’s on/off button and switch it off.
Step 2: Follow the power chord to the outlet and cut the power supply.
Step 3: Disconnect all the chords and cables connecting the router.
Step 4: Leave the primary router unplugged for a couple of minutes.
Step 5: Replug the power chord, and insert the internet cable.
Step 6: Flip the power on.
Step 7: Switch on your router and wait for the status indicator lights to stabilize.
2. Relocate Extender
If a power cycle doesn’t fix your issues, the next step to troubleshoot the Netgear WiFi extender is to change its placement. The stronger the signal reach, the better the connectivity to the target area.
If the signal quality is weaker when it receives, it won’t improve or strengthen when re-transmitted.
Steps to Relocate the Extender:
Step 1: Turn off the Netgear WiFi extender and unplug the power cord.
Step 2: Find a plug point closer to the primary router. The ideal place for a WiFi extender is mid-way between the primary router and the target device/area.
Step 3: Plug in the power chord and power up the device.
Step 4: Wait for the LEDs to light and stabilize.
Step 5: Ensure the highlighted LED is solid green. This means the extender is in the best possible position to transmit the WiFi signal.

If it was a problem of signal quality, this would solve Netgear extender not connecting to the router. If the issue persists, move on to the next step.
3. Re-Run Setup Wizard
Did you set up the extender using the WPS method? While it makes the setup easy, the internal method might vary according to the manufacturer.
If your primary router is not from Netgear, the WPS setup might not have been successful, which may result in the Netgear WiFi extender not connecting to the internet. You can re-run the setup wizard through the Netgear genie portal.
Steps to run the Netgear Setup Wizard:
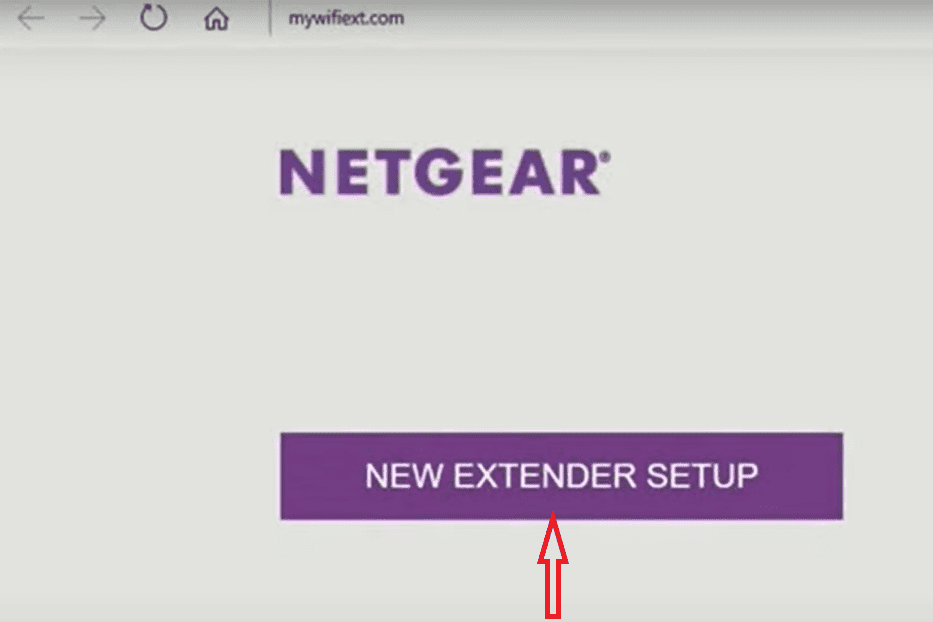
Step 1: Connect the extender’s SSID to a laptop or mobile and open a browser.
Step 2: Key in https://mywifiext.com and click on the Extender setup.
Step 3: Enter the account details and continue the setup.
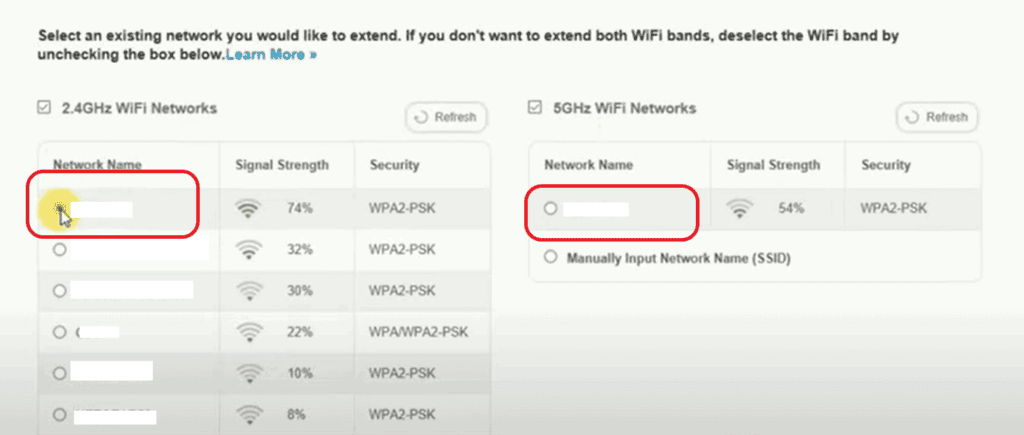
Step 4: Select the home network and enter the passwords when prompted.
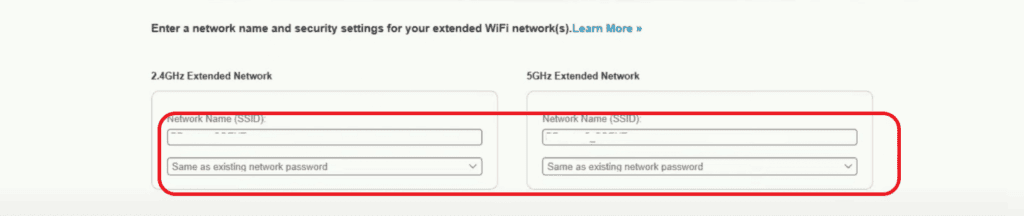
Step 5: Set up the Netgear WiFi extender’s SSID and password.
Step 6: Wait for a few minutes until the setup finishes.

Step 7: Once the setup is complete, connect to the extender’s network using your created ID and password and check if your internet is working.
4. Reset WiFi Extender
If you’re facing serious issues like the Netgear WiFi extender device light not turning on, you should try resetting the device. It will clear any settings or internal memory issues and reset the extender to the initial condition.
Steps To Reset a Netgear Extender:
Step 1: Power up your extender and wait for the LEDs to stabilize.
Step 2: Locate the reset button. Depending on the model, you can find it on the sides or back of the extender.
Step 3: Insert a pin, press, and hold it until the power LED blinks.
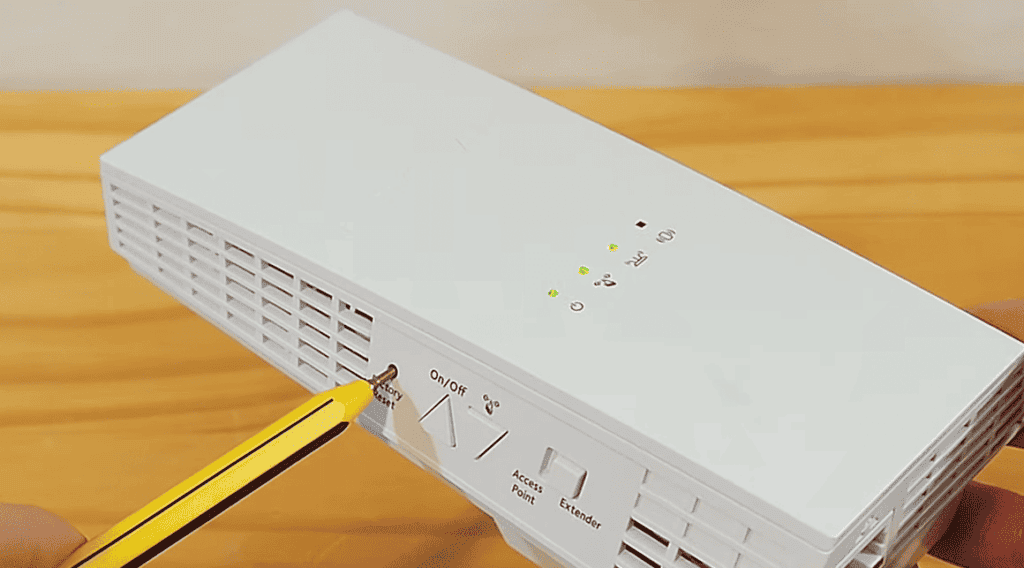
Step 4: Let go of the button and wait until the extender resets itself.
Step 5: The device returns to factory condition and must be set up in your home network to use again.
Steps To Re-Configure:
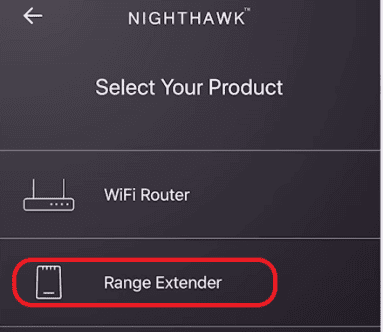
Step 1: Download the Nighthawk App on your smartphone.
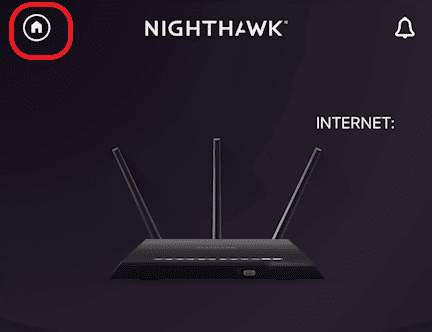
Step 2: Launch the app and click the home button in the left corner.
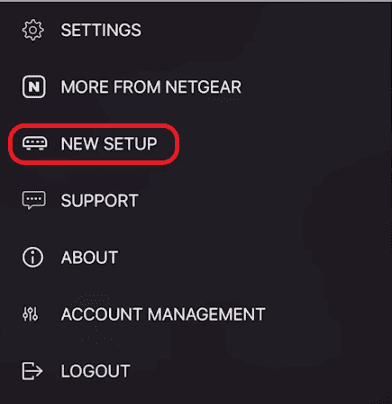
Step 3: Here, click on New Setup.
Step 4: Choose a new extender setup.
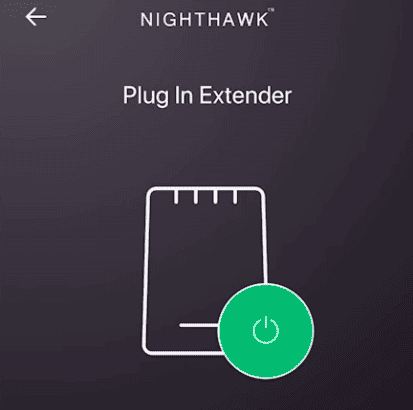
Step 5: Ensure the extender is powered and the LED’s stable, and click next.
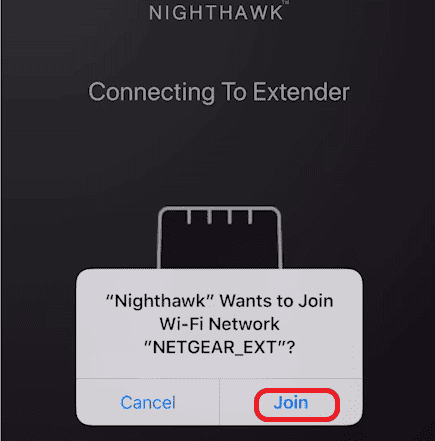
Step 6: The App will connect you to the default SSID, click join.
Step 7: The app will detect and connect your extender to the primary router.
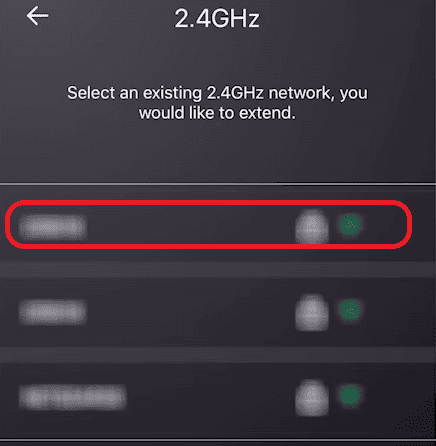
Step 8: Choose the primary router’s WiFi.
Step 9: And set up the password.
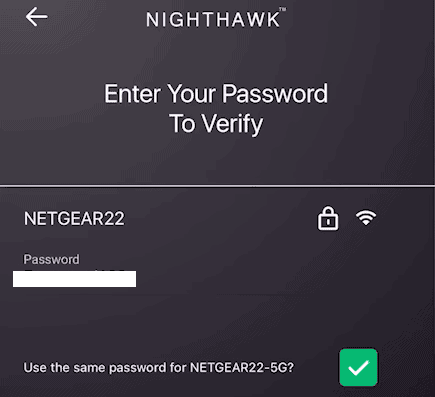
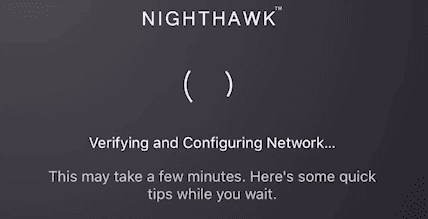
Once you enter the password, the system completes the configuration.
5. Inspect for Physical Damage
Any physical or liquid damage to the buttons, power chord, main board, or point can render your extender useless.
Steps to Check for any Physical Damage:
Step 1: If the power LED lights up green, you can rule out the issue with the power chord or the plugin.
Step 2: Turn the power off and check if the WPS button is stuck.
Step 3: Look for any damage to the external antennas.
Step 4: If you don’t see any visible damage, move on to the next step.
6. Update The Firmware
If your extender runs on older firmware, it might have trouble working at full efficiency. Apart from the operational inefficiencies, it might lead to connection drops, security gaps, etc.
Please find the latest firmware version for the model and install it. This might clear any issues related to settings, stability, and speeds.
Steps to Update the Firmware:
Step 1: Go to the official support portal.
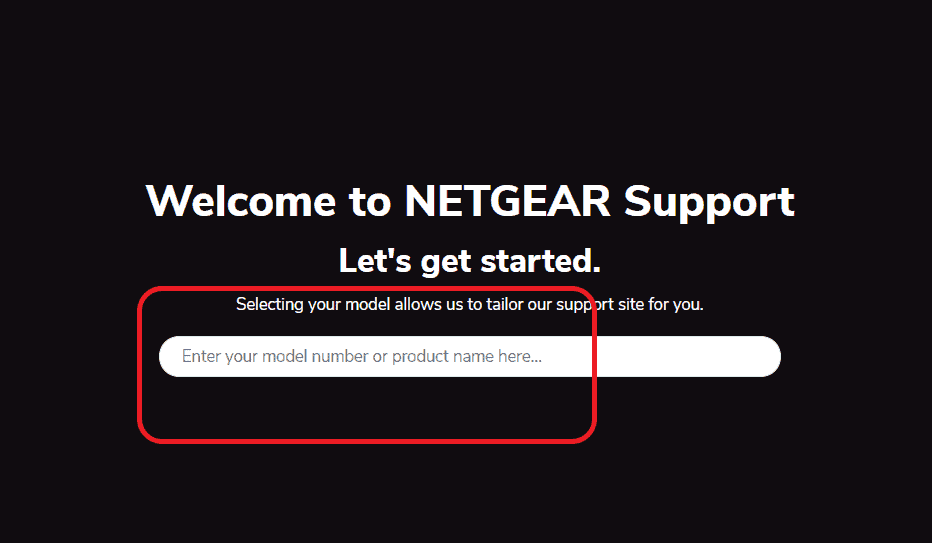
Step 2: Enter your model number, and click search.
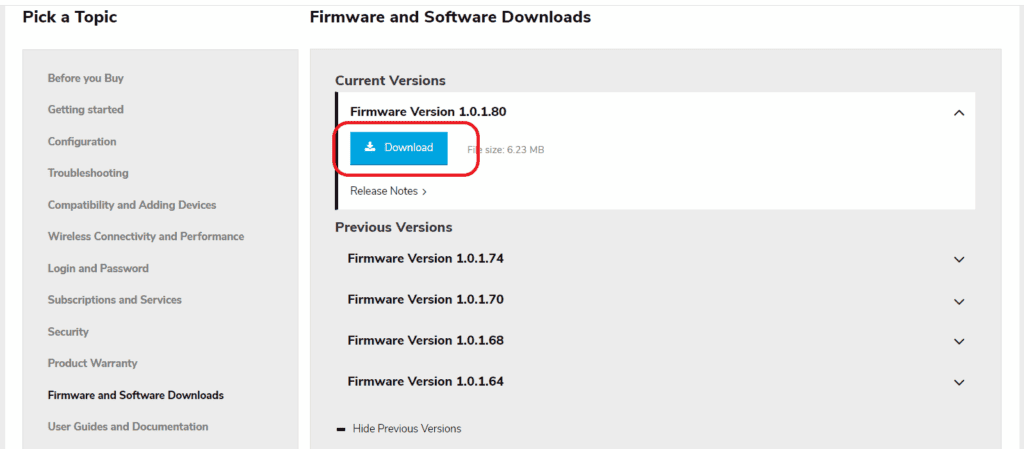
Step 3: Go to the downloads page, look for the latest version, and store it on your hard drive.
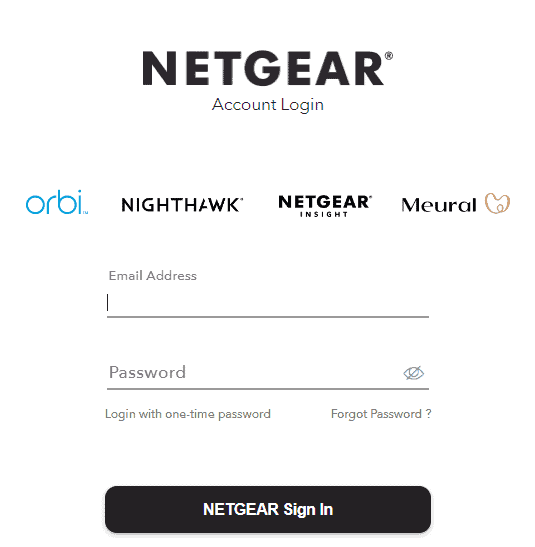
Step 4: Open a browser and Login to mywifiext.net. Key in the login and password.
Step 5: Go to the firmware update menu on the left side.
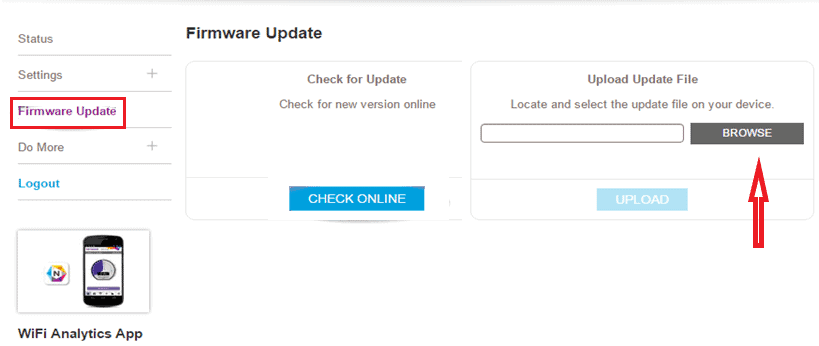
Step 6: Click browse, map the firmware file stored in the hard drive, and click upload.
Step 7: The installation will take a few minutes. Please don’t interrupt the firmware update, and ensure the device is powered on throughout its entirety.
Once the update is complete, the system will restart automatically, and you can start using the extender when the LEDs are stable.
7. Upgrade Your Range Extender
If the firmware update doesn’t fix your issue, it could be an internal hardware defect. It’s time to look for an upgrade or replacement.
If the device is older, you can check out the best-rated Netgear WiFi extenders and decide on one for your home, kitchen, garage, basement, or backyard. If the device is still within the warranty period, move to the next section.
8. Contact Netgear Support
If you have any doubts regarding the extender upgrade or need more clarity on warranty information for your device, you can contact Netgear support.
Steps To Reach Netgear Support:
- You can call support at +1-888-638-4327 and raise your concerns.
- Alternatively, you can visit the MyNETGEAR Home page
- Key in the login details
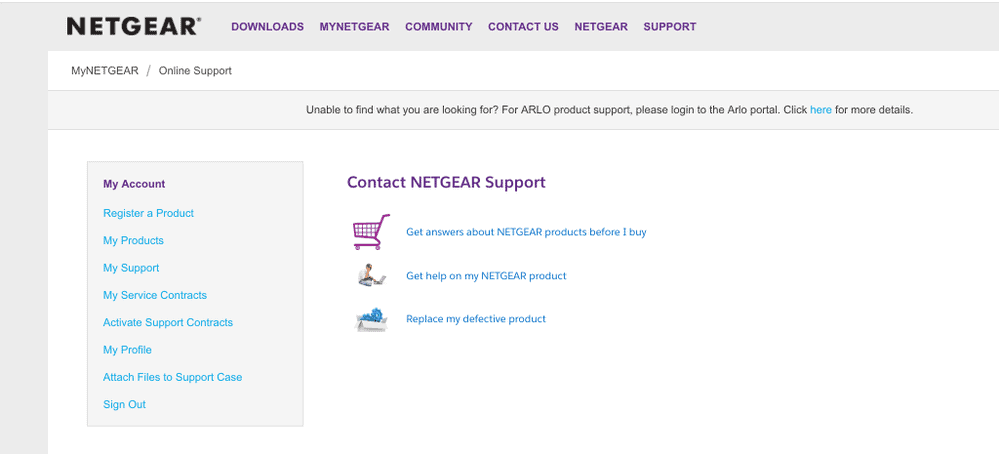
- Go to my products and request support
The Netgear customer representative will contact you and guide you toward a solution.
Frequently Asked Questions
Why is my Netgear extender’s device light not on?
If you’ve set up the extender using the WPS pairing, it might be the case. Depending on the OEM of your router, the WPS-based installation may or may not work as intended. In that case, you can re-run the installation wizard.
How do I fix the Nighthawk extender not found?
This happens if the extender is not broadcasting its SSID. Connect the extender with an Ethernet cable and log in to the admin portal. Go to the wireless settings and enable Wi-Fi and SSID broadcast. Save the settings and restart the extender.
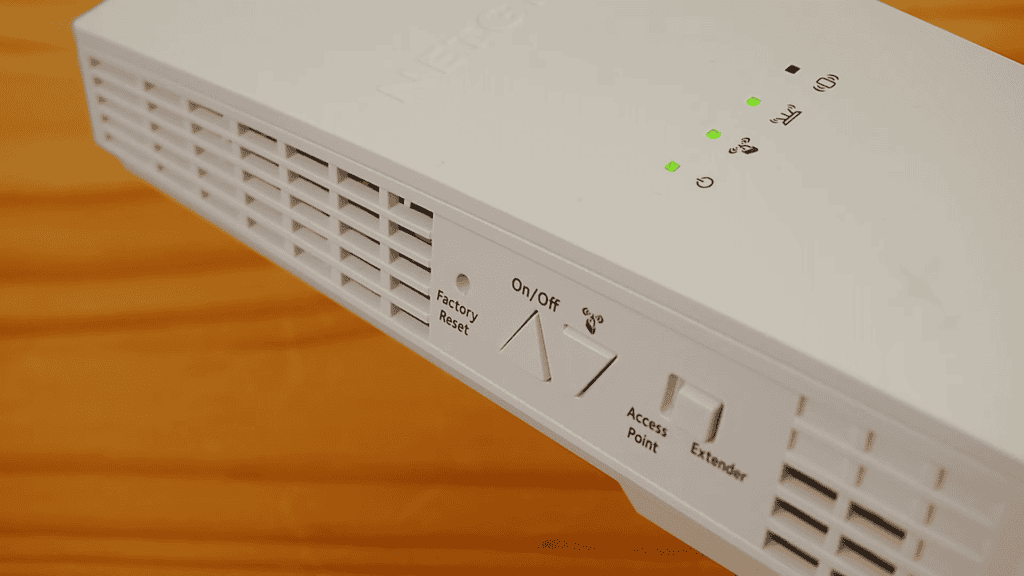
Where is the reset button on a Netgear extender?
You’ll find the reset pinhole on the sides or back of the Netgear extender, along with the power and WPS buttons. The placement, or order, can vary depending on the model.
Use the WPS button to configure only if the primary router and extender are from Netgear; otherwise, stick to portal-based configuration.
I hope this article helped you troubleshoot and fix your Netgear wireless extender!